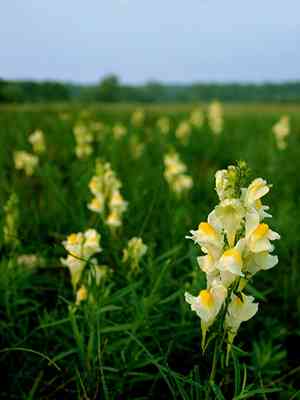
How to Transplant Butter-and-eggs?
For relocating butter-and-eggs, target the optimal window from early to late spring. This timeframe fosters robust root development. Select a bright spot with soil that drains effectively. Be aware that butter-and-eggs might require additional attention during the transplanting process. Best wishes for your gardening endeavors!
What Preparations are Needed Before Transplanting Butter-and-eggs?
What is the Ideal Time for Transplanting Butter-and-eggs?
Early to late spring offers an optimal window for relocating butter-and-eggs. This period supports robust development, as the plant benefits from ample moisture and rising soil temperatures. You'll observe butter-and-eggs adapting quickly and flourishing, creating an attractive focal point in your garden.
How Much Space Should You Leave Between Butter-and-eggs Plants?
When transplanting butter-and-eggs, provide sufficient room for growth. Aim for a separation of approximately 8-12 inches (20-30 cm) to allow them to expand and thrive.
What is the Best Soil Mix for Butter-and-eggs Transplanting?
Prior to transplanting butter-and-eggs, prepare a well-draining soil blend consisting of loam, sand, and organic compost. Incorporating a slow-release granular fertilizer or a balanced organic fertilizer will provide an excellent start.
Where Should You Relocate Your Butter-and-eggs?
When moving butter-and-eggs, select a site that receives full sun to partial shade. Ideally, they should get at least 5-6 hours of daily sunlight for healthy growth and abundant flowers.
What Equipments Should You Prepare Before Transplantation Butter-and-eggs?
Gardening Gloves
To safeguard your hands while handling soil and plants.
Shovel or Spade
For digging holes and trenches, and for loosening soil around the plant.
Trowel
For more precise and delicate digging, especially with potted or seedling plants.
Pruning Shears
To trim any damaged roots or branches before relocation.
Watering Can or Hose
To hydrate the plant both before and after its move.
Organic Fertilizer or Compost
To enrich the planting area and aid the butter-and-eggs in settling into its new spot.
Garden Cart or Wheelbarrow
To facilitate safe and efficient transport of the plant.
How Do You Remove Butter-and-eggs from the Soil?
How Do You Remove Butter-and-eggs from the Soil?
From Ground: First, moisten the butter-and-eggs plant's soil. Then, use a shovel or spade to dig a wide trench around the plant, ensuring the root ball remains intact. Carefully work the spade beneath the root ball to lift the plant from its original position.From Pot: Begin by watering the butter-and-eggs plant. Turn the pot on its side and gently tap the sides and bottom to loosen the soil. Grasp the plant at its base, and carefully slide it out of the pot, keeping the root ball whole.From Seedling Tray: Use a pencil or small stick to loosen the soil around the individual butter-and-eggs plant. Gently lift the seedling by its main stem, taking care not to harm the roots.
Step-by-Step Guide for Transplanting Butter-and-eggs
Preparation
Prepare the new planting site by loosening the soil and removing any weeds or debris. Incorporate organic fertilizer or compost to enhance soil structure and fertility.
Digging Hole
Excavate a hole in the prepared area that is at least twice the width and depth of the plant's root ball. This provides ample room for root expansion and establishment.
Plant Positioning
Carefully place the butter-and-eggs plant in the hole, ensuring the top of the root ball is level with the soil surface. Spread the roots outward and around the hole to encourage more effective growth.
Filling Hole
Backfill the hole with soil, gently compacting it around the roots to eliminate air pockets. Confirm the plant is upright and stable in its new location.
Watering
Thoroughly water the plant, ensuring the soil around the root ball is adequately moistened. This aids the butter-and-eggs plant in establishing its roots in the new soil.
How Do You Care For Butter-and-eggs After Transplanting?
Watering
Water the butter-and-eggs plant consistently for the initial weeks post-transplant, keeping the soil damp but not waterlogged. This promotes strong root development.
Pruning
Remove any dead, damaged, or yellowing foliage after transplanting to redirect the plant's energy towards new growth.
Monitoring
Observe the butter-and-eggs plant for signs of stress, such as wilting or discoloration. Adjust your care as needed, and don't hesitate to consult gardening resources or seek advice if necessary.
Pest and Disease Control
Regularly inspect the butter-and-eggs plant for pests or disease symptoms, and treat promptly to maintain its health and vitality.
Troubleshooting Common Issues with Butter-and-eggs Transplantation.
When is the best time to transplant butter-and-eggs?
The optimal period to move butter-and-eggs is during early to late spring. This allows the plant sufficient time to establish roots before summer.
What spacing is ideal for butter-and-eggs when transplanting?
To allow butter-and-eggs to spread comfortably, provide approximately 8-12 inches (20-30 cm) of space between each plant during relocation.
Why are my transplanted butter-and-eggs wilting?
Butter-and-eggs may wilt due to transplant shock, often caused by sudden environmental changes. Water immediately after transplanting, and keep the soil lightly moist.
How to prepare the soil for butter-and-eggs transplantation?
For butter-and-eggs, the soil should be loamy and well-drained. Enrich the soil with compost or organic matter beforehand to encourage healthy growth.
Why do my butter-and-eggs have yellow leaves after transplanting?
Yellow leaves could indicate overwatering, underwatering, or stress from transplantation. Check the soil condition. Remember to water regularly, but avoid waterlogging the soil.
What are the precautions to be taken while transplanting butter-and-eggs?
Avoid disturbing the roots when moving butter-and-eggs. Water beforehand to loosen soil, and handle with care. Transplant as quickly as possible to prevent root drying.
Should I prune butter-and-eggs before or after transplanting?
It's better to prune butter-and-eggs after transplanting and once new growth is visible. This helps the plant focus its energy on root development.
Why are my transplanted butter-and-eggs not blooming?
Lack of bloom can be due to immature plants or stress from transplanting. Ensure proper care and give butter-and-eggs more time to settle into its new home.
What to do if the transplanted butter-and-eggs shows no signs of growth?
Ensure your butter-and-eggs is in favorable conditions. Ensure adequate watering but avoid waterlogging. Applying a balanced fertilizer can help revive slow-growing plants.
How to manage pests or diseases after transplanting butter-and-eggs?
Monitor butter-and-eggs regularly for pests. If you see signs of disease or pests, treat with a suitable organic or chemical control promptly to prevent spread.


