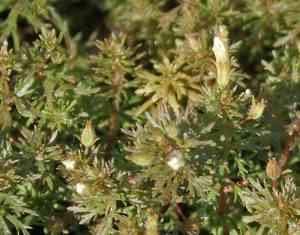
How to Transplant Dwarf ambulia?
The optimal period for transplanting dwarf ambulia is in mid-spring, leveraging vigorous development spurred by elevated temperatures. Select an aquatic site bathed in sunlight but offering some dappled shade to preserve its vividness. Should it be necessary, secure it softly to foster root establishment.
Necessary Preparations Before Relocating Dwarf Ambulia?
When is the Best Time to Move Dwarf Ambulia?
The perfect period for transplanting dwarf ambulia falls within mid to late spring, a time when the environment becomes warm and conducive to growth. Moving dwarf ambulia during this phase aligns with its natural growth cycle, facilitating a smooth transition from an indoor start to outdoor thriving. The favorable weather and nourishing soil of spring offer dwarf ambulia a strong foundation, ensuring it flourishes with vitality and strength in its new spot.
What is the Recommended Spacing Between Dwarf Ambulia Plants?
When transplanting dwarf ambulia, allow ample room between each specimen. Ideally, aim for a separation of 1-2 feet (30-60 cm). This provides sufficient space for individual plants to develop without competing for nutrients and sunlight.
Which Soil Mixture is Optimal for Dwarf Ambulia Transplantation?
Prior to planting dwarf ambulia, enrich the soil by incorporating organic compost or a general-purpose garden fertilizer. This plant thrives best in a loamy, well-drained soil type. Carefully mix the fertilizer into your soil to support root development.
Where Should You Place Your Dwarf Ambulia?
Select a site that receives full to partial sunlight for your dwarf ambulia. These plants enjoy sun exposure, but some afternoon shade will also be beneficial. Avoid heavily shaded areas, as dwarf ambulia requires adequate light to prosper.
What Tools Should You Prepare Before Transplanting Dwarf Ambulia?
Trowel
For digging small holes when extracting and replanting the dwarf ambulia.
Gardening Gloves
To safeguard your hands while handling soil and plants.
Bucket
Used for transporting soil or holding the dwarf ambulia during relocation.
Watering Can
To provide water before, during, and after the transplanting process.
Compost or Organic Fertilizer
To nourish dwarf ambulia once it has been replanted.
Pruners
Useful for trimming any dead leaves or shoots.
How to Extract Dwarf Ambulia from its Current Location?
How to Extract Dwarf Ambulia from its Current Location?
From Ground: Start by hydrating the dwarf ambulia. This makes removal easier and less stressful for the plant. Use a trowel to dig a circle around the dwarf ambulia, taking care to keep the root ball intact. Aim to preserve as much of the root system as possible.From Pot: If the dwarf ambulia is in a pot, invert the pot while holding your hand over the soil, with the plant stem between your fingers. Tap the bottom of the pot so that the dwarf ambulia slides out with the soil and roots undisturbed.From Seedling Tray: Water the seedlings for effortless removal. Grasp the base of the dwarf ambulia and gently pull from the seed cell, attempting to retain as much soil with the roots as possible. If removal is difficult, use a dull knife or a dibble to assist in lifting it out.
Step-by-Step Guide for Relocating Dwarf Ambulia
Preparation
Begin by preparing the new planting site for dwarf ambulia. The hole should be twice as wide and slightly deeper than the dwarf ambulia's root ball. Fill half of the hole with compost or organic fertilizer.
Placement
Position the dwarf ambulia in the center of the prepared hole, ensuring the top of the root ball is level with the ground's surface.
Refill
Backfill the planting hole with garden soil, pressing gently to remove air pockets without overly compacting the soil.
Watering
Once dwarf ambulia is planted, thoroughly water the area to settle the soil around the roots.
How to Care for Dwarf Ambulia After Relocation?
Pruning
After transplanting, remove any dead or damaged leaves and shoots. This helps dwarf ambulia direct energy towards new growth.
Watering
Water the dwarf ambulia regularly, especially during the first week post-transplant, as it establishes itself in the new spot. Avoid overwatering, which can harm the plant.
Observation
Monitor dwarf ambulia for signs of shock or stress in the initial weeks. Yellowing leaves or wilting indicate it may not be adapting well.
Addressing Common Issues with Dwarf Ambulia Relocation.
What is the optimal period for moving dwarf ambulia?
Relocating dwarf ambulia is best done between late spring and early summer, coinciding with the second and third seasons.
What spacing should be maintained between dwarf ambulia plants during relocation?
When moving your dwarf ambulia, a general guideline is to keep a distance of approximately 1-2 feet (30.48 cm - 60.96 cm). This ensures optimal growth and spread.
What actions should I take if dwarf ambulia's leaves turn brown after relocation?
Brown leaves on dwarf ambulia could signal insufficient water or sunlight. Ensure it receives ample light and consistent watering after transplanting.
Why is my relocated dwarf ambulia not growing?
If dwarf ambulia isn't growing, check the soil's nutrient levels. A lack of essential nutrients can impede the plant's development. Consider enriching your soil.
How should I prepare the soil before moving dwarf ambulia?
For dwarf ambulia, ensure the soil is well-drained and nutrient-rich. You can incorporate organic compost or a quality plant food to enrich the soil before transplanting.
Does the size of the relocation hole matter for dwarf ambulia?
Yes, the transplant hole must be deep and wide enough to comfortably accommodate dwarf ambulia's roots, allowing them space to establish firmly.
What should I do if dwarf ambulia's roots are tangled before relocation?
If dwarf ambulia's roots are tangled, gently untangle them with your fingers. Be careful not to break them, as this could impact the plant's growth.
Should I prune dwarf ambulia before or after relocation?
It's generally best to prune dwarf ambulia just before transplanting. This minimizes stress on the plant and encourages healthier, more vigorous growth post-transplant.
What should I do if dwarf ambulia is wilting after relocation?
If dwarf ambulia is wilting after transplanting, it might be experiencing transplant shock. Continue providing necessary care, including adequate watering and protection from harsh weather conditions.
How soon after relocating dwarf ambulia can I anticipate new growth?
Typically, dwarf ambulia may take a few weeks to settle into its new location before you observe new growth. Continue providing proper care to encourage this.


