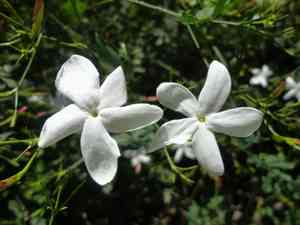
How to Transplant Spanish jasmine?
Grant Spanish jasmine a renewed beginning by transplanting it in the spring, after the last frost and as vegetation recommences. Select a bright location featuring soil that drains effectively, and provide support with periodic guidance to ensure a successful establishment.
What Preparations are Needed Before Transplanting Spanish Jasmine?
What is the Ideal Time for Transplanting Spanish Jasmine?
Relocating your spanish jasmine during the revitalizing spring season significantly boosts its chances of success, as the mild weather promotes root establishment. This crucial timing aligns perfectly with spanish jasmine's natural growth cycle, facilitating a smooth transition to a new spot where it can flourish optimally. Following this advice ensures your spanish jasmine receives the gentle warmth and consistent moisture essential for a strong start in its new home.
How Much Space Should You Leave Between Spanish Jasmine Plants?
For spanish jasmine, ensure each plant has ample room to thrive. Ideally, aim for a spacing of approximately 7-8 feet (about 2- 2.5 meters) between each plant. This will provide sufficient space for them to grow and bloom beautifully.
What is the Best Soil Mix for Spanish Jasmine Transplanting?
Prepare the planting area for spanish jasmine with soil that drains well. Its roots prefer to remain somewhat dry, so preventing waterlogging is crucial. Incorporate organic compost as a foundational fertilizer to give your plant an excellent start!
Where Should You Relocate Your Spanish Jasmine?
Choose a spot for your spanish jasmine where it will receive at least six hours of full sunlight daily. However, some afternoon shade protection is beneficial, especially if you reside in a hot climate region.
What Equipments Should You Prepare Before Transplantation Spanish Jasmine?
Gardening Gloves
To safeguard your hands from dirt and potential thorns on the spanish jasmine plant.
Shovel or Spade
To excavate the new planting site and extract the plant from its original spot.
Trowel
To dig smaller holes or make final adjustments within the transplantation hole.
Watering Can
To adequately hydrate the plant both before and after its relocation.
Mulch
To assist in retaining moisture after the transplant.
Pruning Shears
To trim any damaged roots or branches.
How Do You Remove Spanish Jasmine from the Soil?
How Do You Remove Spanish Jasmine from the Soil?
From Ground: First, water the spanish jasmine plant to moisten the soil. Carefully dig a wide trench around the spanish jasmine with a shovel or spade, taking care not to disturb the plant's root ball. Once the trench is ready, gently work the spade under the root ball to lift the plant, preparing it for transplanting.From Pot: To transplant spanish jasmine from a pot, water the pot thoroughly a few hours prior to the transplant. Then, invert the pot while gently supporting the plant's base and tap the bottom lightly. The plant should slide out with its root ball intact. If it's stubborn, you might need to run a knife along the inside edge of the pot to loosen the roots.From Seedling Tray: If the spanish jasmine plant is in a seedling tray, it's crucial to ensure it's well-watered before attempting removal. Lightly press the bottom of the tray cells to push the plant and its roots upward. Always handle by the leaves, not the stem, to prevent damage.
Step-by-Step Guide for Transplanting Spanish Jasmine
Preparation
Clear the transplanting area of any debris to create space for the spanish jasmine.
Digging
Use your shovel or spade to excavate a hole that is twice as wide and the same depth as the spanish jasmine plant's root ball.
Placing
Gently position the spanish jasmine plant in the prepared hole, spreading its roots outwards. The top of the root ball should be level with the ground surface.
Backfilling
Refill the hole with the excavated soil, lightly pressing it down to eliminate air pockets without compacting it.
Watering
Immediately after transplanting, water the spanish jasmine plant generously, saturating the soil around the root ball.
Mulching
Apply a layer of mulch around the plant to help the soil retain moisture.
How Do You Care For Spanish Jasmine After Transplanting?
Watering
Ensure the spanish jasmine receives ample water post-transplant, especially during the initial weeks after relocation. However, avoid overwatering or allowing the plant to sit in standing water. The soil must be well-draining to prevent root rot.
Pruning
Any damaged or diseased branches should be trimmed after transplanting to encourage new growth and maintain the plant's health.
Protection
Monitor for pests or diseases that might affect the plant while it's adapting to its new environment, and take necessary actions if observed.
Patience
Remember, transplanting is a significant event for the spanish jasmine, and it may take time for it to adjust to the new surroundings. Do not be alarmed if the plant's growth appears slow – it's likely focusing its energy on establishing roots. Continue to care for it patiently and provide optimal conditions.
Troubleshooting Common Issues with Spanish Jasmine Transplantation.
When is the best time to transplant spanish jasmine?
The optimal period to transplant spanish jasmine is from early to late spring. This coincides with rising temperatures and provides spanish jasmine with an entire growing season to establish itself.
How should I space spanish jasmine when transplanting?
Ensure a spacing of approximately 7-8 feet (about 2.1-2.4 meters) between spanish jasmine plants. This promotes adequate air circulation and growth.
Why is spanish jasmine wilting after transplant?
Wilting can occur due to transplant shock. Minimize this by thoroughly watering spanish jasmine before and after transplanting, and provide partial shade for the first few days post-transplant.
How deep should the hole be when transplanting spanish jasmine?
The hole should be twice as wide as the root ball, but not deeper than the root ball's height. This allows roots to spread easily without burying the plant too deeply.
Why does spanish jasmine have yellow leaves after transplant?
Yellow leaves on spanish jasmine could indicate water stress. This might be due to either over or under watering. Check the soil moisture frequently and adjust irrigation accordingly.
Can I immediately install spanish jasmine in direct sunlight after transplant?
Not immediately. Provide spanish jasmine plants with partial shade for the initial few weeks after transplant. Gradually introduce them to more sunlight after this period.
How to water spanish jasmine after transplanting?
Water spanish jasmine thoroughly after transplanting, ensuring the soil is moist but not waterlogged. Subsequently, maintain a consistent and regular watering schedule based on the soil's moisture level.
Why is my transplanted spanish jasmine not producing flowers?
This could be due to the stress of transplanting. It may take time for it to re-establish and begin flowering. Continue with regular care and patience.
Can spanish jasmine be transplanted in a pot?
Yes, spanish jasmine can be cultivated in pots. Just ensure to provide well-draining soil and a pot large enough to accommodate the plant's growth.
Why is spanish jasmine not thriving after transplanting?
This could be due to insufficient sunlight, water, or nutrients. Evaluate its growing conditions and care routine to help resolve the issue.


