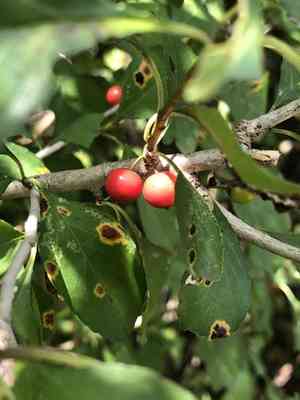
How to Transplant Possumhaw?
Relocate possumhaw once warmer conditions arrive, from late spring through mid-summer, since consistent temperatures facilitate root development. Select a location with good drainage that receives morning sun. Advice: verify the soil remains damp after transplanting to assist with adaptation.
What Preparations are Needed Before Transplanting Possumhaw?
What is the Ideal Time for Transplanting Possumhaw?
The optimal period for relocating possumhaw is during the pleasant days of late spring through mid-summer. This timeframe provides mild weather, enabling the roots of possumhaw to settle into their new spot without the harshness of summer heat or winter cold. Moving possumhaw at this point ensures a less stressful transition, fostering vigorous growth and improved adaptation to its new surroundings. Introducing possumhaw to your garden then enriches the soil and supports local ecosystems, all while enhancing the area with its seasonal charm.
How Much Space Should You Leave Between Possumhaw Plants?
Glad you're getting into gardening! When moving possumhaw, remember it appreciates room, so aim to keep each plant approximately 5-6 feet (1.5-1.8 meters) apart. This will aid its flourishing and maintain robust development.
What is the Best Soil Mix for Possumhaw Transplanting?
A crucial part of preparing for possumhaw is securing the correct soil. This plant favors soil that drains well, enriched with organic compost. Regarding fertilizers, a basic slow-release option works perfectly. Remember not to over-fertilize; balance is essential!
Where Should You Relocate Your Possumhaw?
Possumhaw loves to absorb sunlight! Select a spot for your new plants that receives full sun for most of the day. If such a location isn't available, an area with partial shade should also be suitable. Happy gardening!
What Equipments Should You Prepare Before Transplantation Possumhaw?
Gardening Gloves
To safeguard your hands while handling soil and the possumhaw.
Trowel
This implement will assist in excavating the proper hole size for your possumhaw.
Gardening Spade
To dig around the root ball when extracting the possumhaw from its initial position.
Watering Can
To keep the plant adequately hydrated during the relocation process.
Garden Hose
For supplementary watering both prior to and following transplantation.
Mulch
This will be beneficial in helping the soil retain sufficient moisture after transplanting.
Wheelbarrow
Optional, can be utilized for transport, especially if the plant is large.
Root Pruners
To trim any damaged or excessively long roots.
How Do You Remove Possumhaw from the Soil?
How Do You Remove Possumhaw from the Soil?
From Ground: Start by moistening the soil around the possumhaw. Use a gardening spade to dig a wide trench around the plant, ensuring the plant's root ball stays intact. Gently work the spade beneath the root ball to free the plant from its original spot.From Pot: Water the plant in its container. Tilt the pot sideways, tap it lightly, or insert a trowel along the inner edge to help loosen the soil. Carefully pull out the plant, taking care not to harm the roots. You might need to lay the pot on its side and gently slide the plant out.From Seedling Tray: Water the seedling tray before removal. Use a trowel or spoon to carefully lift out the possumhaw, ensuring the root ball remains whole.
Step-by-Step Guide for Transplanting Possumhaw
Preparation
Before commencing the transplant, thoroughly water the possumhaw; this will aid in reducing shock.
Hole Digging
Use a trowel to excavate a hole where you intend to relocate the possumhaw. The hole should be twice as wide and as deep as your plant's root ball.
Plant Placement
Position the possumhaw into the hole, ensuring the top of the root ball rests at or slightly below ground level, to encourage robust root development.
Backfill
Refill the hole with the excavated soil, gently firming it around the base of the possumhaw.
Watering
Thoroughly water the plant using a watering can or garden hose.
Mulching
Apply a layer of mulch around the base of the possumhaw to help maintain soil moisture.
How Do You Care For Possumhaw After Transplanting?
Watering
Keep the soil around the possumhaw consistently damp, but avoid waterlogging, for the initial weeks post-transplant to establish strong roots.
Protection
Shield the possumhaw from intense sun and wind for a few days after transplanting to prevent dehydration and allow it to acclimate to its new location.
Monitoring
Observe the health of the possumhaw. If you notice wilting, yellowing, or stunted growth, it might be due to transplant shock. If these signs persist, consider seeking advice from a local nursery or horticultural service.
Troubleshooting Common Issues with Possumhaw Transplantation.
When is the best time to transplant possumhaw?
The most appropriate period to relocate possumhaw is during the cooler months, ideally from mid-autumn to early spring (S3-S5). This provides your plant with the best chance of establishing itself in its new spot.
What is the appropriate spacing for possumhaw?
To ensure possumhaw has ample room to grow, the optimal distance between plantings is typically 5-6 feet (1.5-1.8 meters). This is vital for the plant's overall health and vigor.
Why isn't my possumhaw thriving after transplantation?
This could be due to transplant shock. To lessen stress, water the possumhaw well after relocation, keep it adequately hydrated, and place it in a location that meets its light requirements.
Should I prune possumhaw prior to transplanting and why?
Yes, trimming possumhaw before transplanting reduces the plant's water demand, helping it cope better with the move. However, do not remove more than 1/3 of the foliage.
How deep should the hole be when transplanting possumhaw?
The hole should be twice as wide and the same depth as the root ball of possumhaw. This allows for better root establishment and minimizes the risk of planting too deeply.
Why does my recently transplanted possumhaw look wilted?
Possumhaw often experiences wilting after being moved due to shock and the disruption of their routine. Regular watering and placing them in suitable light conditions can aid their recovery.
How often should I water my recently transplanted possumhaw?
Possumhaw requires frequent watering immediately after transplanting, perhaps daily or every other day. Once settled, watering can be reduced to once a week, depending on weather conditions.
What should I do if the leaves of possumhaw turn yellow after transplanting?
Yellowing leaves can indicate overwatering or insufficient drainage. Check the soil's moisture level and ensure it drains well. Adjust your watering schedule if necessary and confirm your possumhaw is receiving adequate light.
Can I transplant possumhaw in the summer?
While it's feasible to transplant possumhaw in the summer, it's not ideal due to the heat, which could cause additional stress to the plant. Adhere to the mid-autumn to early spring window.
What is the best type of soil for transplanting possumhaw?
Possumhaw prefers well-drained, fertile soil but can adapt to other soil types. Before planting, enrich the soil with organic matter to optimize plant health and growth.


