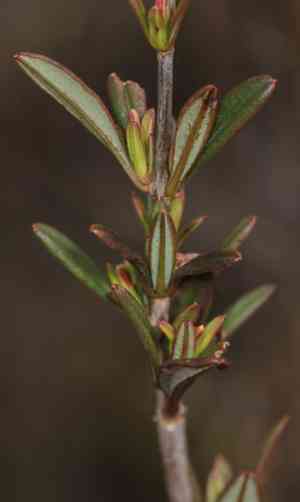
How to Transplant Shrubby St. John's wort?
For shrub-like Hypericum, the ideal period for relocation is during the peak of spring, providing gentle warmth and abundant development—a time when the earth is warm and accommodating. Select a location with good drainage that receives full sunlight to partial shade. If necessary, enrich the soil with organic material to foster and support robust root establishment.
What Preparations are Needed Before Transplanting Shrubby St. John's Wort?
What is the Ideal Time for Transplanting Shrubby St. John's Wort?
The best time to transplant shrubby St. John's wort is during the mild temperatures of mid to late spring. This period promotes root growth without the harshness of summer heat. Planting shrubby St. John's wort then takes advantage of the start of the growing season, allowing ample time for a strong root system to develop before winter. A helpful hint: your shrubby St. John's wort will thrive with this early spring start, maximizing its potential for vigorous growth and resilience.
How Much Space Should You Leave Between Shrubby St. John's Wort Plants?
Begin by ensuring shrubby St. John's wort has sufficient room to expand. Aim for a spacing of approximately 3-4 feet (about 1-1.2 meters) between each plant. This guarantees they have adequate space to fully mature without becoming crowded.
What is the Best Soil Mix for Shrubby St. John's Wort Transplanting?
Next, prepare your soil. Shrubby St. John's wort prefers soil that drains well, so incorporate sand if needed. A balanced, slow-release fertilizer should be sufficient at planting. This will supply the necessary nutrients for shrubby St. John's wort to establish successfully.
Where Should You Relocate Your Shrubby St. John's Wort?
Finally, consider sunlight. Shrubby St. John's wort flourishes in full sun to partial shade. Be sure to select a garden spot that receives ample sunlight for optimal growth. Happy gardening!
What Equipments Should You Prepare Before Transplantation Shrubby St. John's Wort?
Garden Trowel
For excavating a hole at the new site for shrubby St. John's wort.
Watering Can
To hydrate the plant prior to and following the transplanting process.
Garden Spade or Shovel
To dig around the plant at its original spot to remove it with the root system intact.
Burlap
To wrap around the root ball, if you are moving shrubby St. John's wort from the ground.
Wheelbarrow
To move the shrubby St. John's wort plant from its initial location to the new one.
Gardening Gloves
To safeguard your hands while working with the soil and plant.
Mulch
To apply to the newly transplanted shrubby St. John's wort to enhance moisture retention and reduce weed competition.
How Do You Remove Shrubby St. John's Wort from the Soil?
How Do You Remove Shrubby St. John's Wort from the Soil?
From Ground: First, water the shrubby St. John's wort plant to moisten the soil. This helps minimize plant stress and keeps the root ball cohesive. Use your garden spade or shovel to carefully dig a circle around the plant, leaving plenty of room to avoid root damage. Gently lift the plant from the ground, supporting the root ball. Wrap the root ball in burlap for protection during transport.From Pot: If removing shrubby St. John's wort from a pot, water the plant thoroughly. Carefully tip the pot sideways and ease the plant out, being careful not to pull on the stem or leaves. Ensure all roots and soil remain together.From Seedling Tray: If shrubby St. John's wort is in a seedling tray, it's best to transplant when the plant has two to three true leaves. Pinch the base of the seedling cell or pot to push the small root ball upward, and gently lift it out, holding the plant by its leaves to prevent damage.
Step-by-Step Guide for Transplanting Shrubby St. John's Wort
Preparation
Several days before you plan to transplant shrubby St. John's wort, water it thoroughly. This prepares the plant for the upcoming stress of relocation.
Site Preparation
Dig a hole at the new location using a garden trowel. The hole should be twice as wide as shrubby St. John's wort's root ball and equally deep.
Transplanting
Carefully place the shrubby St. John's wort plant into the hole, ensuring the top of the root ball is level with the ground. Backfill the hole with the original soil, gently firming around the base of shrubby St. John's wort.
Finishing
Once shrubby St. John's wort is positioned, water it generously. Then apply a layer of mulch around the plant, leaving some space clear around the stem. This helps to conserve moisture and prevents weed growth.
How Do You Care For Shrubby St. John's Wort After Transplanting?
Watering
Ensure consistent watering for the initial weeks after transplanting, until shrubby St. John's wort is well established. The soil should remain moist, but not waterlogged.
Pruning
Remove spent flowers and any dead, damaged, or diseased foliage. This directs the plant's energy towards root development and overall health.
Protection
Shrubby St. John's wort is largely resistant to pests and diseases. However, monitor for any changes in your plant's health. If you notice any unhealthy leaves or pest signs, consult a local nursery or extension service.
Troubleshooting Common Issues with Shrubby St. John's Wort Transplantation.
When's the optimal time to transplant shrubby St. John's wort?
The ideal time to move shrubby St. John's wort is during late spring to early summer (S2-S3). This ensures the plant establishes before winter.
What is the ideal distance between shrubby St. John's wort plants when transplanting?
Provide each shrubby St. John's wort ample space, ideally about 3-4 feet (0.9-1.2 meters) apart to allow for healthy growth.
How much sunlight does shrubby St. John's wort need after transplantation?
Shrubby St. John's wort prefers full sun to partial shade. Position it where it receives plenty of sunlight for optimal growth.
How frequently should I water shrubby St. John's wort after moving?
Water shrubby St. John's wort immediately after transplanting, then regularly until the plant establishes. Adjust based on season and rainfall.
Whatâs the key to successful transplantation of shrubby St. John's wort?
The key involves proper new site preparation, timely relocation, and good aftercare, such as watering.
Do I need to alter the soil for transplanting shrubby St. John's wort?
Yes, well-draining soil enriched with organic matter is recommended. It ensures shrubby St. John's wort grows healthy and disease-free.
How deep should the hole be when transplanting shrubby St. John's wort?
The transplant hole should be twice the width and the same depth as the root ball, typically around 10 inches (25 cm).
What should I consider when choosing a new location for shrubby St. John's wort?
Look for a spot with abundant sunlight, well-draining soil, and sufficient space for shrubby St. John's wort to spread.
Does shrubby St. John's wort need any special care after transplanting?
Regular watering, mulching around the base, and periodic pruning are crucial for the health of transplanted shrubby St. John's wort.
Would it be better to prune shrubby St. John's wort before or after transplanting?
It's generally advised to lightly prune shrubby St. John's wort before transplanting. This helps reduce water loss and stress during the move.


