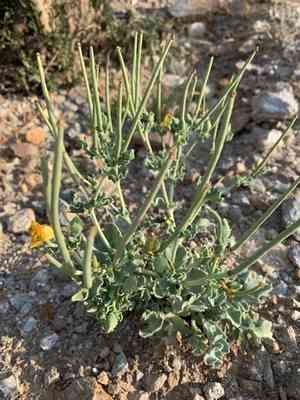
How to Transplant Yellow horned poppy?
The ideal period for transplanting yellow horned poppy is from the gentle warmth of late spring through mid-summer, allowing the extended, bright days to aid its rooting. Position yellow horned poppy in a bright spot with soil that drains effectively, and if needed, protect it from powerful gusts for best development.
What Preparations are Needed Before Transplanting Yellow Horned Poppy?
What is the Ideal Time for Transplanting Yellow Horned Poppy?
The optimal period for relocating yellow horned poppy is from late spring through early summer. This timeframe allows yellow horned poppy to settle into warm, receptive soil, benefiting from extended daylight hours that encourage robust development. The mild weather during this phase also minimizes transplant shock, ensuring yellow horned poppy's roots establish deeply for a thriving season ahead. Moving yellow horned poppy within this prime window enhances your garden with its vibrant display and facilitates a smooth transition from container to ground.
How Much Space Should You Leave Between Yellow Horned Poppy Plants?
Begin the rewarding process of transplanting yellow horned poppy by providing ample room for its growth. Aim for a separation of approximately 1-2 feet (30-60 cm) between each specimen. This will offer sufficient area for these plants to expand and flourish.
What is the Best Soil Mix for Yellow Horned Poppy Transplanting?
For a flourishing yellow horned poppy, ensure planting in well-draining soil. Before placement, enrich your soil with compost or a slow-release fertilizer. This simple action will guarantee your plant receives all necessary nutrients for strong, beautiful development.
Where Should You Relocate Your Yellow Horned Poppy?
Allow your yellow horned poppy to luxuriate in sunlight! Locate a spot in your garden that receives full sun for optimal growth. Excessive shade could impede its development. Happy gardening!
What Equipments Should You Prepare Before Transplantation Yellow Horned Poppy?
Shovel or Spade
To excavate the new planting site for the yellow horned poppy and assist in extracting the plant from its current position.
Garden Fork
To loosen the soil surrounding the plant's original location if it is in the ground.
Gardening Gloves
To safeguard your hands while handling soil and the plant.
Wheelbarrow or Large Bucket
For moving the yellow horned poppy from its current spot to its new destination.
Garden Hose or Watering Can
To irrigate the yellow horned poppy in its new setting.
Mulch
Mulch is a crucial material for regulating soil moisture after transplantation.
How Do You Remove Yellow Horned Poppy from the Soil?
How Do You Remove Yellow Horned Poppy from the Soil?
From Ground: Prior to attempting to extract the yellow horned poppy, ensure the plant is thoroughly watered to help loosen the soil. Use a shovel or spade to dig a circle around the plant, ensuring the root ball remains intact. Gently work the spade beneath the root ball, then carefully lift the plant from its initial location.From Pot: If your yellow horned poppy is in a container, watering it before removal can simplify the process. Invert the pot while supporting the top of the soil, and gently shake the pot. The yellow horned poppy should slide out. If the plant feels stuck, tap the sides and bottom of the pot with your hand.From Seedling Tray: If the yellow horned poppy is still a seedling in a tray, proceed with care and slowness. Using a dibber or similar tool, push it into the growing medium below the seedling. Push the seedling from underneath so it gently pops out of its cell. Always handle seedlings by their leaves, not the stem.
Step-by-Step Guide for Transplanting Yellow Horned Poppy
Preparation
Prepare the new site beforehand by digging a hole approximately twice the width of the yellow horned poppy's root ball and roughly the same depth as the root ball. Fill it with water and allow it to drain.
Removal
Follow the instructions detailed in the 'removal process' section above to carefully extract your yellow horned poppy from its original spot.
Placement
Position the yellow horned poppy in the center of the prepared hole. Ensure the root ball is level with or slightly below the surrounding soil surface.
Backfilling
Refill around the plant using the soil you excavated when digging the hole. Gently firm the soil around the base of the yellow horned poppy.
Watering
Water the transplanted specimen generously immediately after relocation. Use a garden hose or watering can for this purpose.
How Do You Care For Yellow Horned Poppy After Transplanting?
Moisture Maintenance
Yellow horned poppy prefers consistently damp soil, but not waterlogged. Observe the plant daily and irrigate as needed to maintain proper moisture levels. A layer of mulch can aid in retaining soil moisture.
Pruning
Should any damage or stress occur during the transplanting process, your yellow horned poppy might exhibit signs of wilting or discoloration in its foliage. Trim any dead or drooping leaves to help the plant direct its energy towards new growth.
Pest Monitoring
Newly transplanted plants may experience stress and attract pests. Regularly inspect your yellow horned poppy for pest activity and address any issues promptly.
Frost Protection
If frost is anticipated, be sure to cover your yellow horned poppy to shield it, as it can be particularly vulnerable immediately after replanting.
Troubleshooting Common Issues with Yellow Horned Poppy Transplantation.
What's the most suitable season to transplant yellow horned poppy?
The optimal period to transplant yellow horned poppy is from late summer into early autumn (Season 3 to Season 5). This timing supports the plant's natural growth cycles.
How much space should I keep between the yellow horned poppy plants when transplanting?
Ensure a separation of about 1-2 feet (30-60 cm) between yellow horned poppy plants. This is crucial to provide ample room for development and prevent competition for resources.
Do I need a special type of soil to transplant yellow horned poppy?
Yellow horned poppy is adaptable and thrives in various soil types. However, it favors well-draining soil. Waterlogged or overly compacted soil may impede its growth.
How deep should the hole be for transplanting yellow horned poppy?
When transplanting yellow horned poppy, excavate a hole that is twice the width and the same depth as the root ball. This size facilitates soil coverage and root expansion.
Do I need to water yellow horned poppy immediately after transplanting?
Yes, you should gently water yellow horned poppy right after transplanting. This helps the soil settle and improves root-to-soil contact, promoting successful plant establishment.
How important is sunlight exposure for yellow horned poppy after transplanting?
Yellow horned poppy thrives in locations with full, direct sunlight. After transplanting, ensure it receives sufficient daily sun exposure to optimize its growth.
What regular care should yellow horned poppy get after transplanting?
Regularly water yellow horned poppy and monitor its health. Excessive or insufficient watering may impact its condition. Also, watch out for any pests or diseases.
Can I fertilize yellow horned poppy right after transplanting?
You should refrain from fertilizing yellow horned poppy immediately after transplanting. Wait a few weeks to allow it to acclimate to the new environment before beginning fertilization.
When should I stake yellow horned poppy after transplanting?
Staking yellow horned poppy is often unnecessary as it is relatively sturdy. However, if you observe it leaning or unstable, provide a stake for support.
How can I protect the newly transplanted yellow horned poppy from pests?
Regularly inspect yellow horned poppy for any indications of pests. Employ organic pest management techniques. If the pest problem is widespread, consider using a mild organic pesticide.


