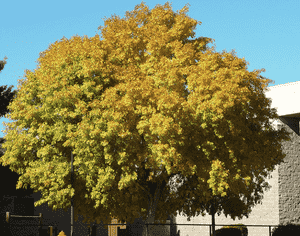
How to Transplant Velvet ash?
For velvet ash, the most favorable period for successful relocation is during the initial to middle stages of spring's increasing warmth, capitalizing on robust growth phases. Choose a sunny spot with soil that drains effectively; a thoughtful application of mulch after transplanting can enhance root strength and regulate hydration.
What Preparations are Needed Before Transplanting Velvet Ash?
What is the Ideal Time for Transplanting Velvet Ash?
The best time to move velvet ash is at the start of spring, a period of new beginnings. This timing aligns with the plant's natural growth cycle for better establishment. Relocating velvet ash as the ground thaws and new shoots appear promotes strong root development and reduces transplant shock, utilizing the season's mild temperatures for optimal acclimation.
How Much Space Should You Leave Between Velvet Ash Plants?
When planting your velvet ash, ensure ample room for development! An ideal spacing is approximately 20-30 feet (6-9 meters) apart. This will enable each plant to expand and thrive without competing for space.
What is the Best Soil Mix for Velvet Ash Transplanting?
For your velvet ash, a well-draining soil rich in organic matter is perfect. Incorporate a slow-release granular fertilizer during planting to encourage robust growth. This way, you're establishing a strong foundation from the outset!
Where Should You Relocate Your Velvet Ash?
Placement is crucial for your velvet ash. It will flourish in an area receiving full sun to partial shade. Therefore, select a spot where it can absorb at least 6 hours of sunlight daily for the best outcomes.
What Equipments Should You Prepare Before Transplantation Velvet Ash?
Shovel or Garden Spade
These tools are vital for excavating the new planting site for the velvet ash and for extracting it from its original spot, if it's already in the ground.
Gardening Gloves
To safeguard your hands while handling soil and the plant.
Pruning Shears
These are utilized for trimming the plant's roots and branches before transplanting to lessen the stress of relocation.
Wheelbarrow or Garden Cart
This can be employed to move the velvet ash from its initial location to its new position.
Watering Can or Garden Hose
To hydrate the plant after it has been moved.
Mulch
This aids in retaining soil moisture and regulating soil temperature once the velvet ash has been relocated.
How Do You Remove Velvet Ash from the Soil?
How Do You Remove Velvet Ash from the Soil?
From Ground: Ensure you water the velvet ash a day prior to transplanting; this allows water to penetrate deep into the roots, facilitating easier removal. Using a shovel or garden spade, carefully dig around the plant, making sure to extract as much of the root ball as possible. Loosen the soil surrounding the velvet ash and gently lift it from the ground.From Pot: To take the velvet ash out of a pot, water the plant thoroughly before transplanting. Turn the pot on its side, steady the plant, then with your hand at the plant's base and fingers extended into the soil, carefully pull the tree out.From Seedling Tray: If the velvet ash is a seedling, gently squeeze the tray cell to loosen the soil. Hold the seedling by its leaves, not the stem, and gently pull upward. The roots and soil should slide out easily. If not, continue to gently squeeze the cell until they do.
Step-by-Step Guide for Transplanting Velvet Ash
Plant Preparation
Trim any dead or excessive growth from the velvet ash, focusing on preserving the healthiest parts of the plant. This will reduce the plant's overall size, making it simpler to transplant.
Hole Preparation
Dig a hole in the new spot that is two to three times wider than the velvet ash's root ball, but no deeper than the root ball itself.
Plant Positioning
Place the velvet ash in the hole, ensuring it stands upright. The top of the root ball should be level with the ground surface.
Backfilling
Refill the hole with garden soil, gently firming it around the base of the velvet ash.
Watering
Water the velvet ash generously immediately after transplanting. This will settle the soil and eliminate any air pockets around the roots.
How Do You Care For Velvet Ash After Transplanting?
Watering
For the initial few weeks post-transplant, the velvet ash will require more frequent watering as it establishes itself in its new location. Water it thoroughly, rather than just sprinkling the surface.
Pruning
Pruning for shape is not advised immediately after transplanting. However, if any branches die back due to transplant shock, these can be removed.
Mulching
Applying a layer of mulch around the base of the velvet ash will help conserve moisture and reduce weed competition during its establishment phase.
Troubleshooting Common Issues with Velvet Ash Transplantation.
When is the best time to transplant velvet ash?
The optimal period to transplant velvet ash is during the S1-S2 phases. This ensures the highest survival rate.
How much space should be between each velvet ash when transplanting?
A gap of 20-30 feet (6-9 meters) should be maintained between each velvet ash during transplant to ensure healthy growth.
How deep should the hole be to transplant the velvet ash?
The hole should be twice as wide and the same depth as the root ball of the velvet ash. This allows the roots to spread easily.
What type of soil is best for transplanting velvet ash?
Velvet ash prefers well-drained soil with neutral to slightly alkaline pH levels. Ensuring this helps the plant establish faster.
What precautions should be taken when handling velvet ash for transplanting?
Make sure to handle the velvet ash carefully to avoid root damage. Severed or damaged roots can impede healthy growth post transplantation.
How should the root ball of velvet ash be prepared for transplanting?
Before transplanting, soak the root ball of velvet ash thoroughly. This allows the roots to absorb moisture and eases the shock of transplantation.
How often should the transplanted velvet ash be watered?
Immediately after transplanting, water velvet ash generously and maintain regular watering until the plant has fully established itself.
How long does it take for a transplanted velvet ash to establish?
It generally takes velvet ash about a season to establish after transplanting. Careful watering and monitoring during this period is crucial.
What signs of strain should I look for after transplanting velvet ash?
Watch for wilting, yellowing leaves, or a lack of new growth. These are signs of strain that may signal transplant shock in velvet ash.
What should be done if the transplanted velvet ash shows signs of wilting?
If velvet ash wilts after transplanting, it might need more water. However, check the soil moisture level first to avoid overwatering.


