How to Transplant White ash?
For the white ash, a perennial species, successful relocation is best achieved from the middle of spring through the beginning of summer. This period is ideal because of consistent temperatures and abundant light. Select a site that drains effectively and receives either partial or full sun for peak development. When moving the plant, guarantee adequate distance between specimens to encourage robust air movement.
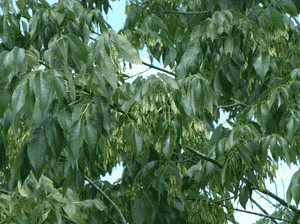
Preparations Required Before Relocating White Ash
Optimal Period for Relocating White Ash?
The prime window for moving white ash spans from mid-spring to early summer, promoting robust development and a thriving outcome. Utilize this transitional season for a strong, healthy white ash!
Recommended Distance Between White Ash Specimens?
When planting white ash, maintain a separation of approximately 50-60 feet (15-18 meters). This provides ample room for growth and fosters a healthy, balanced landscape.
Ideal Soil Blend for White Ash Relocation?
For white ash, prepare a well-draining, loamy soil. Prior to transplanting, it's beneficial to incorporate organic matter, such as compost, and a slow-release, balanced fertilizer to give your plant an excellent start!
Where to Replant Your White Ash?
Select a site with full sun or partial shade for your white ash. This plant thrives with 6-8 hours of daily sunlight, so placing it in a bright spot will help it flourish and grow beautifully.
Equipment to Prepare Before Relocating White Ash
Gardening Gloves
To safeguard your hands while handling soil and the white ash plant.
Shovel or Spade
For excavating holes and trenches when extracting and replanting your white ash specimen.
Garden Trowel
For more precise digging around the plant's root system and soil manipulation.
Container or Burlap
To transport and temporarily secure the root ball during the relocation process.
Pruning Shears
To remove any dead or damaged branches, leaves, and roots before transplanting.
Garden Hose or Watering Can
Essential for hydrating the plant and soil to encourage optimal root development post-transplant.
How to Extract White Ash from the Ground?
How to Extract White Ash from the Ground?
- From Ground:First, hydrate the white ash plant to moisten the soil. Then, excavate a wide trench around the plant using a shovel or spade, ensuring the plant's root ball remains intact. Carefully work the spade beneath the root ball to lift the plant from its original position.- From Pot:Water the pot to dampen the soil. Gently lay it on its side and carefully roll it back and forth to loosen the root ball. Grasp the base of the plant to softly slide it from the container, ensuring minimal root damage in the process.- From Seedling Tray:Gently push up the bottom of the cell containing the white ash seedling from the tray until the plant and its root ball can be gently lifted from the cell. Ensure not to harm the delicate roots of the young plant.
Detailed Steps for Relocating White Ash
Site Selection
Choose a location with adequate sunlight and space for your white ash plant to reach its mature size.
Dig a Hole
Use a shovel or spade to excavate a hole that is at least twice as wide and as deep as the white ash plant's root ball.
Position the Plant
Carefully place the white ash plant in the hole, ensuring the top of the root ball is level with the surrounding soil.
Backfill the Hole
Gently refill the hole with soil around the root ball, making sure there are no air pockets left that could cause root damage.
Firm the Soil
Lightly press down on the soil around the base of the white ash plant to eliminate any remaining air pockets and ensure the plant is securely in place.
Water and Mulch
Thoroughly water the relocated area and apply a 2-3 inch layer of mulch around the base of the plant, leaving a small buffer zone around the stem to prevent rot.
Post-Relocation Care for White Ash
Watering
Keep the soil around the white ash consistently moist, but not waterlogged, for the initial weeks after transplanting to aid in establishing strong roots.
Pruning
Regularly inspect the white ash plant for dead or damaged branches, leaves, and roots, and trim them away using pruning shears to encourage healthy growth.
Weeding
Keep the area around the relocated white ash plant free of weeds, as they compete with the plant for soil nutrients and moisture.
Monitoring
Observe the white ash's growth and the surrounding environment, adjusting care as needed to ensure optimal health and development.
Protection
Consider installing a small fence or barrier around the relocated white ash plant if it is vulnerable to damage from animals or other external factors.
Resolving Common Issues with White Ash Relocation.
When is the best time to relocate white ash?
The optimal period for relocating white ash is during mid-spring to early summer, when growth is active.
What is the recommended spacing between white ash plants?
Ensure a separation of approximately 50-60 feet (15-18 meters) between white ash plants to encourage proper growth.
How do I properly excavate white ash for relocation?
Dig a wide, deep trench around the white ash base, severing the roots cleanly. Preserve as many roots as possible.
What type of soil should white ash be relocated into?
White ash prefers well-draining, nutrient-rich soil with a pH between 6.0 and 7.0 for optimal growth.
How much water does white ash need after relocation?
Water white ash thoroughly after relocating, ensuring adequate soil moisture. Avoid overwatering and standing water.
Should I prune white ash before or after relocation?
Prune any dead or damaged branches before relocating. Light pruning after transplant encourages new growth.
How deep should I dig the new hole for white ash?
Dig a hole twice the width and the same depth as the root ball to ensure proper relocation.
Can I use fertilizer when relocating white ash?
Yes, use a well-balanced, slow-release fertilizer mixed with the soil to encourage successful relocation.
What should I do if white ash shows drooping leaves after relocation?
Ensure consistent watering and consider adding a layer of mulch for moisture retention. Be patient as white ash recovers.
How can I protect white ash from pests and diseases?
Monitor white ash for signs of pests and diseases. Treat with appropriate control methods as needed to maintain plant health.


