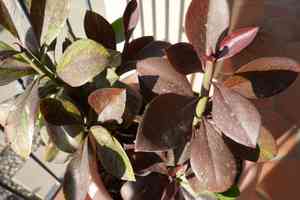
How to Transplant African Milk Bush?
For the vigorous African Milk Bush, the ideal period for relocation is from the refreshing onset of early spring through the bright expanse of late spring. Select a location bathed in sunlight with superior drainage to encourage its development. Should it be required, enrich the soil for peak health.
What Preparations are Needed Before Transplanting African Milk Bush?
What is the Ideal Time for Transplanting African Milk Bush?
The optimal period for relocating african Milk Bush spans from the onset of spring through its later stages. During this time, mild temperatures and consistent soil moisture provide an ideal setting for root development, ensuring a smooth transition for african Milk Bush. This also aligns with the growth surge often observed in perennials, allowing african Milk Bush to recover swiftly and flourish after transplant. A friendly reminder: you're giving african Milk Bush a fresh start in a season full of growth potential!
How Much Space Should You Leave Between African Milk Bush Plants?
When getting ready to move your african Milk Bush, you'll want to provide ample room for them to thrive. Aim to space them approximately 24-36 inches (61-91 cm) apart. This ensures each plant has sufficient area to grow without crowding, which is crucial for their health and your gardening success!
What is the Best Soil Mix for African Milk Bush Transplanting?
Before introducing your african Milk Bush to their new location, let's prepare the soil! They flourish in well-draining soil enriched with a good amount of organic material. Incorporate a balanced, slow-release fertilizer to give your african Milk Bush an excellent start. A mix specifically designed for perennials or cacti is perfect for this resilient plant.
Where Should You Relocate Your African Milk Bush?
Your african Milk Bush loves the sun and will thrive in a spot that receives full sunlightâaim for about 6-8 hours of direct sun daily. Select a sunny area in your garden that is free from shade, helping to ensure your african Milk Bush gets the light it requires to grow healthy and strong.
What Equipments Should You Prepare Before Transplantation African Milk Bush?
Gardening Gloves
To safeguard your hands while handling soil and plants.
Garden Shovel or Spade
For excavating the plant and preparing its new site.
Garden Fork
To loosen the earth surrounding the root ball.
Watering Can or Garden Hose
For hydrating the plant before and after its relocation.
Pruning Shears
To trim any damaged roots or foliage.
Wheelbarrow or Garden Cart
To move the plant from one spot to another.
Mulch
To help retain soil moisture and inhibit weed growth around the new planting area.
How Do You Remove African Milk Bush from the Soil?
How Do You Remove African Milk Bush from the Soil?
From Ground: First, hydrate the african Milk Bush plant to moisten the soil, making it easier to manage. Dig a wide circle around the plant using a garden shovel or spade, taking care not to harm the root ball. Use a garden fork to gently lift and separate the roots if they are tightly packed, then leverage the plant up and out of the ground with the spade.From Pot: Water the african Milk Bush in its current container to ensure the roots are adequately hydrated. Turn the pot on its side, tap the bottom or gently press the sides to loosen the root ball. Carefully slide the plant out, supporting it by the base and avoiding pulling on the stems.From Seedling Tray: Water the seedlings thoroughly before beginning. Use a spatula, dibbler, or similar tool to carefully remove each african Milk Bush seedling from its cell, trying to keep as much soil around the roots as possible to minimize transplant shock.
Step-by-Step Guide for Transplanting African Milk Bush
Preparation
Check the weather forecast to confirm no extreme weather is expected in the coming days, which could stress the african Milk Bush after transplanting. Gather all necessary tools and supplies listed above before starting the process. Ensure you have ample time and do not rush the transplanting process to avoid damaging the plant.
Root Ball
Carefully extract the african Milk Bush plant following the 'removal process' guidelines. If moving from the ground, gently shake or brush off excess soil to better view the root structure and facilitate easier planting. For potted african Milk Bush, inspect the roots and trim any that are circling or excessively long.
Transplant Hole
Dig a hole in the ground where you intend to transplant african Milk Bush. Make the hole twice as wide as the root ball and of equal depth. If the soil is compacted, break it up with the garden fork to make it more suitable for new root growth.
Placing the Plant
Gently place the african Milk Bush into the hole. The top of the root ball should be level with the surrounding soil surface. Once the plant is positioned, backfill the hole with the excavated soil, gently tamping down as you go to eliminate air pockets without compacting the soil too tightly around the roots.
Watering
Once african Milk Bush is in place and the soil is backfilled, water thoroughly to settle the soil around the roots and aid in recovery from transplant shock. The water will also help remove any remaining air gaps in the soil.
Mulching
After the water has been absorbed, apply a layer of mulch around the base of african Milk Bush, keeping it away from the stem to prevent rot. Mulch will help maintain moisture levels in the soil and keep the root system cool.
How Do You Care For African Milk Bush After Transplanting?
Immediate Aftercare
Keep the transplanted african Milk Bush well-hydrated to help the roots establish. For the initial week or so, water daily unless there is sufficient natural rainfall. Gradually decrease the watering frequency as the plant becomes established.
Monitoring
Watch for indications of transplant shock, such as wilting or yellowing leaves. These symptoms may appear but should subside as the african Milk Bush adapts to its new location. If not, further investigation into potential issues with root development or pests may be necessary.
Pruning
Trim any dead or damaged branches to direct the african Milk Bush's energy towards root establishment rather than repairing compromised foliage.
Stake Support
If the african Milk Bush is tall or in an exposed area, use a stake to support it while it establishes. Secure the plant with loose ties that allow for movement and growth. Remove the stakes once the plant is stable, typically after the first growing season.
Troubleshooting Common Issues with African Milk Bush Transplantation.
How do I know when is the best time to transplant african Milk Bush?
It's ideal to transplant african Milk Bush when temperatures begin to rise, in the pleasant period of early to late spring. This provides the plant ample time to establish before the summer heat.
What's the appropriate space between african Milk Bush when transplanting?
Give each african Milk Bush plenty of room to flourish by spacing them about 24-36 inches (61-91 cm) apart, promoting good air circulation and growth.
What depth should I plant african Milk Bush?
The new hole for your african Milk Bush should be just deep enough for the root ball to sit slightly below the soil line, ensuring sturdy support.
How much should I water african Milk Bush after transplanting?
Water african Milk Bush generously after transplanting to settle the soil, then maintain consistent moisture without waterlogging the area.
Can I transplant african Milk Bush on a hot, sunny day?
Transplanting african Milk Bush on a cooler, overcast day minimizes stress. Avoid extreme heat as it can damage the sensitive roots.
What type of soil is best for transplanting african Milk Bush?
Use well-draining soil rich in organic matter for african Milk Bush, which nourishes the plant and prevents water stagnation.
Do I need to fertilize african Milk Bush when transplanting?
Wait a few weeks before fertilizing african Milk Bush post-transplant to avoid burning the roots and give them time to acclimatize.
How do I handle african Milk Bush safely during transplanting?
Wear gloves and handle african Milk Bush with care, since its sap can be irritating. Grip the plant by the base, avoiding stem and leaf damage.
What signs indicate transplant shock in african Milk Bush?
Drooping, yellowing, or browning leaves on african Milk Bush post-transplant could signify shock. Provide shade and water gently to recover.
Should I prune african Milk Bush before or after transplanting?
Lightly prune african Milk Bush before transplanting to focus its energy on root establishment. Postpone heavy pruning until it's settled in its new spot.


