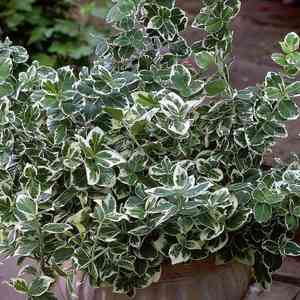
How to Transplant Wintercreeper?
Euonymus fortunei flourishes when relocated in early spring, facilitating prime root development. Select a site offering partial shade and soil that drains effectively. Carefully untangle the root ball prior to planting; this promotes successful integration.
What Preparations are Needed Before Transplanting Wintercreeper?
What is the Ideal Time for Transplanting Wintercreeper?
The initial bloom of spring, immediately following the winter chill, is an optimal period to relocate wintercreeper. This timing allows wintercreeper to develop strong roots prior to warmer months. Moving wintercreeper in early spring also provides ample time for the plant to recover and enhance its foliage, boosting your home garden's visual appeal.
How Much Space Should You Leave Between Wintercreeper Plants?
When relocating wintercreeper, maintain a separation of approximately 3-4 feet (0.9-1.2 meters). This provides sufficient room for expansion and guarantees robust development.
What is the Best Soil Mix for Wintercreeper Transplanting?
Prepare the soil with a well-draining, loamy, or sandy mixture, slightly acidic to neutral (pH 6.0-7.0). Incorporate a slow-release, balanced granular fertilizer (e.g., 10-10-10) to promote vigorous root growth.
Where Should You Relocate Your Wintercreeper?
Select a site that offers wintercreeper partial shade to full sun. However, in hotter regions, choose an area with filtered light to shield them from intense afternoon sun.
What Equipments Should You Prepare Before Transplantation Wintercreeper?
Gardening Gloves
Protects hands during the relocation process.
Spade or Shovel
For excavating and lifting the plant from its original spot.
Garden Trowel
Useful for digging small holes or moving soil.
Wheelbarrow or Pot
To move the plant from its initial location to its new home.
Watering Can
For hydrating your plant during and after the move.
Mulch
Helps retain soil moisture post-transplant and minimizes weed growth.
Pruning Shears
To trim any dead or damaged foliage before and after relocation.
How Do You Remove Wintercreeper from the Soil?
How Do You Remove Wintercreeper from the Soil?
From Ground: Hydrate the wintercreeper plant to moisten the soil. Then, using a spade or shovel, dig a wide trench around the plant, ensuring the plant's root ball remains intact. With the spade, carefully work it beneath the root ball and lift the plant from its current position.From Pot: Start by watering the wintercreeper plant. Gently tip the pot on its side and apply light pressure to the plant's base. The pot should slide off, and the plant roots should stay intact. Be careful not to pull the plant by its stem.From Seedling Tray: Water the seedlings, then gently pinch each seedling at the base of its stem. Pull it upward carefully without harming the roots or leaves. Wintercreeper seedlings are delicate; handle with care.
Step-by-Step Guide for Transplanting Wintercreeper
Preparation
Prepare your new site for wintercreeper by digging a hole deep and wide enough to accommodate the plant's root ball. The hole's depth should be roughly equivalent to the root ball's height. The width should be twice the diameter of the root ball.
Transfer
Use a wheelbarrow or plant pot to transport wintercreeper to its new location. Carefully lower wintercreeper into the hole, ensuring it's positioned at the correct height. The top of the root ball should be level with or slightly above the ground surface.
Backfilling
Refill the hole, gently compacting the soil around the root ball to eliminate any air pockets and ensure the plant is stable.
Watering
Thoroughly water wintercreeper after relocation.
Mulching
Apply a layer of mulch around wintercreeper, but keep it about two inches away from the stem to allow proper airflow and prevent decay.
How Do You Care For Wintercreeper After Transplanting?
Pruning
Trim any dead or dying leaves from wintercreeper to encourage healthier development.
Watering
Water wintercreeper thoroughly immediately after relocation. For the subsequent few weeks, keep the soil around wintercreeper consistently moist. The roots require time to re-establish in the new spot.
Care for Dehydration
Wintercreeper may experience transplant shock, similar to dehydration, after being moved. Monitor your plant closely. If it shows signs of drooping or wilted leaves, water it gently and ensure it receives adequate, but not excessive, sunlight.
Weed Control
Regularly check for and remove any weeds growing near wintercreeper. Weeds can compete with wintercreeper for water and nutrients.
Troubleshooting Common Issues with Wintercreeper Transplantation.
When is the best time to transplant wintercreeper?
Wintercreeper prefers relocation in early spring, just before its active growth phase.
How far apart should I space wintercreeper plants when transplanting?
For optimal growth, provide a distance of 3-4 feet (90-120 cm) between each wintercreeper plant.
Why are my transplanted wintercreeper plants wilting?
Wilting may occur due to insufficient moisture. Be sure to water wintercreeper plants regularly after relocation.
What kind of soil does wintercreeper prefer when transplanting?
Wintercreeper thrives in well-drained soil, rich in organic matter. This aids in a smooth relocation process.
Do I need to prune wintercreeper before transplanting?
While not essential, pruning can lessen stress on wintercreeper by reducing water loss and promoting new growth.
What's the appropriate depth to plant wintercreeper when transplanting?
Plant wintercreeper at the same depth it was in its original pot, typically around 10 inches (25 cm).
Should I add any fertilizer when transplanting wintercreeper?
Yes, add a slow-release fertilizer to support wintercreeper's growth after moving, but avoid over-fertilizing.
Why are my transplanted wintercreeper leaves turning yellow?
Yellowing leaves can indicate overwatering or poor drainage. Ensure wintercreeper has adequate drainage to prevent root rot.
Should I water wintercreeper immediately after transplanting?
Absolutely! Thorough watering after relocation helps wintercreeper settle into its new environment and reduces transplant shock.
How to protect transplanted wintercreeper from frost in early spring?
Covering wintercreeper with a breathable fabric or plastic can shield it from unexpected frost after relocation.


