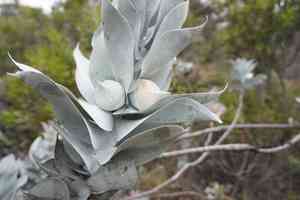
How to Transplant Mottlecah?
Mottlecah flourish when relocated during the splendid period of mid to late spring, guaranteeing they get abundant solar exposure. Select a site that is well-draining and sunny, offering moderate shelter from wind, to facilitate their smooth establishment. Minimize disruption throughout the procedure for optimal outcomes.
What Preparations are Needed Before Transplanting Mottlecah?
What is the Ideal Time for Transplanting Mottlecah?
The best time to move mottlecah is from mid-spring through late spring. Relocating during these warmer months aids in better root establishment as the soil warms and moisture is plentiful. This timing ensures mottlecah adapts well to its new spot, encouraging strong development as it enters the growing season.
How Much Space Should You Leave Between Mottlecah Plants?
For a thriving and aesthetically pleasing garden, plant mottlecah 10-15 feet (3-4.5 meters) apart. This provides each plant sufficient room to grow and flourish without overcrowding.
What is the Best Soil Mix for Mottlecah Transplanting?
Prepare soil that drains well with a slightly sandy texture for mottlecah. Mix in a phosphorus-rich base fertilizer to encourage root growth. Consider adding compost to boost soil fertility.
Where Should You Relocate Your Mottlecah?
Select a sunny location for mottlecah in your garden. Ensure it receives at least 6-8 hours of direct sunlight daily, which is vital for its development and blooming.
What Equipments Should You Prepare Before Transplantation Mottlecah?
Gardening Gloves
To safeguard your hands while handling soil and plants.
Garden Shovel or Spade
For digging around and lifting the plant from its initial spot.
Pruning Shears
To trim any damaged roots or branches.
Watering Can or Hose
To keep the soil moist before and after moving the plant.
Mulch
To help retain moisture and stabilize soil temperature.
Garden Fork
To loosen the soil in the new planting area.
How Do You Remove Mottlecah from the Soil?
How Do You Remove Mottlecah from the Soil?
From Ground: First, hydrate the mottlecah plant to moisten the soil. Then, dig a wide trench around the plant using a garden shovel or spade, ensuring the plant's root ball stays intact. Carefully work the spade beneath the root ball to lift the plant from its original position.From Pot: Water the mottlecah plant thoroughly. Gently tap the pot's sides to loosen the soil. Carefully slide the plant out of the pot, supporting the root ball with your hand.From Seedling Tray: Water the seedlings well. Use a small garden fork or your fingers to gently lift the seedlings from the tray, taking care to keep the root ball intact.
Step-by-Step Guide for Transplanting Mottlecah
Prepare the New Site
Ensure the new planting location has well-draining soil. Loosen the soil with a garden fork and dig a hole twice as wide and slightly deeper than the mottlecah plant's root ball.
Remove the Plant
Following the steps outlined in the removal process category, carefully extract the mottlecah plant from its initial spot.
Inspect the Roots
Examine the roots for any signs of damage. Use pruning shears to snip off any dead or compromised roots.
Plant the mottlecah
Place the mottlecah plant in the prepared hole at the same depth it was growing in its previous location. Fill the hole with soil, gently firming it around the root ball to eliminate air pockets.
Water the Plant
Water the mottlecah plant thoroughly after transplanting to help settle the soil around the roots.
Mulch
Apply a 2-3 inch layer of mulch around the base of the mottlecah plant, keeping it a few inches away from the stem to prevent rot.
How Do You Care For Mottlecah After Transplanting?
Watering
Keep the soil around the mottlecah consistently moist, but not waterlogged, for the initial weeks post-transplant to aid in strong root establishment.
Mulching
Maintain the mulch layer to conserve moisture and regulate soil temperature.
Monitoring
Observe the mottlecah for any indications of transplant shock, such as wilting or yellowing leaves.
Troubleshooting Common Issues with Mottlecah Transplantation.
When is the best time to transplant mottlecah?
Move mottlecah from mid-spring to late spring for optimal growth and establishment.
What spacing should be maintained for mottlecah?
Space mottlecah plants 10-15 feet (3-4.5 meters) apart to allow ample growth room.
How to prepare the soil for transplanting mottlecah?
Ensure well-drained soil with added compost to boost fertility before transplanting mottlecah.
Should I water mottlecah immediately after transplanting?
Yes, water mottlecah thoroughly right after transplanting to help it settle in the new spot.
How to handle root damage while transplanting mottlecah?
Be gentle and avoid breaking roots. If roots are damaged, trim them cleanly before planting.
Is mulching necessary for mottlecah?
Apply a mulch layer around mottlecah to retain moisture but keep mulch away from the trunk.
What should I do if mottlecah shows transplant shock symptoms?
Keep mottlecah well-watered, provide partial shade, and avoid fertilizing until it recovers from shock.
How deep should the planting hole be for mottlecah?
Dig a hole twice as wide and the same depth as the root ball of mottlecah.
Should I fertilize mottlecah right after transplanting?
Wait until mottlecah shows new growth before fertilizing to avoid stress from excessive nutrients.
How to secure the transplanted mottlecah against strong winds?
Stake young mottlecah plants if your area is windy, using soft ties to avoid trunk damage.


