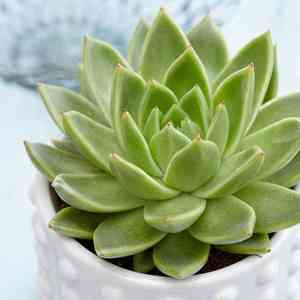
How to Transplant Lipstick echeveria?
The ideal period for relocating lipstick echeveria spans from the beginning to the end of spring, or from late autumn to the close of winter. These times offer the most favorable environmental factors for the plant's development. Select a site with good drainage and ample sunlight, and carefully manage its root system during the transfer to ensure a flourishing lipstick echeveria!
What Preparations are Needed Before Transplanting Lipstick Echeveria?
What is the Ideal Time for Transplanting Lipstick Echeveria?
The optimal period for lipstick echeveria's relocation is from early spring to late spring, or from late autumn into the heart of winter. Moving lipstick echeveria during these times allows it sufficient opportunity to establish roots prior to the vigorous growth of summer or the harsh conditions of mid-winter. You'll find that lipstick echeveria will create a vibrant display that's sure to capture attention when all these pre-transplanting tasks have been carefully completed.
How Much Space Should You Leave Between Lipstick Echeveria Plants?
When relocating lipstick echeveria, maintain a distance of 8-10 inches (20-25 cm) between each specimen. This will provide adequate room for robust development and prevent competition for nutrients.
What is the Best Soil Mix for Lipstick Echeveria Transplanting?
For the lipstick echeveria, ensure the soil is well-draining and comprises a blend of potting soil, coarse sand, and perlite. Incorporate a slow-release fertilizer as a foundation to supply essential nutrients.
Where Should You Relocate Your Lipstick Echeveria?
Select a spot with full sun exposure or partial shade for your lipstick echeveria plant. They require at least 6 hours of daily sunlight, so a south or west-facing location would be perfect.
What Equipments Should You Prepare Before Transplantation Lipstick Echeveria?
Gardening Gloves
To safeguard your hands while handling soil and the plant.
Shovel or Spade
For excavating holes and lifting the plant from its initial position.
Pruning Shears
To trim any damaged or deceased roots and foliage.
Trowel
For digging smaller holes and smoothing the soil around the plant.
Watering Can
To hydrate the lipstick echeveria plant during and after its relocation.
Organic Compost
To furnish nutrients and enhance the soil structure for the lipstick echeveria plant.
How Do You Remove Lipstick Echeveria from the Soil?
How Do You Remove Lipstick Echeveria from the Soil?
From Ground: First, irrigate the lipstick echeveria plant to moisten the soil. Then, excavate a wide trench around the plant using a shovel or spade, ensuring the plant's root ball remains intact. Carefully work the spade beneath the root ball to lift the plant from its original spot.From Pot: Water the lipstick echeveria plant and allow it to sit for a few minutes to permit the soil to loosen. Gently tilt the pot on its side and slide the plant out, keeping the root ball whole. If the plant is stuck, use a trowel to loosen the soil around the pot's edges.From Seedling Tray: Gently grasp the lipstick echeveria seedling by its true leaves, not the stem. Use a small tool or your fingers to carefully loosen the soil around the roots before extracting the seedling from its cell.
Step-by-Step Guide for Transplanting Lipstick Echeveria
Prepare the Plant
Carefully remove any dead or damaged leaves and roots from the lipstick echeveria plant with pruning shears. This will help lessen stress during relocation and promote healthy development.
Hole Preparation
Dig a hole in the ground that is twice as wide and as deep as the plant's root ball. Add 1-2 inches of organic compost to the bottom of the hole and blend it with the existing soil.
Placement
Position the lipstick echeveria plant in the center of the hole, ensuring that the top of the root ball is level with the surrounding soil. Gently spread out the roots if the plant was previously pot-bound.
Backfilling
Fill the hole with the native soil, incorporating some compost into the removed soil if desired. Gently firm the soil around the lipstick echeveria plant, eliminating any air pockets.
Watering
Thoroughly water the lipstick echeveria plant after transplanting to help settle the soil and reduce transplant shock. Ensure the plant receives adequate moisture in the coming weeks as it establishes roots.
How Do You Care For Lipstick Echeveria After Transplanting?
Monitoring
Regularly observe the lipstick echeveria plant for any indications of stress, such as wilting or yellowing foliage, and address any issues promptly.
Pest and Disease Control
Keep an eye out for any pests or diseases that might affect the lipstick echeveria plant, treating them as needed with organic or chemical remedies.
Pruning
Trim off any dead or damaged leaves and branches to encourage healthy growth and maintain the desired form of the lipstick echeveria plant.
Feeding
After 3-4 weeks, begin applying a balanced liquid fertilizer every 4-6 weeks during the active growth period to support continued development and overall plant vitality.
Troubleshooting Common Issues with Lipstick Echeveria Transplantation.
When is the best time to transplant lipstick echeveria?
The optimal periods for transplanting are from the start of spring to late spring, or from late autumn to the close of winter.
What's the correct spacing for lipstick echeveria when transplanting?
For robust growth, ensure there's approximately 8-10 inches (20-25 cm) distance between each lipstick echeveria plant.
Is it necessary to prune lipstick echeveria before transplanting?
Yes, remove any dead or diseased parts. This helps lighten the plant and promotes healthy new growth after you relocate lipstick echeveria.
What's the best soil for transplanting lipstick echeveria?
Lipstick echeveria thrives in well-draining soil. Consider a mixture of cactus soil and sharp sand or a specialized cactus blend.
Should I immediately water lipstick echeveria after transplanting?
After relocating lipstick echeveria, do not water immediately. Wait for a few days so that any damaged roots can heal and prevent rot.
How deep should the planting hole be when transplanting lipstick echeveria?
You should dig a hole that's deep enough to cover the roots of lipstick echeveria, generally 2-3 inches (5-7.5 cm). Ensure the rosette is above the soil surface.
Can we transplant lipstick echeveria in non-ideal seasons?
Relocating lipstick echeveria in non-ideal seasons is not advised as it can stress the plant and impede its development.
What should I do if the transplanted lipstick echeveria starts wilting?
Immediately check the watering and lighting conditions. Lipstick echeveria could be overwatered or not receiving enough sunlight, both of which can cause wilting.
What size pot is suitable for transplanting lipstick echeveria?
A pot that's 1-2 inches (2.5-5 cm) wider than the rosette of lipstick echeveria is appropriate. Ensure the pot has excellent drainage.
Can I fertilize lipstick echeveria immediately after transplanting?
No, refrain from fertilizing for a few weeks after relocating lipstick echeveria. Unnecessary early fertilization can lead to root burn.


