How to Transplant Spreading woodfern?
The ideal period for relocating spreading woodfern spans from the onset of early spring's renewal to the threshold of summer's heat, facilitating strong root development. Position it in partial shade and damp, adequately draining earth for peak post-transplant vigor.
Essential Preparations Before Relocating Spreading Woodfern?
Optimal Period for Moving Spreading Woodfern?
The best time to rehome spreading woodfern is during the vibrant renewal of spring. Moving spreading woodfern in this season leverages its natural growth surge, aiding root development before summer's heat. This timing aligns with spreading woodfern's active growth cycle, ensuring a smooth transition and boosting survival rates.
Required Spacing Between Spreading Woodfern Plants?
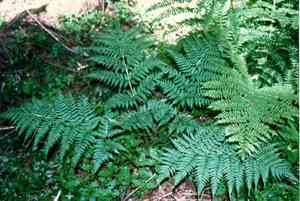
To allow your lovely spreading woodfern to thrive, provide ample room! Position them approximately 18-24 inches (45-60 cm) apart. This spacing ensures each plant has sufficient area to unfurl its fronds and grow beautifully.
Ideal Soil Blend for Spreading Woodfern Transplantation?
Prepare to nurture your spreading woodfern by combining well-draining, loamy soil with a gentle, slow-release fertilizer. A healthy start with the correct nutrients sets them up for a flourishing existence!
Preferred Location for Your Spreading Woodfern?
Your spreading woodfern will thrive in a spot where sunlight filters through! Choose an area with dappled sunlight or partial shade to shield its delicate fronds from intense rays.
Equipment Needed Before Transplanting Spreading Woodfern?
Gardening Gloves
To safeguard your hands while handling soil and the plant.
Shovel or Spade
For excavating the plant from its original spot and preparing the new planting site.
Watering Can or Hose
To hydrate the spreading woodfern before and after relocation, ensuring it remains moisturized.
Pruning Shears
To trim any dead or excess parts of the spreading woodfern prior to transplanting.
Wheelbarrow or Garden Cart
To transport the spreading woodfern to its new location if necessary.
Garden Trowel
To refine the planting hole or assist in removing a spreading woodfern from a smaller container.
How to Extract Spreading Woodfern from the Soil?
How to Extract Spreading Woodfern from the Soil?
From Ground: Start by watering the spreading woodfern to soften the soil, making plant removal easier. Use a shovel or spade to carefully dig around the plant, maintaining a wide perimeter to avoid root system damage. Gently lift the plant from the ground, preserving as much of the root ball as possible.From Pot: Water the spreading woodfern thoroughly beforehand. Invert the pot and gently tap or squeeze it to loosen the root ball. Carefully pull the plant by its base, not the leaves or stems, until it slides out. If it's stuck, use a garden trowel to loosen the soil around the pot's edges.From Seedling Tray: Water the seedlings to ensure moist soil. Carefully separate individual spreading woodfern by pushing up from the cell's bottom or using a tool like a spoon or dibber to lift the plant, minimizing root disturbance.
Step-by-Step Guide for Relocating Spreading Woodfern
Preparation
Ensure all necessary tools are ready and the new planting site is prepared for the spreading woodfern.
Root Ball Care
Before moving the spreading woodfern, inspect its root ball. If roots are tightly packed or circling, gently untangle them to encourage outward growth.
Planting Hole
Excavate a hole in the new spot that is twice the width of the root ball and the same depth. This provides ample space for the spreading woodfern to establish its roots.
Setting the Plant
Position the spreading woodfern in the planting hole so the top of the root ball is level with the surrounding soil. Adjust depth as needed before backfilling.
Backfilling
Gently refill around the spreading woodfern with the excavated soil, lightly tamping to remove air pockets. Ensure the spreading woodfern is upright and well-placed as you fill.
Watering In
After relocation, thoroughly water the spreading woodfern to settle the soil around the roots and hydrate the plant. This also helps reduce transplant shock.
Post-Transplant Care for Spreading Woodfern?
Monitoring
Check the spreading woodfern daily to observe its adaptation to the new location and ensure no signs of stress like wilting or discolored leaves.
Watering
Maintain consistent soil moisture around the newly relocated spreading woodfern, especially in the initial weeks, to support root establishment without overwatering.
Mulching
Apply a layer of mulch around the base of the spreading woodfern to help retain soil moisture, regulate temperature, and suppress weed growth.
Pruning
Trim any damaged or broken fronds after relocation to encourage new healthy growth and maintain the plant's aesthetic form.
Troubleshooting Common Issues with Spreading Woodfern Relocation.
Why is my spreading woodfern struggling after being moved?
Ensure it was relocated during the optimal period from early to late spring. Verify that the soil drains well and the plant is watered regularly without becoming waterlogged.
How much space does spreading woodfern require when being moved?
Aim to space spreading woodfern at the ideal range of 18-24 inches (45-60 cm) apart to allow for ample growth and air circulation.
How do I prepare the soil for relocating spreading woodfern?
Prepare a rich, humusy, and well-draining soil. It should be loosened to a depth of 12 inches (30 cm) to encourage healthy root spread.
Can I move spreading woodfern in the summer instead of spring?
It's best to relocate spreading woodfern when temperatures are cooler in spring to minimize stress and promote root establishment before the summer heat.
What is the ideal depth to plant spreading woodfern after relocation?
Relocate spreading woodfern so the root crown is level with the soil surface, ensuring roots can spread without being too deep or shallow.
How often should I water spreading woodfern after relocation?
Water generously at relocation and then regularly, allowing the soil to slightly dry between waterings, without letting spreading woodfern dry out completely.
Should I fertilize spreading woodfern immediately after relocation?
Wait until spreading woodfern shows signs of new growth before fertilizing, then use a balanced, slow-release fertilizer according to manufacturer's instructions.
What if the leaves of spreading woodfern turn yellow after relocation?
Yellowing can indicate overwatering or poor drainage. Ensure the plant isn't sitting in water and the soil drains properly.
Is mulching beneficial for spreading woodfern post-relocation?
Yes, mulching helps retain moisture, prevents weed competition, and keeps root temperatures stable. Apply a 2-3 inch (5-7.5 cm) layer around but not touching the stems.
How do I protect spreading woodfern during a frost after relocation?
If an unexpected frost is predicted, shield spreading woodfern with a frost cloth or blanket overnight and remove it during the day to prevent overheating.


