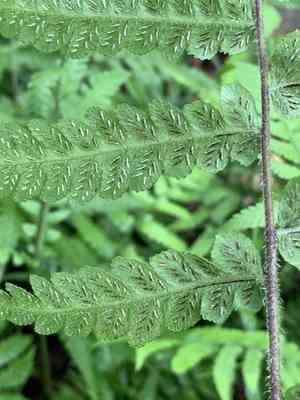
How to Transplant Black lady fern?
For optimal growth of black lady fern, relocate it during the warmest period, spanning from late spring through early summer. Select a shaded location featuring damp earth. Bear in mind that careful handling of the root system aids in more effective establishment.
What Preparations are Needed Before Transplanting Black Lady Fern?
What is the Ideal Time for Transplanting Black Lady Fern?
The best time to move black lady fern is when the earth begins to revive, typically from late spring to early summer. This period offers a perfect mix of warmer soil and mild weather, creating prime conditions for roots to establish without extreme heat stress. This strategic timing allows black lady fern to adjust comfortably, benefiting from the growing season's energy, which in turn, supports strong and healthy development. Following these transplanting steps during this recommended phase will help your black lady fern flourish in your garden.
How Much Space Should You Leave Between Black Lady Fern Plants?
When getting ready to transplant your black lady fern, ensure they have ample room to grow. Aim for a spacing of roughly 12-18 inches (30-46 cm) between each black lady fern, so they don't compete for nutrients or sunlight.
What is the Best Soil Mix for Black Lady Fern Transplanting?
Your black lady fern will thrive in fertile, well-draining soil. Before transplanting, mix in some organic compost to enrich the soil. A gentle, balanced slow-release fertilizer will supply essential nutrients for healthy growth.
Where Should You Relocate Your Black Lady Fern?
Select a spot that receives partial to full shade, as too much direct sunlight can harm your black lady fern. An ideal location would get morning sun and afternoon shade, allowing your ferns to flourish.
What Equipments Should You Prepare Before Transplantation Black Lady Fern?
Gardening Gloves
To safeguard your hands while handling soil and plants.
Shovel or Spade
For digging up the black lady fern and preparing the new planting hole.
Garden Trowel
For minor adjustments to the planting site and assisting with placement.
Watering Can or Hose
To hydrate the black lady fern before, during, and after moving it.
Wheelbarrow or Garden Cart
For moving the plant and soil, if needed.
Pruning Shears
To trim any damaged or excess growth.
Mulch
To help maintain soil moisture and prevent weeds around the new planting area.
Measuring Tape
To ensure correct spacing from other plants and garden features.
How Do You Remove Black Lady Fern from the Soil?
How Do You Remove Black Lady Fern from the Soil?
From Ground: First, water the black lady fern to moisten the soil and lessen transplant shock. Then, dig a wide trench around the plant with a shovel, making sure you are far enough from the base to avoid damaging the root ball. Gently work the spade under the root ball and lift the plant from its spot.From Pot: Begin by watering the black lady fern in its current container. Once the soil is damp, carefully tilt the pot and tap its sides or press the bottom to loosen the plant. Gently pull the base of the stems or invert the pot to slide the plant out with the soil intact.From Seedling Tray: Water the tray to facilitate easier removal of the black lady fern seedlings. Use a garden trowel or your fingers to carefully ease the seedlings out of the tray, taking care to keep the delicate roots and surrounding soil undisturbed.
Step-by-Step Guide for Transplanting Black Lady Fern
Preparation
Gather all necessary tools and materials for transplanting the black lady fern. Ensure you are dressed appropriately for the task, with gardening gloves to protect your hands.
Removal
Use the method described in the removal process section to extract the black lady fern from its current location, being careful not to harm the root ball.
Transplant Hole
Dig a hole in the new spot that is twice as wide and the same depth as the root ball of your black lady fern.
Placement
Position the black lady fern in the center of the hole. The top of the root ball should be level with the surrounding ground for proper growth.
Filling In
Carefully backfill around the root ball with soil, gently firming it down to remove any air pockets that could dry out the roots.
Watering In
Water the black lady fern thoroughly after planting to settle the soil and provide hydration. Be careful not to overwater; just ensure the surrounding soil is moist.
Mulching
Apply a layer of mulch around the base of the black lady fern, keeping it a few inches away from the stems. This helps retain moisture and prevents weed growth.
How Do You Care For Black Lady Fern After Transplanting?
Observation
Regularly inspect your black lady fern for signs of stress, such as wilting or discoloration, and address any issues promptly.
Watering
Establish a routine to keep the soil around the black lady fern consistently moist, especially during the initial weeks after transplanting. Adjust as needed based on weather conditions.
Pruning
Snip off any damaged or dead fronds with pruning shears to direct the black lady fern's energy towards establishing new growth.
Support
If your black lady fern is particularly tall or slender, you might provide temporary stakes or supports to prevent it from falling over in strong winds until its roots are firmly established.
Troubleshooting Common Issues with Black Lady Fern Transplantation.
What's the best time to transplant black lady fern?
Optimal timing is during the gentle warmth of late spring to the onset of summer, ensuring a smooth transition.
How should black lady fern be spaced when transplanting?
Allocate ample space between transplants, ideally 12-18 inches (30-45 cm), to encourage healthy growth.
Why are my black lady fern leaves turning yellow after transplanting?
Yellowing leaves could indicate stress from insufficient watering or a dramatic change in location. Gradual acclimatization may help.
What's the ideal soil for transplanting black lady fern?
Use fertile, well-drained soil with a balanced pH to set the stage for black lady fern's thriving.
Can I transplant black lady fern in full sun?
Black lady fern prefers dappled sunlight over direct exposure. Choose a spot with filtered light to mimic natural habitat conditions.
How do I prepare the site for black lady fern transplanting?
Enrich your transplant site with organic matter and ensure it's free of weeds. Proper prepping promises a prosperous plant!
Is mulching necessary after transplanting black lady fern?
Absolutely, mulching conserves moisture and maintains soil temperature, which is vital for the delicate roots of black lady fern.
How often should black lady fern be watered post-transplant?
Initially, water black lady fern generously to help roots settle. Then, maintain consistent moisture but avoid overwatering.
What should I do if black lady fern wilts after transplanting?
Wilting may be a hydration issue or a sign of transplant shock. Keep the soil moist and provide shade momentarily.
Can I transplant mature black lady fern plants?
Indeed, mature black lady fern can be transplanted. Ensure careful handling to preserve root structure and minimize stress.


