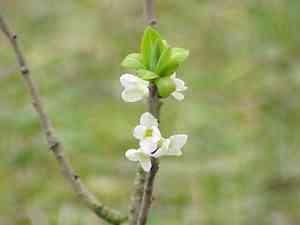
How to Transplant February daphne?
The ideal period for relocating february daphne is the inactive winter months, providing a peaceful interval for roots to settle without strain. Choose a location with partial shade and soil that drains effectively. Careful manipulation safeguards february daphne's fragile root structure during its move.
What Preparations are Needed Before Transplanting February Daphne?
What is the Ideal Time for Transplanting February Daphne?
The perfect time for relocating february daphne is during its dormant phase in late winter, just prior to the onset of spring. This timing aligns with the plant's natural growth cycle, allowing roots to establish in cooler, moist soil, ensuring a strong start as the season progresses. By selecting this opportune moment, you facilitate a smooth transition for february daphne, promoting resilience and vigor, which enhances its ability to flourish and adorn your garden with charming blooms.
How Much Space Should You Leave Between February Daphne Plants?
When moving your february daphne, provide each plant with ample personal space! Position them approximately 3-4 feet (91-122 cm) apart. This grants them sufficient room to thrive without competing for resources.
What is the Best Soil Mix for February Daphne Transplanting?
For successful february daphne relocation, utilize well-drained, humus-rich soil. Before planting, enrich the soil with a slow-release foundational fertilizer. This will supply your plant with essential nutrients and encourage robust development.
Where Should You Relocate Your February Daphne?
Selecting the correct spot is crucial! February daphne prefers partial sun to light shade. Therefore, locate an area with filtered sunlight, avoiding excessive intense, direct sun exposure. Happy planting!
What Equipments Should You Prepare Before Transplantation February Daphne?
Gardening Gloves
To safeguard your hands when handling compost, potting mix, and sharp garden tools.
Shovel or Spade
For excavating a hole in the ground at the plant's new location.
Garden Trowel
Useful for minor digging tasks and loosening roots.
Pruning Shears
To trim the plant as needed and remove any dead or damaged sections.
Watering Can/Hose
To moisten the soil and hydrate the plant after relocation.
Wheelbarrow(Optional)
Helpful for moving the plant and soil, especially for large february daphne.
Mulch
To aid in retaining soil moisture and suppressing weeds post-transplant.
Stake and Ties(Optional)
To support the plant and prevent uprooting, particularly for large february daphne
How Do You Remove February Daphne from the Soil?
How Do You Remove February Daphne from the Soil?
From Ground: Begin by watering the february daphne plant to moisten the soil. Next, dig a trench around the plant using your shovel or spade. Ensure you maintain a safe distance from the plant to avoid root damage. Work your shovel or spade beneath the plant, being careful not to harm the root ball, and gently lift the plant from its original spot.From Pot: Water the plant and allow it to sit for a few minutes to facilitate easier removal of soil and roots. Gently tilt the pot and tap it to loosen the root ball, then slide the plant out. Avoid pulling the plant by its stem as this can cause injury.From Seedling Tray: Lightly water the seedling tray. Using a trowel or your fingers, carefully separate each february daphne seedling, starting from the outer edges of the tray. Be extra gentle to prevent damage to the delicate roots.
Step-by-Step Guide for Transplanting February Daphne
Hole Preparation
Excavate a hole wide and deep enough to accommodate the root ball of your february daphne. The hole should be two to three times the width of the root ball and of equal depth.
Root Preparation
Gently separate the roots of the february daphne if they are densely packed. This encourages them to spread outwards into the soil.
Placement
Position the plant in the hole, ensuring it is not planted deeper than its original location. The top of the root ball should be level with or slightly above the ground surface.
Backing
Refill the hole with soil, gently firming it around the base of the february daphne. Confirm there are no air pockets around the roots.
Watering
Thoroughly water the plant after transplanting. The water should penetrate to the depth of the root ball.
Mulching
Apply a layer of mulch around the base of the plant, taking care to keep it away from the stem. This will help the soil retain moisture and inhibit weed growth.
How Do You Care For February Daphne After Transplanting?
Watering
Ensure the february daphne receives ample water, especially during the initial weeks. This aids in the development of strong roots. However, be cautious not to overwater as waterlogged soil could harm the plant.
Plant Support
Utilize a support stake and ties if necessary, particularly in windy areas or for larger february daphne.
Monitoring
Keep a close watch on your february daphne, observing its growth progress, and do not hesitate to trim any dead or damaged sections. Also, remember to regularly inspect for signs of pests or disease.
Troubleshooting Common Issues with February Daphne Transplantation.
When is the best time to transplant february daphne?
The optimal period to relocate february daphne is between stages S10-S12, which spans from late fall to early winter.
How much space should I leave between plants when transplanting february daphne?
For the successful growth of february daphne, maintaining an appropriate distance is essential. Aim for a spacing of approximately 3-4 feet (0.9-1.2 meters).
Should february daphne be planted in full sun or shade?
February daphne prefers partial to full shade. It does not tolerate excessive sun exposure well, which can scorch its leaves.
What type of soil is suitable for planting february daphne?
February daphne thrives in well-drained soil rich in organic matter. A slightly acidic to neutral pH is ideal for its development.
How much water does february daphne require after transplantation?
February daphne has moderate water needs. Water sufficiently after transplanting to eliminate any air pockets, then continue with regular watering.
What should I do if the leaves of february daphne turn yellow after transplantation?
Yellow leaves may indicate water stress or a nutrient deficiency. Check the soil's moisture and nutrient levels and adjust as needed.
How deeply should I transplant february daphne?
The february daphne should be transplanted at a depth equivalent to the height of its root ball. This ensures stability and improved nutrient absorption.
Can I use fertilizer after transplanting february daphne?
Yes, applying a balanced, slow-release fertilizer after relocating february daphne can aid in its establishment. However, avoid high nitrogen as it may promote excessive foliage growth.
What is the ideal temperature for february daphne to thrive post-transplant?
February daphne is a resilient plant that can withstand a broad temperature range. Nevertheless, it flourishes between 65-75 degrees F (18-24 degrees C).
How to minimize transplant shock while repositioning february daphne?
Reduce transplant shock by minimizing root disturbance, establishing in suitable site conditions, and ensuring adequate watering after the process.


