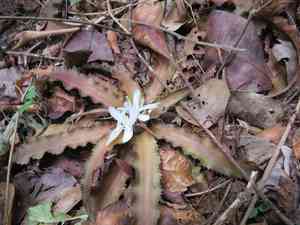
How to Transplant Earth star?
The most suitable period for relocating earth star is amidst the warmth of summer, when its development is vigorous. Select a location offering ample, diffused illumination, and only transfer earth star if it has exceeded its current container or to revitalize its substrate every few years.
Essential Preparations Before Relocating Earth Star?
Optimal Period for Earth Star Relocation?
The prime period for moving your earth star is the pleasant warmth of summer. This season offers perfect temperatures for root establishment, facilitating a smooth transition to new surroundings. Summer's consistent weather patterns provide the gentle encouragement your earth star needs for successful transplantation. By selecting this season, you're giving your plant a vigorous boost, leveraging the natural growth cycle that summer's mild conditions offer. Allow your earth star to flourish by utilizing this opportune timing!
Required Spacing Between Earth Star Plants?
Your earth star plant will benefit from ample room to expand. Aim to maintain a distance of approximately 1-2 feet (30.5-61cm) between each plant. This spacing supports growth and enhances air circulation.
Best Soil Blend for Earth Star Transplanting?
For soil preparation, your earth star thrives in a well-draining soil mixture. A combination of sand, peat, and a small amount of clay works exceptionally well. Begin with a foundational fertilizer rich in organic matter to support the plant's nutritional requirements.
Ideal New Location for Your Earth Star?
When selecting a site, earth star prefers bright, indirect sunlight. Avoid areas with direct, intense sun exposure as it can scorch the leaves. A spot with filtered sunlight could provide the perfect growing conditions!
Equipment Needed Before Transplanting Earth Star?
Gardening Gloves
To safeguard your hands from soil and minor injuries during plant relocation.
Shovel
To efficiently excavate the plant from its original spot while preserving as much of the root system as possible.
Watering Can
To hydrate the plant before and after the transplanting process, and to moisten the soil for easier digging.
Spade
Useful for creating a suitable hole for the plant in its new location.
Trowel
A smaller implement for detailed work or careful handling of the plant or soil.
Bypass Pruners
To trim any broken or damaged roots during the transplanting procedure.
Wheelbarrow
Optional, can be used for transporting plants if the distance between the old and new locations is considerable.
A cloth or burlap
To wrap and safeguard the root ball during the move.
How to Extract Earth Star from the Soil?
How to Extract Earth Star from the Soil?
From Ground: Begin by thoroughly watering the earth star plant to soften the surrounding soil. Dig a wide circle around the plant with your shovel, aiming to keep the root system as intact as possible. Carefully work the shovel beneath the root ball to loosen the plant from its original position.From Pot: Start by watering the plant. Gently invert the pot and tap around to loosen the root ball. Handle the plant by its base to prevent damage to the plant’s stems or roots.From Seedling Tray: If the earth star is currently in a seedling tray, ensure it is watered first. Then, use a trowel or similar tool, dig under each individual plant, lifting it by holding onto as many roots as possible. Be careful not to harm the delicate young roots.
Step-by-Step Guide for Transplanting Earth Star
Preparation
Begin by digging a hole in the new location that is approximately twice as wide and slightly deeper than the earth star plant's root ball.
Careful Uprooting
Using your tools, carefully remove the earth star from its original location, as previously described.
Transport
If the distance is significant, you might consider using a wheelbarrow to move the plant. Otherwise, you can simply carry it while protecting the root ball with a cloth or burlap.
Placement
Position the earth star plant in the hole, ensuring it is not seated deeper than it was in its initial spot. Gently backfill the hole with soil, making sure there are no air pockets.
Water
Water the plant generously immediately after transplanting is completed.
Post-Transplant Care for Earth Star
Watering
Ensure the soil around the earth star plant remains consistently moist, but not waterlogged, for the first few weeks after transplantation. This will aid the earth star in establishing a robust root system in its new environment.
Pruning
Remove any dead leaves or flowers to allow the plant to direct more energy into establishing its roots in the new location.
Heat Stress Awareness
Transplanting can be a shock to plants, so observe your earth star plant for any signs of heat stress, and provide shade if necessary.
Monitoring
Keep an eye on the plant for any indications of disease or pest infestation. These could pose a direct threat to successful transplantation. Also, pay attention to the condition of the leaves as they can signal if the plant is thriving in its new location.
Troubleshooting Common Earth Star Transplant Issues.
What's the best season to transplant earth star?
The ideal time to transplant earth star is during the late spring to early summer period.
How far apart should I plant earth star?
Ensure each earth star is given a spread of 1-2 feet (30-60 cm). This spacing aids in better growth.
How to prepare the root system for transplanting earth star?
Start by gently loosening the roots. This will encourage them to grow into the new soil once transplanted.
How deep should the hole be when transplanting earth star?
Dig a hole that's twice the size of earth star's root ball. This ensures ample room for roots to spread.
What type of soil does earth star need when transplanting?
Earth star prefers well-drained soil. Incorporate some organic matter to enhance the soil's fertility and structure.
How should I handle earth star when transplanting?
Handle earth star with care to avoid damaging its delicate roots. Ensure the stem is straight when placing it in the hole.
What immediate care is needed after transplanting earth star?
Water earth star thoroughly after transplanting. Be careful not to waterlog the soil, as this can harm the plant.
How often should I water earth star shortly after transplanting?
Immediately after transplanting, water earth star daily for the initial week. Gradually reduce to a normal watering schedule as the plant acclimates.
How will I know if the earth star is successfully transplanting?
Earth star will exhibit signs of successful transplanting through new growth. This may take a few weeks, so be patient.
What if earth star shows signs of stress after transplanting?
If earth star displays signs of stress like wilting or yellowing leaves, it may require more water or less exposure to direct sunlight.


