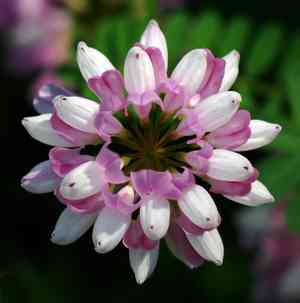
How to Transplant Shrubby crownvetch?
The perfect period for relocating shrubby crownvetch is in the revitalizing phase, spanning from late winter to early summer. Select locations that receive ample sunlight and possess soil with good drainage. Guarantee successful establishment by providing shrubby crownvetch sufficient room to thrive after its relocation.
What Preparations are Needed Before Transplanting Shrubby Crownvetch?
What is the Ideal Time for Transplanting Shrubby Crownvetch?
For shrubby crownvetch, move them to their new location after winter's cold but before summer's heat. This period allows roots to establish without extreme temperature stress.
How Much Space Should You Leave Between Shrubby Crownvetch Plants?
When planting shrubby crownvetch, ensure adequate room for growth! Aim for approximately 24-36 inches (61-91 cm) between each plant. This provides sufficient nutrients and light for each, while still being close.
What is the Best Soil Mix for Shrubby Crownvetch Transplanting?
For your shrubby crownvetch, prepare a site with soil that drains well. Incorporate organic compost as a foundational fertilizer to give your plants a healthy start. This nutrient-rich addition will aid in developing strong roots.
Where Should You Relocate Your Shrubby Crownvetch?
Choose a sunny spot for your shrubby crownvetch that receives full sunlight for most of the day. This is crucial, as they flourish with ample sunshine, much like a bright day lifts your spirits!
What Equipments Should You Prepare Before Transplantation Shrubby Crownvetch?
Gardening Gloves
To safeguard your hands while handling soil and the plant.
Shovel or Spade
For excavating the shrubby crownvetch from its current spot and preparing the new planting hole.
Pruning Shears
For trimming any damaged roots or stems prior to transplanting.
Garden Fork
To loosen the soil surrounding the plant's root system, facilitating easier removal.
Watering Can or Hose
To hydrate the shrubby crownvetch before and after relocation.
Wheelbarrow or Garden Cart
To safely transport the shrubby crownvetch from its original site to the new planting area.
Mulch
To help retain moisture and regulate soil temperature after transplant.
Plant Support Stakes
To stabilize the shrubby crownvetch after transplanting if needed.
How Do You Remove Shrubby Crownvetch from the Soil?
How Do You Remove Shrubby Crownvetch from the Soil?
From Ground: Water the shrubby crownvetch to moisten the soil, making digging easier. Use a shovel or spade to dig a wide circle around the plant, going deep enough to encompass the entire root ball. Carefully slide the shovel beneath and gently lift the plant from the ground.From Pot: Tilt the pot sideways and gently tap the bottom to help loosen the shrubby crownvetch's roots. Support the plant by the stem's base as you slide it out, being careful not to pull or yank.From Seedling Tray: Dampen the soil first to minimize root disruption. Use a garden fork or similar tool to gently lift the shrubby crownvetch from its compartment, supporting the root ball and stem during removal.
Step-by-Step Guide for Transplanting Shrubby Crownvetch
Preparation
Gather all necessary tools and ensure the new planting site is ready for the shrubby crownvetch.
Water Thoroughly
Water the shrubby crownvetch well a few hours before transplanting to ensure roots are hydrated.
Excavation
Using the shovel, dig around the shrubby crownvetch, being careful to include the entire root ball and maintain its structure to minimize root damage.
Root Ball Handling
Carefully lift the shrubby crownvetch's root ball from the ground or container, keeping the soil around the roots as intact as possible.
Transport
Move the shrubby crownvetch to its new spot using a wheelbarrow or garden cart to prevent shaking and root damage.
Planting Hole
Dig a hole in the new location that is twice as wide as the root ball and equally deep, so the shrubby crownvetch can be planted at its original depth.
Positioning
Place the shrubby crownvetch in the center of the new hole and gently spread out its roots.
Backfilling
Refill the hole with the excavated soil, gently tamping down around the shrubby crownvetch to remove air pockets.
Watering In
Water the shrubby crownvetch generously immediately after planting to help settle the soil and provide moisture for the roots.
Mulching
Apply a layer of mulch around the base of the shrubby crownvetch, keeping some distance from the stem to prevent rot.
Supporting
If the shrubby crownvetch appears unstable, use plant support stakes to anchor it securely.
How Do You Care For Shrubby Crownvetch After Transplanting?
Regular Watering
Water the shrubby crownvetch to maintain consistent soil moisture, promoting root recovery and establishment in its new location.
Monitoring
Observe the shrubby crownvetch for signs of transplant shock, such as wilting, leaf drop, or discoloration, and take appropriate action.
Staking
Provide support for the shrubby crownvetch if it becomes top-heavy or is exposed to strong winds to ensure it remains upright and stable.
Pruning
Trim any broken or dead stems and leaves to help the shrubby crownvetch direct energy towards root establishment instead of repairing damaged foliage.
Mulch Refreshing
Periodically check the mulch to ensure it maintains proper moisture levels and temperature control in the soil around the shrubby crownvetch.
Troubleshooting Common Issues with Shrubby Crownvetch Transplantation.
What's the best time to transplant shrubby crownvetch?
The ideal period for transplanting shrubby crownvetch spans from early spring's thaw to the mild days of late spring.
How far apart should I space shrubby crownvetch plants?
Ideally, space shrubby crownvetch plants approximately 24-36 inches (61-91 cm) apart to allow ample room for growth.
Why is my shrubby crownvetch wilting after transplanting?
Wilting may indicate transplant shock. Ensure the soil is moist and provide shade to reduce stress.
When transplanting shrubby crownvetch, how deep should I dig?
Dig a hole as deep as the root ball but twice as wide to encourage root expansion.
Can I transplant shrubby crownvetch during the summer or fall?
Transplanting shrubby crownvetch outside the recommended spring window may lead to increased stress and growth problems.
What soil type is best for transplanting shrubby crownvetch?
Utilize well-draining soil rich in organic matter to provide a nourishing environment for shrubby crownvetch's roots.
How much water does shrubby crownvetch need after transplanting?
Keep the soil consistently moist for the initial few weeks post-transplant without overwatering the plant.
Can I use fertilizer when transplanting shrubby crownvetch?
Wait about 4-6 weeks after transplant before applying a balanced, slow-release fertilizer.
How do I choose the best spot to transplant shrubby crownvetch?
Select a location with full to partial sun and good air circulation to promote robust growth in shrubby crownvetch.
My shrubby crownvetch isn't blooming post-transplant, what should I do?
Be patient, as shrubby crownvetch may not bloom in the first year to prioritize root establishment.


