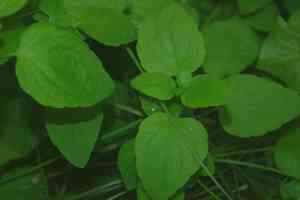
How to Transplant Pilose bellflower?
For pilose bellflower, relocation is most successful from the end of the frost period until late spring. Select a location that receives dappled light, and verify that the ground has good drainage. Handling the root system with care during this procedure guarantees improved adaptation.
What Preparations are Necessary Before Relocating Pilose Bellflower?
What is the Optimal Period for Relocating Pilose Bellflower?
The best time for moving pilose bellflower is during the invigorating period of early to mid-spring. This timeframe offers a favorable start, avoiding the harshness of winter or the peak of summer. During this phase, ground temperatures and moisture levels are ideal for root establishment, ensuring pilose bellflower develops a strong base for the upcoming year. This timing also allows pilose bellflower to benefit from the entire growing season, fostering robust health and vigorous development, setting the stage for years of abundant foliage and vitality.
What Distance Should You Maintain Between Pilose Bellflower Plants?
Greetings, gardening enthusiast! When rehousing pilose bellflower, ensure they are spaced approximately 12-18 inches (30-46 cm) apart. This spacing permits each plant to thrive without competing for resources and space. Happy planting!
What is the Best Soil Blend for Pilose Bellflower Relocation?
For your pilose bellflower, prepare to indulge it with well-draining soil rich in organic matter. Incorporating a bit of compost or a slow-release fertilizer will give your plants an excellent start. They will reward you with beautiful growth!
Where Should You Replant Your Pilose Bellflower?
When selecting a site for your pilose bellflower, choose an area with full sun to partial shade. They enjoy soaking up the sun but also appreciate some afternoon shade. Aim for a balance to see your pilose bellflower flourish!
What Tools Should You Prepare Before Relocating Pilose Bellflower?
Gardening Gloves
To safeguard your hands while handling soil and plants.
Hand Trowel
For excavating and shifting small quantities of soil.
Shovel or Garden Spade
For digging out the root ball of the pilose bellflower from its current spot.
Pruning Shears
To trim any dead or excess plant parts before relocation.
Watering Can or Hose
To hydrate the pilose bellflower before and after relocation to minimize transplant shock.
Wheelbarrow
For transporting the pilose bellflower and its soil without straining your back.
Plant Supports or Stakes
To provide support for the pilose bellflower if it has a climbing or sprawling habit.
How Do You Extract Pilose Bellflower from the Soil?
How Do You Extract Pilose Bellflower from the Soil?
From Ground: First, water the pilose bellflower to moisten the soil, making it easier to manage. Use a shovel or spade to dig a wide trench around the plant, being careful to keep the root ball intact. Gently work the tool under the root ball and lift the pilose bellflower out of the ground.From Pot: Begin by watering the pilose bellflower to dampen the soil. Tilt the pot sideways and gently tap it to loosen the soil's grip. You might need to slide a hand trowel along the inner edge of the pot. Gradually ease the plant out while supporting the base of the stem with your hand.From Seedling Tray: Moisten the soil in the tray to facilitate the removal of each seedling. Use a dibber or a pencil to push up from the bottom, or gently squeeze the tray's cells to release each seedling. Support the seedling by its leaves, not the delicate stem, and carefully extract it from the tray.
Step-by-Step Guide for Relocating Pilose Bellflower
Preparation
Before relocating, ensure the pilose bellflower is not stressed by dry soil or extreme temperatures. Water the plant thoroughly a few hours before or even the day prior to your planned move.
Digging the Hole
Excavate a hole in the ground that is twice as wide and equally as deep as the pilose bellflower's root ball. This will ensure ample space for the roots to spread.
Placing the Plant
Carefully position the pilose bellflower in the center of the hole. The top of the root ball should be level with the surrounding ground. This prevents the pilose bellflower's stem from being buried too deeply, which can lead to rot.
Refilling the Hole
Backfill the hole with the excavated soil, gently firming it down around the base of the pilose bellflower to eliminate air pockets. Add soil until it is even with the ground level.
Watering
After planting, water the pilose bellflower generously to help settle the soil and remove any remaining air gaps. This also provides the necessary moisture for the roots to begin establishing in their new location.
Staking
If the pilose bellflower requires support, insert plant stakes into the ground near the base without harming the roots. Secure the plant to the stakes loosely using plant ties or soft materials that will not cut into the stem.
How Do You Care For Pilose Bellflower After Relocation?
Watering
For the initial weeks following relocation, keep the soil consistently moist to aid the pilose bellflower in establishing its roots. Water the base of the plant rather than from above to concentrate hydration on the roots.
Pruning
Trim any damaged or excessively long stems after relocation. This can encourage the pilose bellflower to direct its energy towards establishing strong roots instead of supporting unnecessary foliage.
Monitoring
Observe the pilose bellflower for signs of stress such as wilting or discolored leaves. If these appear, assess and adjust care accordingly.
Mulching
Apply a layer of organic mulch around the base of the pilose bellflower to help retain soil moisture, regulate temperature fluctuations, and suppress weeds. Ensure the mulch is not touching the stem to prevent rot.
Troubleshooting Common Issues with Pilose Bellflower Relocation.
Why is my pilose bellflower not thriving after relocation?
Ensure your pilose bellflower is planted during early to late spring and spaced optimally at 12-18 inches (30-45 cm) apart. Insufficient light, water, or incorrect soil conditions might also affect its growth.
How often should I water pilose bellflower after relocation?
Water your pilose bellflower generously right after relocation, then maintain moist soil, especially during the first few weeks, to help establish roots.
What's the best soil for relocating pilose bellflower?
A well-draining, fertile soil with good organic content is ideal for pilose bellflower. Ensure it's loose and not compacted for better root growth.
How deep should I plant pilose bellflower when relocating?
The root ball of pilose bellflower should be level with the soil surface. Don't bury too deep as it can cause stem rot.
Can I relocate pilose bellflower during summer?
Relocating during the optimal window from early to late spring gives pilose bellflower the best start. Summer heat can stress the plant.
How do I prepare pilose bellflower for relocation?
Water the plant well a day before, and ensure the new location has the right conditions and space for root development.
My pilose bellflower is wilting post-relocation, what should I do?
Wilting may occur due to transplant shock. Keep the soil moist without overwatering, provide shade if too sunny, and avoid fertilizing immediately.
What spacing is needed between relocated pilose bellflower?
Space pilose bellflower at least 12-18 inches (30-45 cm) apart. Proper spacing allows adequate air circulation and room for growth.
Why are the leaves of my pilose bellflower turning yellow after relocation?
Yellow leaves might be due to overwatering, under watering, or a nutrient imbalance. Check the soil moisture and adjust your water and fertilizer application accordingly.
Can I relocate pilose bellflower into a container?
Absolutely, pilose bellflower can be relocated into a container with sufficient drainage holes, using a suitable potting mix, following the same care guidelines.


