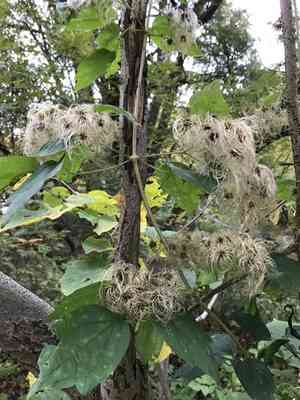
How to Transplant Devil's darning needles?
The ideal period for relocating devil's darning needles is from mid to late spring or early summer, allowing roots to firmly establish prior to winter's rest. Choose a location offering partial shade and damp ground, then carefully loosen the adjacent soil to facilitate expansion.
What Preparations are Needed Before Transplanting Devil's Darning Needles?
What is the Ideal Time for Transplanting Devil's Darning Needles?
The optimal period for relocating devil's darning needles spans from the onset of mid-spring to the gentle warmth of early summer. This timeframe offers consistent temperatures and sufficient moisture, fostering an environment conducive to root development and growth. Moving devil's darning needles during this season aligns with its natural growth cycle, promoting a strong start. A friendly reminder: the mild weather and light rainfall of this period aid devil's darning needles in its new location, ensuring smooth adaptation and vibrant health.
How Much Space Should You Leave Between Devil's Darning Needles Plants?
When considering the appropriate spacing for your devil's darning needles, a good guideline is to allow approximately 3-6 feet (0.91-1.83 meters). This spacing enables devil's darning needles to flourish without overcrowding, encouraging more robust development.
What is the Best Soil Mix for Devil's Darning Needles Transplanting?
Your devil's darning needles will thrive best in soil that drains well to prevent water accumulation. Prepare the ground with a foundational fertilizer rich in potassium and phosphorus. Remember, enriching the soil initially leads to a healthier, more enduring devil's darning needles!
Where Should You Relocate Your Devil's Darning Needles?
For its planting site, devil's darning needles prefers a location where it receives some sunlight but is shielded from the intense midday sun. A partially shaded spot is ideal. Let's ensure your devil's darning needles gets the light it prefers while also having some protection.
What Equipments Should You Prepare Before Transplantation Devil's Darning Needles?
Gardening Gloves
Used to safeguard your hands from prickly or rough stems and abrasive soil.
Shovel or Spade
Necessary for excavating holes and lifting the plant's root ball.
Pruning Shears
Needed for lightly trimming the plant's roots prior to transplanting, which encourages new root growth.
Watering Can or Hose
Required for hydrating the plant before and after its relocation.
Mulch
To assist in retaining moisture around the plant following transplantation.
Garden Trowel
For digging smaller holes or extracting the plant from containers.
Gardening Fork
Useful for loosening soil and separating roots without causing significant damage.
Stakes and Tie
To provide support for your devil's darning needles if it is a larger, mature specimen.
How Do You Remove Devil's Darning Needles from the Soil?
How Do You Remove Devil's Darning Needles from the Soil?
From Ground: Initially, thoroughly water the devil's darning needles plant to soften the soil. This facilitates easier digging and removal of the plant. Using a spade or shovel, create a wide trench around the plant, ensuring the root ball remains intact. Work the spade beneath the root ball and lift the plant from its original spot. Aim to keep as much original soil attached to the roots as possible to minimize transplant shock. From Pot: Water your devil's darning needles plant until water drains from the bottom and the soil is completely saturated. Turn it sideways, gently hold it by the stems or leaves, and tap the base of its container until the plant slides out. If roots have grown through the drainage holes, sever them with pruning shears. From Seedling Tray: Water the seedlings well before starting. Use a gardening fork or your fingers to carefully separate the roots surrounding the seedling you wish to remove. Be sure to hold the seedling by its true leaves (second set of leaves) and never by the stem.
Step-by-Step Guide for Transplanting Devil's Darning Needles
Digging Hole
Excavate a hole at least twice the width and similar in depth to the plant's current root ball. This provides ample room for the roots to spread.
Preparing Plant
Inspect the plant's roots. If they are excessively dense or tangled, gently untangle them with your fingers or a gardening fork.
Placing the Plant
Position the plant in the hole, ensuring the top of the root ball is level with the surrounding soil. Backfill the hole with soil, pressing down gently to eliminate air pockets.
Watering
Water the plant generously after transplanting, thoroughly saturating the soil.
Adding Mulch
Apply a 2-inch layer of mulch over the root area, keeping it clear of the plant stem to prevent rot.
How Do You Care For Devil's Darning Needles After Transplanting?
Careful Observation
Watch for wilting leaves or a lack of growth, which indicate transplant shock. If this occurs, ensure the plant is well-hydrated and receives ample shade.
Regular Watering
Keep the soil consistently moist â but not waterlogged â until the plant is well-established, typically after the initial few weeks.
Supporting the Plant
Depending on the size and age of the devil's darning needles, it may require staking until its roots are strong enough to support its weight.
Troubleshooting Common Issues with Devil's Darning Needles Transplantation.
What's the ideal time of the year to transplant devil's darning needles?
The optimal period to move devil's darning needles is between late spring and early fall (S2-S4), when the plant is not actively blooming.
How much distance should I maintain between each devil's darning needles during transplanting?
Ensure each devil's darning needles has a generous spacing of approximately 3 to 6 feet (0.9 - 1.8 meters) from one another. This promotes healthy growth and air circulation.
Is there a specific soil condition good for transplanting devil's darning needles?
Devil's darning needles thrives best in well-draining soil enriched with organic matter. Waterlogged or compacted soil can lead to root diseases.
How deep do I plant devil's darning needles during transplanting?
Insert the devil's darning needles rootball into the ground, deep enough so the plant's base is at the same level as the soil surface, not deeper.
What's the best way to water devil's darning needles after transplanting?
Provide devil's darning needles with a thorough watering after transplanting. Continue to keep the soil uniformly moist until established, without saturating the roots.
Do I need to prune devil's darning needles before transplanting?
Yes, trimming devil's darning needles back by about one-third before relocating can reduce transplant shock. However, be careful not to prune the roots!
How should I prepare the transplanting hole for devil's darning needles?
The hole should be roughly twice the width of devil's darning needles's rootball. Add a mixture of topsoil and compost before placing the plant.
What should I do if devil's darning needles shows signs of stress after transplanting?
First, verify adequate watering and drainage. If the plant continues to wilt, consider a sheltered location or adding more compost to the soil.
When can I expect devil's darning needles to adapt after transplantation?
Generally, devil's darning needles should begin to exhibit new growth within a few weeks of transplanting. Be patient as it establishes its root system.
What measures should be taken to prevent devil's darning needles from diseases after transplanting?
Regularly inspect your devil's darning needles for pests or disease symptoms. Mulch around the base to regulate soil temperature and deter weeds, but avoid contact with the stem.


