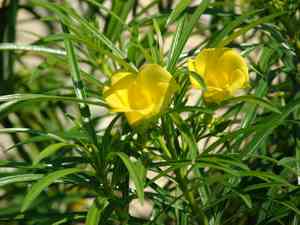
How to Transplant Yellow oleander?
For yellow oleander, the optimal period for relocation is from early to mid-spring or from late autumn to late winter. Select a site with ample sunlight, guaranteeing adequate drainage and sufficient room for development. Be sure to carefully separate the root mass during the transplanting process to facilitate improved settling. Enjoy your gardening endeavors!
Essential Preparations Before Relocating Yellow Oleander
When is the Best Time to Move Yellow Oleander?
The prime period for relocating your yellow oleander falls between early spring and mid-spring, or from late autumn through the close of winter. These seasons offer a stable and favorable setting for the plant to adjust and grow. Moving your yellow oleander during these times encourages stronger root growth and boosts survival rates. I advise considering this timeframe to give your yellow oleander the greatest chance to thrive!
How Much Distance Should Be Maintained Between Yellow Oleander Plants?
To allow your yellow oleander ample room for development, aim to transplant them with an optimal spacing of 15-20 feet (4.5-6 meters) apart. This will ensure proper root expansion and reduce competition for nutrients.
What is the Optimal Soil Blend for Yellow Oleander Relocation?
For yellow oleander, you'll need soil that drains well and is rich in organic material. Incorporate compost or aged manure into the soil to enhance its fertility. Adding a balanced slow-release granular fertilizer (e.g., 10-10-10) will also boost your plant's vigor and growth.
Where Should You Replant Your Yellow Oleander?
Select a spot where your yellow oleander will receive full sun exposure, ideally at least 6-8 hours of direct sunlight daily. However, it can also tolerate partial shade. A south or west-facing location is a good option to provide the best light conditions for your plant.
What Tools Are Necessary Before Relocating Yellow Oleander?
Gardening Gloves
To effectively protect your hands from thorns and soil while working with the yellow oleander plant.
Shovel or Trowel
To excavate the ground around the plant and to comfortably lift the plant without causing damage.
Pruning Shears
To gently trim the plant and remove any dead branches or leaves.
Watering Can
To moisten the soil before and after the relocation process.
Gardening Fork
Useful for loosening the soil in the new planting site prior to placement.
How Do You Extract Yellow Oleander from Its Current Location?
How Do You Extract Yellow Oleander from Its Current Location?
From Ground: Gently water the soil surrounding your yellow oleander plant. Allow the water to soak in, then carefully dig a wide area around the plant with a shovel or trowel, being cautious not to harm the roots. Carefully lift the plant from the ground, gently shaking to remove excess soil from the root ball. From Pot: Water the yellow oleander plant's soil until it is slightly damp. Invert the pot and gently pull the plant from its base to prevent damage. Some tapping or squeezing might be necessary for plants with tightly bound roots. From Seedling Tray: Carefully sprinkle water onto the seedlings to moisten the soil. Use a transplanting tool or a spoon to lift out the seedlings, ensuring the roots remain undamaged. Hold the seedlings by their leaves rather than the stem or roots during handling.
Detailed Steps for Relocating Yellow Oleander
Assess Plant Health
Ensure the yellow oleander plant intended for relocation is free from any infections or diseases. Remove any dead or decaying branches or leaves.
Prepare New Site
Use the gardening fork to gently aerate the soil at the new location and create an appropriately sized hole for the root ball.
Position the Plant
Carefully place the yellow oleander plant into the hole, and backfill the hole with well-drained soil up to the base of the plant's stem.
Watering
After planting yellow oleander, water thoroughly until the soil is saturated but not waterlogged.
Mulch
Apply organic mulch around the base of the plant to help retain soil moisture and suppress weeds.
How to Care for Yellow Oleander After Relocation?
Watering
Regularly water your yellow oleander plant. Ensure you water deeply around the base, keeping the surrounding soil consistently moist.
Pruning
Once the yellow oleander plant has established itself in its new spot, routine pruning will encourage growth and maintain a healthy plant.
Pest Control
Periodically check for pests or diseases. If detected, use appropriate organic pesticides and remove any affected plant parts as needed.
Feeding
While the yellow oleander plant is resilient and adaptable, it will benefit from occasional feeding with a balanced fertilizer to support growth and blooms.
Addressing Common Issues with Yellow Oleander Relocation.
What is the most suitable period to relocate yellow oleander?
The optimal timeframe for relocating yellow oleander is early to mid-spring or late fall extending into late winter to ensure the best outcomes.
How much space should I allow between yellow oleander during relocation?
Yellow oleander require a generous amount of room to grow. Aim for a spacing of approximately 15-20 feet (4.5-6 meters) between each plant.
Is it necessary to prune yellow oleander before relocation?
Yes, consider a light trim only. Remove any dead, diseased, or damaged branches to direct the plant's energy towards root development.
What type of soil is ideal for relocating yellow oleander?
Yellow oleander thrive in well-drained soil. They prefer a slightly acidic to neutral pH, but can tolerate various soil types with adequate drainage.
Should I water yellow oleander immediately after relocation?
Yes, provide yellow oleander with a generous drink of water after relocation. Afterward, maintain a consistent watering schedule based on climate and soil conditions.
What should be the ideal depth for planting yellow oleander?
Relocate yellow oleander at a depth where the top of the root ball is level with or slightly above the ground surface.
How to prepare the relocation hole for yellow oleander?
You should dig a hole twice the width of the root ball and roughly the same depth. Ensure it has loose, enriched soil at the bottom.
What to do if yellow oleander appears stressed after relocation?
If your yellow oleander appears stressed, ensure it is properly watered and consider moving it to a partially shaded area. Be patient as it recovers and establishes itself.
Are yellow oleander susceptible to relocation shock?
Like any plant, yellow oleander can experience relocation shock. Help prevent this by watering thoroughly before and after relocation, and by minimizing unnecessary root disturbance.
What should be the response to wilting leaves after relocating yellow oleander?
Wilted leaves can indicate relocation stress. Ensure adequate watering and avoid exposing the plant to intense sunlight immediately after relocation.


