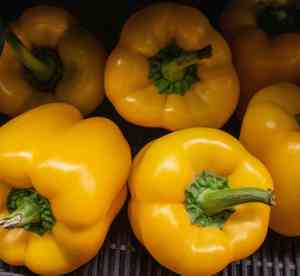
How to Transplant Yellow lantern chili?
Relocate yellow lantern chili during the warm period of early to mid-summer for vigorous development. Select a bright location featuring soil that drains effectively. When managing yellow lantern chili, proceed with care to prevent root trauma and allow ample space for them to thrive.
Preparations Required Before Relocating Yellow Lantern Chili?
When is the Best Time to Move Yellow Lantern Chili?
The perfect time to move your yellow lantern chili is at the start to middle of summer, providing a warm and steady climate ideal for root development. Transplanting then takes advantage of longer days and strong sunlight, which yellow lantern chili thrives on. This period allows the plant ample time to grow before colder weather arrives. Placing your yellow lantern chili in the ground during this season utilizes peak growing conditions, ensuring a strong and abundant yield.
What Distance Should Be Maintained Between Yellow Lantern Chili Plants?
When moving yellow lantern chili, remember to give each plant sufficient room to thrive. Ideally, aim to space them approximately 2-3 feet (60-90 cm) apart. This ensures each plant gets enough sunlight and nutrients, preventing excessive competition.
What is the Optimal Soil Blend for Yellow Lantern Chili Transplanting?
For best outcomes with yellow lantern chili, prepare soil that drains well, such as loamy or sandy, and is rich in organic material. Incorporate a base fertilizer high in phosphorus and potassium. This will foster healthy roots and encourage better fruit production. Always ensure the soil is thoroughly mixed!
Where Should You Replant Your Yellow Lantern Chili?
Finding the ideal spot is vital for yellow lantern chili. Select a location that receives about 6-8 hours of daily sunlight. This guarantees your plants get enough light to grow and produce many fruits. Remember, yellow lantern chili loves warmth!
What Tools Should You Prepare Before Transplanting Yellow Lantern Chili?
Gardening Gloves
To safeguard your hands while digging holes and handling the yellow lantern chili plant.
A Trowel or Shovel
To assist in excavating holes for the plants. A sharper implement, like a shovel, might be necessary if your soil is particularly hard or compressed.
A Planting Square
This simple device can help ensure your yellow lantern chili plants are correctly spaced.
A Hose or Watering Can
To hydrate the plant before and after placement.
Bucket or Container
This is needed for moving the plant from its original spot to the new one.
How Do You Extract Yellow Lantern Chili from the Soil?
How Do You Extract Yellow Lantern Chili from the Soil?
From Ground: If the yellow lantern chili plants are currently in the ground, first water the plant to moisten the soil, making it easier to remove without harming the roots. Then, using a shovel or trowel, carefully begin to dig around the plant, ensuring a wide enough margin to include all roots. Once the roots are visible, make sure the entire root system is preserved when lifting the plant from the ground and transferring it to a bucket or container.From Container/Pot: If the yellow lantern chili plant is growing in a pot or container, you'll need to dampen the soil first. Hold the plant at its base, invert the container, and gently tap the bottom. Try to keep the root ball and surrounding soil as intact as possible. Then, place the plant directly into a bucket or container for transport.From Seedling Tray: For younger yellow lantern chili plants grown in seedling trays, start by watering the tray thoroughly. Gently push the individual plant out from the bottom of the tray. Be extra careful with the delicate roots during this process.
Step-by-Step Guide for Relocating Yellow Lantern Chili
Preparation
Thoroughly moisten the roots of the yellow lantern chili plant before you start. Ensure the hole you've dug in the new spot is twice the size of the root ball. Position the plant in the hole so the top of the root ball is level with the soil surface.
Placement
Carefully position the yellow lantern chili plant in the hole. Keep it upright and ensure it sits at the same depth it was in its initial planting spot.
Backfill
Refill the hole with the original soil, gently firming it down around the plant's base with your hand. Be careful not to pack it too tightly to allow the roots to breathe.
Watering
Water the plant thoroughly after planting to settle the soil around the roots.
How Do You Care For Yellow Lantern Chili After Relocation?
Pruning
You might need to trim back the yellow lantern chili to offset the shock of transplanting. Prune any withered, diseased, or damaged foliage, which can drain the plant's energy.
Staking
If the yellow lantern chili plant is tall, it may require some support in the form of a stake to prevent it from toppling. Even small plants might be supported to aid upright growth in the initial stages.
Watering and Observing
Be sure to monitor the yellow lantern chili plant in the subsequent weeks, watering it well, especially in the first few weeks, but being careful not to overdo it. If the plant's leaves begin to yellow, it might be receiving too much water.
Pests and Diseases
Regularly inspect the yellow lantern chili plant for any indications of pests or disease. Early detection can prevent a minor issue from escalating into a major one.
Resolving Common Issues with Yellow Lantern Chili Transplantation.
When is the best time to transplant yellow lantern chili?
The ideal time to transplant yellow lantern chili is during season 4 to season 5. These periods are perfect for your plant to establish itself before it gets too cold.
How far apart should I plant yellow lantern chili seedlings?
Each yellow lantern chili should be planted 2-3 feet (approximately 60-90 cm) apart. This provides the roots ample space to spread and grow.
Why are my transplanted yellow lantern chili plants wilting?
Wilting after transplantation could be due to sudden temperature shifts or excessive sunlight. Gradually acclimatize yellow lantern chili to outdoor conditions before permanent outdoor placement.
How do I water yellow lantern chili after transplanting?
After transplanting, water yellow lantern chili deeply, but do not allow the plants to sit in waterlogged soil. The top 1-2 inches (2.5-5 cm) of soil should be dry before rewatering.
Why do the leaves of my transplanted yellow lantern chili plant look yellowish?
Yellowing leaves on yellow lantern chili could signal overwatering, poor drainage, or insufficient sunlight. Ensure you provide optimal conditions for each after transplanting.
Can I transplant yellow lantern chili in a pot?
Yes, yellow lantern chili adapts well to containers. Ensure the pot is large enough, as its roots require space, and that it has good drainage.
My transplanted yellow lantern chili is not growing well, what could be wrong?
Yellow lantern chili may not thrive due to inadequate nutrients, lack of sunlight, over/under watering, or low soil pH. Examine all these factors and correct as needed.
What type of soil is best when transplanting yellow lantern chili?
Yellow lantern chili prefers well-drained, nutrient-rich soil with a neutral pH. Adding compost or organic matter can enhance soil texture and nutritional content.
My transplanted yellow lantern chili doesn't have many fruits. Why?
Low fruit production in yellow lantern chili could be due to insufficient pollination or nutrient deficiency. Ensure your plant receives plenty of sunlight and consider using a balanced fertilizer.
How do I deal with pests after transplanting yellow lantern chili?
Keep an eye out for common pests such as aphids and caterpillars. Use organic pesticides or introduce beneficial insects into your garden as an environmentally friendly pest control method.


