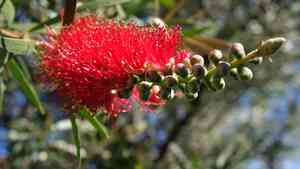
How to Transplant Crimson bottlebrush?
The optimal period for relocating crimson bottlebrush spans from mid-spring through late spring, given that the plant rapidly acclimates in elevated temperatures. Select a bright, adequately drained spot for a flourishing relocation. Remember, it is crucial to manage crimson bottlebrush delicately to prevent harm to its root system.
What Preparations are Needed Before Transplanting Crimson Bottlebrush?
What is the Ideal Time for Transplanting Crimson Bottlebrush?
The optimal period to relocate crimson bottlebrush is from mid-spring through late-spring. This timeframe allows crimson bottlebrush to establish its root system prior to the summer heat. Moving crimson bottlebrush during these months minimizes plant stress, boosting its survival rate and overall vitality.
How Much Space Should You Leave Between Crimson Bottlebrush Plants?
When relocating crimson bottlebrush, ensure a spacing of 6-10 feet (1.8-3 meters) between them. This provides ample room for growth without crowding and promotes robust development.
What is the Best Soil Mix for Crimson Bottlebrush Transplanting?
Utilize well-drained, loamy to sandy soil with a slightly acidic pH, ideally 6.0-6.5. Before transplanting, incorporate slow-release granular fertilizer or aged compost to enrich the soil and supply vital nutrients for the crimson bottlebrush plant.
Where Should You Relocate Your Crimson Bottlebrush?
Select a garden location that receives full sunlight, as crimson bottlebrush plants flourish with at least 6 hours of direct sun daily. An area offering some shelter from strong winds will also aid the plant in growing stronger and healthier.
What Equipments Should You Prepare Before Transplantation Crimson Bottlebrush?
Gardening Gloves
To shield your hands from dirt and minor scrapes.
Spade or Shovel
To excavate the plant from its initial spot and prepare the new planting site.
Garden Fork
For loosening the soil around the roots when extracting the plant.
Wheelbarrow or Large Bucket
To move the plant with minimal root disturbance.
Garden Hose or Watering Can
To hydrate the plant before and after its relocation.
Mulch
To help maintain moisture around the plant following transplantation.
How Do You Remove Crimson Bottlebrush from the Soil?
How Do You Remove Crimson Bottlebrush from the Soil?
From Ground: First, water the crimson bottlebrush plant to moisten the soil, which will facilitate removal. Next, dig a wide trench around the plant using your spade or shovel, being careful not to harm the root system. Gently work the spade around and beneath the root ball to lift the plant. Aim to keep as much intact soil around the roots as possible to reduce shock.From Pot: Water the potted crimson bottlebrush, then invert the pot while supporting the plant with your other hand. Lightly tap the pot's rim on a firm surface to dislodge the plant. Slide the plant out of the pot, keeping as much soil around the roots as possible.From Seedling Tray: Water the tray first, then carefully lift the crimson bottlebrush seedling by pushing up the soil from the tray's bottom. Handle the seedling by its leaves to minimize stem damage.
Step-by-Step Guide for Transplanting Crimson Bottlebrush
Preparation
Clear the transplanting area of any weeds or debris. Then, dig a hole that is wider and the same depth as the crimson bottlebrush plant's root ball.
Placement
Position the crimson bottlebrush plant into the hole, ensuring it is not planted deeper than its original location. Backfill the hole with the excavated soil, gently pressing it around the plant.
Watering
After transplanting, thoroughly water the crimson bottlebrush plant. This will help settle the soil around the roots and lessen transplant shock.
Mulching
Cover the area around the plant's base with a layer of mulch. This will help retain moisture, control weed growth, and protect the plant's roots.
How Do You Care For Crimson Bottlebrush After Transplanting?
Watering
For the initial weeks, ensure the soil remains moist but not waterlogged. This will aid your crimson bottlebrush in establishing robust roots. A deep watering once weekly should suffice, unless the weather is particularly hot and dry.
Pruning
Minimal pruning is needed for crimson bottlebrush, primarily to maintain its shape and remove old or dead wood. It's best to do this after flowering to avoid reducing next year's blooms.
Monitoring
Keep a close watch on the crimson bottlebrush plant for signs of stress or disease, such as wilting or yellowing leaves. If you observe anything unusual, consulting a local nursery or extension service can be beneficial.
Troubleshooting Common Issues with Crimson Bottlebrush Transplantation.
When is the best time to transplant crimson bottlebrush?
The ideal window for relocating crimson bottlebrush spans from mid-spring to late-spring.
What is the ideal spacing when re-planting crimson bottlebrush?
It's advisable to provide crimson bottlebrush with ample room, ideally 6 to 10 feet (1.8 to 3 meters), to ensure optimal development.
Should I water crimson bottlebrush right after transplanting?
Absolutely! Hydrating crimson bottlebrush immediately after relocation is vital to help it recover from the shock and adapt to its new environment.
How to prepare the soil for transplanting crimson bottlebrush?
Ensure the soil is well-draining and enriched with compost. Crimson bottlebrush prefers slightly acidic to neutral soil, so you might need to adjust the pH accordingly.
Do I need to prune crimson bottlebrush before transplanting?
Yes, it's advantageous to lightly prune crimson bottlebrush before transplanting. Remove dead, weak, or excessively long branches to focus the plant's energy on root establishment.
How deep should I plant crimson bottlebrush when transplanting?
Aim to keep the crimson bottlebrush root ball level with or slightly above the soil surface. Ensure all roots are covered, but avoid burying the stem.
Should I add fertilizer after transplanting crimson bottlebrush?
A slow-release general-purpose fertilizer can be beneficial. However, wait a couple of weeks for crimson bottlebrush to settle before introducing any nutritional amendments.
What should I do if crimson bottlebrush wilts after transplanting?
Don't fret! Wilting can occur due to transplant shock. Keep crimson bottlebrush hydrated and in partial shade until it recovers.
How frequently should I water crimson bottlebrush after transplantation?
During the initial weeks after moving, water crimson bottlebrush regularly, but avoid overwatering. Once established, crimson bottlebrush is fairly drought tolerant.
What if the leaves of crimson bottlebrush turn yellow after transplanting?
Yellowing leaves can indicate overwatering or a nutrient deficiency. Adjust your watering schedule and consider using a balanced fertilizer if necessary.


