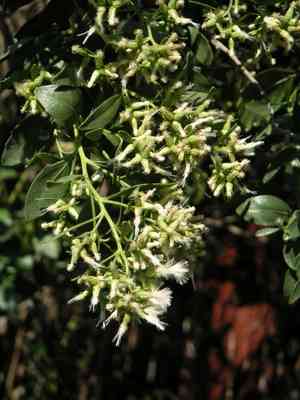
How to Transplant Groundsel bush?
Embrace the spring equinox by relocating your groundsel bush! This period offers us temperate conditions, encouraging root establishment prior to the summer warmth. Select a bright location with adequately draining soil for the groundsel bush to flourish. A gentle reminder: ensure the roots remain hydrated and settled throughout the procedure.
What Preparations are Needed Before Transplanting Groundsel Bush?
What is the Ideal Time for Transplanting Groundsel Bush?
The optimal period for moving groundsel bush is at the start of spring or when spring is in full bloom. Relocating groundsel bush during the lively embrace of early to mid-spring promotes strong root development before summer's heat. This timing allows groundsel bush to benefit from the season's mild temperatures and increasing daylight, which aid in recovery and new growth. Moving groundsel bush during this renewal window not only lessens transplant shock but also aligns with nature's cycle of rejuvenation, ensuring a smooth transition to a new setting.
How Much Space Should You Leave Between Groundsel Bush Plants?
Ensure groundsel bush has ample room to expand. Aim to position each plant approximately 10-15 feet (3-4.5 meters) apart. This spacing will provide sufficient area for growth without competition for nutrients and sunlight.
What is the Best Soil Mix for Groundsel Bush Transplanting?
Prepare the soil that groundsel bush prefers for optimal growth. It generally thrives in well-draining soil. Before planting, enrich the soil with a general-purpose, slow-release fertilizer to stimulate growth and flowering.
Where Should You Relocate Your Groundsel Bush?
Select a spot for groundsel bush where it can receive abundant sunlight, ideally full sun to partial shade. This ensures your plants obtain the necessary energy for robust and healthy development.
What Equipments Should You Prepare Before Transplantation Groundsel Bush?
Gardening Gloves
To safeguard your hands while handling the plant and working with the soil.
Shovel or Spade
These implements will be essential for digging a hole for groundsel bush in the ground, and also for extracting the plant from its original spot if it's not a seedling.
Trowel
To smooth the edges and base of the hole and to assist in removing the plant if it is in a container.
Watering Can
To hydrate the plant before and after the relocation.
Wheeled Plant Mover (optional)
If groundsel bush is particularly large, a wheeled plant mover can reduce strain and the risk of damage during transport.
Mulch
Mulch will help retain moisture in the soil around groundsel bush following the transplant.
Gardening Shears
These might be needed for trimming some branches off groundsel bush if it has grown too large.
How Do You Remove Groundsel Bush from the Soil?
How Do You Remove Groundsel Bush from the Soil?
From Ground: Assuming groundsel bush is already growing in the ground, the initial step is to water the plant to moisten the soil. Next, using a shovel or spade, carefully dig around the plant, ensuring a reasonable distance from the base to prevent root damage. The goal is to keep the root ball intact. Once a sufficiently wide trench has been dug, slide the spade or trowel under the root ball and gently lift groundsel bush from its original location.From Pot: If groundsel bush is coming from a pot, begin by watering the plant. After allowing the water to soak in, carefully turn the pot sideways and gently pull the plant, grasping it by its base while supporting the bottom of the root ball.From Seedling Tray: If you're dealing with a seedling of groundsel bush, simply water the tray and carefully lift the seedling by lightly grasping the stem and holding under the root ball.
Step-by-Step Guide for Transplanting Groundsel Bush
Preparation
Begin by watering groundsel bush in its current location to ensure it's well-hydrated before the move. While groundsel bush absorbs the water, you can proceed to dig a hole in the new spot – it should be twice as wide as the plant's root ball and of the same depth.
Transplantation
Lower groundsel bush into the hole, making sure it's not planted deeper than its original depth. The top of the root ball should be level with or slightly above the surrounding soil to prevent waterlogging. Settle groundsel bush in its new home by filling the hole with the same soil you had removed. Gently pat around the base of the plant to firm the soil and eliminate any air pockets.
Watering
After transplanting, water groundsel bush generously to settle the soil around the roots and to help alleviate transplant shock.
Mulching
Apply a layer of mulch around groundsel bush to help conserve moisture and suppress weeds.
How Do You Care For Groundsel Bush After Transplanting?
Irrigation
After transplanting, groundsel bush will require some time to recover. During this period, it's vital to ensure the soil around it remains moist. Always check the soil before watering; it should stay damp, but not excessively wet, to avoid waterlogged conditions.
Pruning
In the first year post-transplant, refrain from any severe pruning. If necessary, only prune to maintain groundsel bush's shape or remove dead/damaged branches.
Protection
If transplanting occurred during a particularly hot period, consider providing shade for groundsel bush for a few days until it begins to show signs of new growth. This will help prevent sun scald.
Troubleshooting Common Issues with Groundsel Bush Transplantation.
When should I transplant the groundsel bush plant?
You should transplant your groundsel bush during the change of seasons or during mild weather. Ideally, this would be during the transition from spring to summer and summer to fall.
How can I know the perfect spot for transplanting the groundsel bush?
Considering their mature size, groundsel bush should be planted approximately 10-15 feet (3-4.5 meters) apart. Choose an area that receives ample sunlight and has well-draining soil.
What should be the depth of the hole for transplanting groundsel bush?
Dig a hole twice as wide as your plant's root ball and equally deep. This provides groundsel bush with sufficient space to spread out and establish itself in its new location.
What should I do if the leaves of my transplanted groundsel bush are wilting?
Wilting can indicate transplant shock. Provide adequate water and shade to aid your plant's recovery. Consistent care is crucial after transplanting.
Why is my transplanted groundsel bush turning yellow and dropping its leaves?
This could be due to overwatering or poor drainage. Ensure your groundsel bush is in an area with good drainage. Reduce the watering schedule and observe changes.
How to maintain the root ball while transplanting groundsel bush?
Handle groundsel bush's root ball gently during the transplant process. Ensure it remains intact and undisturbed as much as possible to avoid damaging the plant.
How much water does a transplanted groundsel bush require?
Groundsel bush requires immediate watering after being transplanted. Afterward, keep the soil moist but not waterlogged. Gradually decrease watering as the plant settles in.
How should I prepare the soil for transplanting groundsel bush?
Preparing the soil with organic matter like compost can supply nutrients for groundsel bush. Ensure the soil has good drainage to prevent root rot.
Can I add fertilizer when transplanting groundsel bush?
Yes, a balanced slow-release fertilizer can support groundsel bush's growth. Apply it around the base of the plant, but be careful not to over-fertilize as it might cause burns.
What if my groundsel bush doesn't show growth after transplanting?
Patience is necessary, as groundsel bush might need time to establish and grow. If there's no sign of growth after several weeks, check its roots for any damage or disease.


