How to Transplant Japanese laurel?
For Japanese laurel, the ideal period for relocation is the nascent months of early spring, allowing new root systems to rapidly take hold. Select a site with partial shade where it can flourish. Ensure consistent hydration during the initial stage for peak development!
What Preparations are Needed Before Transplanting Japanese Laurel?
What is the Ideal Time for Transplanting Japanese Laurel?
The optimal period to move your japanese laurel is indeed the onset of spring. This season provides mild climatic conditions that japanese laurel favors, lessening transplant shock. Relocating in early spring allows japanese laurel to establish its root system prior to summer's intense heat, significantly boosting its survival chances. By doing so, you guarantee more vigorous growth and enhanced resilience in japanese laurel.
How Much Space Should You Leave Between Japanese Laurel Plants?
When relocating japanese laurel, ensure ample room for development. Position each plant approximately 6-10 feet (1.8-3 meters) apart to facilitate good air circulation and space to expand.
What is the Best Soil Mix for Japanese Laurel Transplanting?
For japanese laurel, a well-draining and fertile soil composition is most suitable. Consider incorporating organic matter such as compost and aged manure to foster a healthy, nutrient-rich growing medium. Blend in a foundational fertilizer to support the plant's development.
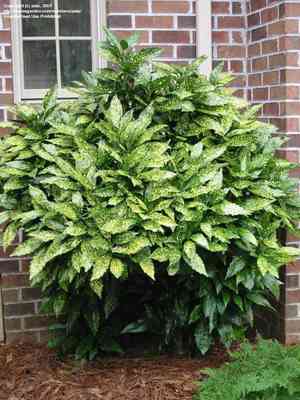
Where Should You Relocate Your Japanese Laurel?
Select a site that receives partial sunlight or filtered shade for your japanese laurel plant. Steer clear of areas with full sun exposure as this can lead to leaf scorching. Happy planting!
What Equipments Should You Prepare Before Transplantation Japanese Laurel?
Gardening Gloves
To safeguard your hands while handling soil and japanese laurel.
Shovel or Garden Spade
To excavate the japanese laurel from its original spot without harming the roots.
Wheelbarrow or Garden Cart
To effortlessly move the japanese laurel from its initial location to the new site, minimizing stress on the plant.
Watering Can or Hose
To hydrate the plant before and after relocation to aid root establishment.
Mulch
To apply around the plant's base post-transplant to retain moisture and inhibit weed growth.
How Do You Remove Japanese Laurel from the Soil?
How Do You Remove Japanese Laurel from the Soil?
From Ground: Hydrate the japanese laurel plant to moisten the earth. This will facilitate extraction and lessen plant stress. Then, using a shovel or spade, dig a wide trench around the plant, taking care not to harm the root ball. Gently work the spade beneath the root ball and lift the plant from its initial position.From Pot: Water the potted japanese laurel to dampen the soil. Carefully invert the pot while supporting the japanese laurel to gently extract it. If the plant resists, you might need to tap the pot's bottom or carefully run a trowel along the pot's inner edge.From Seedling Tray: Moisten the soil of the seedling japanese laurel beforehand to ensure easy removal. Hold the plant's base and gently lift it from the tray.
Step-by-Step Guide for Transplanting Japanese Laurel
Preparation
Excavate a hole in the new spot that is twice the width and equivalent in depth to the japanese laurel's root ball. Keep the displaced soil nearby.
Placement
Position the japanese laurel in the center of the hole. The top of the root ball should be flush with the ground's surface. Adjust the soil beneath the root ball to achieve this if required.
Backfilling
Refill the hole with the excavated soil, pressing down gently to eliminate any air pockets. Ensure the japanese laurel is stable in the ground.
Watering
Thoroughly water the japanese laurel after transplanting. This assists in settling the soil around the roots.
Mulching
Apply a layer of mulch around the base of the japanese laurel, but avoid direct contact with the stem to prevent rot.
How Do You Care For Japanese Laurel After Transplanting?
Pruning
It's advisable to trim japanese laurel immediately after relocation to minimize water loss. However, refrain from aggressive pruning as it could induce additional stress.
Watering
Consistently keep the soil around japanese laurel moist for several weeks post-transplant to foster strong roots, but avoid over-watering as japanese laurel dislikes excessively wet conditions. Adjust your watering schedule based on the weather, watering less frequently in damp conditions.
Inspection
Regularly examine japanese laurel for indications of stress, such as wilting, yellowing, or leaf drop. If these signs appear, modify its environment or care accordingly.
Adaption Time
Remember, japanese laurel requires time to acclimate to its new surroundings. Be patient, continue providing care, and anticipate new growth in the upcoming season.
Troubleshooting Common Issues with Japanese Laurel Transplantation.
When is the best time to transplant japanese laurel?
Early spring, as the plant begins to emerge from dormancy, is the ideal period to relocate japanese laurel. This allows the plant to establish itself in the new site before the summer heat arrives.
What should be the ideal distance between the japanese laurel plants while transplanting?
Allow a spacing of 6-10 feet (approximately 1.8-3 meters) between each japanese laurel to ensure they have ample room to grow and spread.
How deep should I dig a hole for transplanting japanese laurel?
The hole should be twice as wide and equal in depth to the japanese laurel's root ball. Always ensure the top of the root ball is at ground level.
Why is my transplanted japanese laurel wilting or turning yellow?
Japanese laurel may wilt or yellow due to excessive watering or inadequate drainage. Ensure the soil drains well and you are not over-irrigating the plant.
Can japanese laurel be transplanted in a pot and what's the ideal size?
Yes, japanese laurel can be moved into a pot. The container should be sufficiently wide and deep to comfortably accommodate the root system, typically around 10-12 inches (25-30 cm) in diameter.
What type of soil is suitable for japanese laurel while transplanting?
Japanese laurel prefers well-drained, loamy, and humus-rich soil. However, it can tolerate various soil types, including clay and sandy soil, provided they offer good drainage.
How often should I water the japanese laurel after transplanting?
Water japanese laurel thoroughly after transplanting and then consistently while they establish. Once settled, reduce watering unless during extended dry periods. Avoid waterlogged conditions.
Should I add fertilizer when transplanting japanese laurel?
It's generally not necessary to apply fertilizer at the time of planting. However, a slow-release, balanced fertilizer can be used in the spring once the japanese laurel starts new growth.
Why are the leaves of my transplanted japanese laurel dropping?
Leaf shedding could indicate shock from transplanting. Ensure minimal root disturbance during relocation and provide proper care, including sufficient watering without overdoing it.
How to handle japanese laurel during transplanting to prevent damage?
Carefully lift japanese laurel from its base, avoiding pulling from the top. Keep as much of the root ball intact as possible. Be gentle to ensure minimal harm to the plant.


