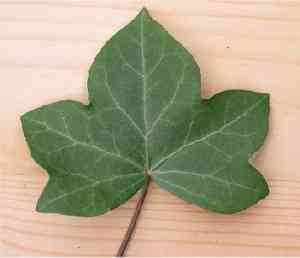
How to Transplant Bristly Sarsaparilla?
To ensure vigorous development of bristly Sarsaparilla, transfer it once winter's cold recedes into the mild temperatures of early to late spring. Choose a site featuring soil that drains effectively and offers partial shade. During the relocation process, proceed cautiously to lessen any disruption to the roots.
What Preparations are Needed Before Transplanting Bristly Sarsaparilla?
What is the Ideal Time for Transplanting Bristly Sarsaparilla?
The optimal period for moving bristly Sarsaparilla is during the gentle start of spring, usually from late March to mid-June. Relocating bristly Sarsaparilla in this mild season allows it to establish roots in its new spot without the stress of summer heat or winter cold. This timeframe offers the perfect balance of cooler temperatures, which aid root development, and the approaching warmth of summer, which encourages top growth. A friendly tip: Transplanting at this time ensures a smooth transition into your garden, leading to a strong, thriving bristly Sarsaparilla.
How Much Space Should You Leave Between Bristly Sarsaparilla Plants?
When selecting a location for your bristly Sarsaparillas, provide ample room for growth! Position them 24-36 inches apartâthat's approximately 61-91 cm. This spacing promotes sufficient development and air circulation, helping your plants flourish.
What is the Best Soil Mix for Bristly Sarsaparilla Transplanting?
For healthy bristly Sarsaparillas, prepare a site with well-draining soilâloamy soil is excellent. Before planting, enhance the soil with a general-purpose fertilizer. This will give your bristly Sarsaparillas a nourishing start. Remember to follow the product instructions for the correct amount!
Where Should You Relocate Your Bristly Sarsaparilla?
Select a location where your bristly Sarsaparillas will receive some sun exposure but can also enjoy partial shade. This balanced environment keeps them comfortable and promotes vigorous growth. Smart sun placement leads to happy, sun-kissed leaves!
What Equipments Should You Prepare Before Transplantation Bristly Sarsaparilla?
Shovel or Spade
For digging around and beneath the plant to ensure safe removal.
Gardening Gloves
To safeguard your hands while handling soil and plants.
Watering Can or Hose
To hydrate the plant before extraction and after replanting.
Gardening Trowel
For refining the planting hole and managing smaller root structures.
Pruning Shears
To trim any damaged or excessively long roots.
Wheelbarrow or Garden Cart
For transporting the bristly Sarsaparilla plant and soil.
Mulch
To apply around the plant's base post-transplant to retain moisture.
Rooting Hormone (optional)
To stimulate root development in its new environment.
Measuring Tape
To maintain appropriate distances between transplanted specimens.
How Do You Remove Bristly Sarsaparilla from the Soil?
How Do You Remove Bristly Sarsaparilla from the Soil?
From Ground: Hydrate the bristly Sarsaparilla to moisten the soil, making it easier to work with. Use a spade or shovel to dig a wide circle around the plant, maintaining a safe distance to avoid harming the root system. Carefully lift the entire root ball from the ground, preserving as much soil around the roots as possible.From Pot: Dampen the soil in the pot beforehand. Turn the pot on its side, tap the bottom, and gently ease the bristly Sarsaparilla out while supporting the plant's base with your other hand. Avoid pulling by the stems.From Seedling Tray: Water the seedling tray to soften the soil. Use a gardening trowel to lift the seedling by its root ball, preventing any disturbance to the roots.
Step-by-Step Guide for Transplanting Bristly Sarsaparilla
Preparation
Water the bristly Sarsaparilla thoroughly before beginning the transplant process to ensure the roots are well-hydrated.
Excavation
Dig a hole in the new location that is twice the width of the root ball and of equal depth to provide ample space for root expansion.
Root Pruning
Trim any broken or overly long roots with clean pruning shears to encourage fresh growth.
Planting
Position the bristly Sarsaparilla in the center of the hole. The top of the root ball should be level with the ground. Gently backfill the hole with soil without over-compacting, ensuring no air pockets remain.
Watering
After planting, water the bristly Sarsaparilla generously to settle the soil and provide hydration. Use a gentle stream of water to avoid excessive soil disturbance.
Mulching
Apply a layer of mulch around the base of the bristly Sarsaparilla to help retain soil moisture and suppress weeds. Keep the mulch a few inches away from the stem to prevent rot.
How Do You Care For Bristly Sarsaparilla After Transplanting?
Monitoring
Observe the bristly Sarsaparilla for indications of transplant shock, such as wilting or yellowing leaves, and address them as needed.
Steady Watering
Establish a consistent watering schedule to keep the soil uniformly moist until the bristly Sarsaparilla is firmly established.
Pruning
Remove any dead or damaged foliage to direct the plantâs energy towards root establishment and new growth.
Stabilization
If the bristly Sarsaparilla is tall or top-heavy, gently stake it to provide support until it becomes strong enough to stand independently.
Protection
In instances of extreme weather, provide protection like shade covers or windbreaks to help the bristly Sarsaparilla adapt to its new environment.
Troubleshooting Common Issues with Bristly Sarsaparilla Transplantation.
When's the best time to transplant bristly Sarsaparilla?
The optimal season for transplanting bristly Sarsaparilla is during the peak of spring, roughly from March to June.
How far apart should I space bristly Sarsaparilla when transplanting?
Each bristly Sarsaparilla should be given ample room, approximately 24-36 inches (61-91 cm) apart to flourish.
What's the ideal depth for transplanting bristly Sarsaparilla?
The root ball of bristly Sarsaparilla should be positioned at the same depth as it was in its previous location.
How much sunlight does bristly Sarsaparilla need after transplanting?
Post-transplant, bristly Sarsaparilla thrives best in filtered sunlight or partial shade for optimal development.
Should I water bristly Sarsaparilla immediately after transplanting?
Yes, water bristly Sarsaparilla right after transplanting to settle the soil around its roots and reduce transplant shock.
How do I prepare the soil for bristly Sarsaparilla transplant?
Enrich the soil with compost for a nutrient-rich base before placing bristly Sarsaparilla in its new home.
Can I fertilize bristly Sarsaparilla after transplanting?
Refrain from fertilizing until bristly Sarsaparilla has acclimated to its new setting for a few weeks.
How often should I water bristly Sarsaparilla after transplanting?
Water bristly Sarsaparilla regularly, keeping the soil consistently moist but not waterlogged during the initial growth phase.
What should I do if bristly Sarsaparilla's leaves wilt after transplanting?
Wilting can occur; ensure bristly Sarsaparilla is adequately watered and shielded from intense sun until it recovers.
Is it necessary to prune bristly Sarsaparilla during transplanting?
Pruning is not typically required; however, you may gently trim damaged or excessively long roots.


