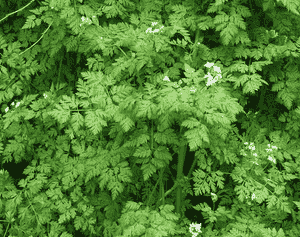
How to Transplant Garden chervil?
Garden chervil thrives when relocated during the early to mid-spring period, preferring a spot with dappled sunlight and consistently damp, adequately draining earth. Provide ample space for its development, exercising caution with its fragile root system during the transfer process.
What Preparations are Needed Before Transplanting Garden Chervil?
What is the Ideal Time for Transplanting Garden Chervil?
Relocating garden chervil as the frost recedes offers an excellent start, allowing roots to establish in the cool, moist soil optimal for development.
How Much Space Should You Leave Between Garden Chervil Plants?
When preparing to transplant your garden chervil, maintain a distance of approximately 6-12 inches (15-30 cm) between each plant. This provides ample room for growth and flourishing. As a novice, a ruler can assist in achieving this accurately.
What is the Best Soil Mix for Garden Chervil Transplanting?
Your garden chervil will thrive in well-drained, loamy soil enriched with a small amount of compost or a balanced fertilizer. This ensures your plants receive all necessary nutrients for growth. Remember not to over-fertilize, to avoid overwhelming it.
Where Should You Relocate Your Garden Chervil?
Locate a garden spot that receives ample sunlight, but isn't excessively hot. Partial shade would be perfect. Your garden chervil is somewhat like Goldilocks – it dislikes extremes of heat or cold, so aim for a just-right location!
What Equipments Should You Prepare Before Transplantation Garden Chervil?
Gardening Gloves
To shield your hands from soil and potential abrasions while handling the plant and earth.
Shovel
To excavate the garden chervil plant from its original spot and prepare the new planting site.
Garden Trowel
For smaller or more precise digging tasks, such as removing the plant from a container.
Watering Can or Hose
To hydrate the plant before and after relocation.
Pruning Shears
To trim any damaged roots or excessive foliage.
Gardening Fork
To loosen the ground and roots prior to transplanting.
Organic Mulch
To aid in moisture retention and soil temperature regulation post-transplant.
How Do You Remove Garden Chervil from the Soil?
How Do You Remove Garden Chervil from the Soil?
From Ground: Begin by thoroughly watering the garden chervil plant to hydrate it and make the soil easier to manage. Afterward, use a garden fork to gently loosen the soil around the plant. Insert the fork at an angle to slowly lift the plant, taking care not to harm the root system.From Pot: Water the plant thoroughly. Turn the pot sideways, hold the plant by its base, and tap the bottom of the pot until the plant and its root ball slide out. Be gentle to prevent damage to the root system.From Seedling Tray: Lightly water the garden chervil seedlings to moisten the soil. With a small trowel or your hand, carefully lift the seedlings from the tray, ensuring the root system remains intact.
Step-by-Step Guide for Transplanting Garden Chervil
Hydration
Thoroughly water the garden chervil plant before extracting it from its initial location. This safeguards the roots and lessens transplant shock.
Digging
Excavate a hole at the new planting site. The hole should be twice the width of the root ball and of equal depth.
Inserting Plant
Position the garden chervil plant into the hole. The top of the root ball should be level with the soil surface.
Backfilling
Refill the hole with the excavated soil, gently firming it around the base to ensure no air pockets remain.
Watering
Water the plant thoroughly immediately after transplanting. This helps the plant settle into its new environment and reduces transplant shock.
Mulching
Apply a layer of organic mulch around the plant's base, leaving a small gap near the stem to prevent rot.
How Do You Care For Garden Chervil After Transplanting?
Watering
Provide garden chervil with consistent and gentle watering, ideally in the early morning. The soil should remain moist, but not waterlogged.
Pruning
Lightly trim the garden chervil plant to encourage new growth. Do this after the plant has had a couple of weeks to establish itself in the new location.
Mulch
Replenish the mulch layer around garden chervil as needed to maintain moisture.
Observation
Monitor your garden chervil for indications of transplant stress, such as wilting or yellowing leaves. If these symptoms persist, consider adjusting care conditions or consulting a local nursery for advice.
Troubleshooting Common Issues with Garden Chervil Transplantation.
What's the best time of the year to transplant a garden chervil?
Transplanting garden chervil is ideally performed during S1-S2. This timing provides the plant with the best opportunity to establish roots before significant growth periods.
What is the optimal spacing between garden chervil plants?
The recommended distance for garden chervil plants is between 6-12 inches (15-30 cm). Providing this space helps ensure optimal growth.
Why is my transplanted garden chervil wilting?
Wilting could be a result of transplantation stress. Ensure adequate watering immediately after transplanting and maintain consistent irrigation thereafter.
How deep should I plant the garden chervil seeds?
The garden chervil seeds should be sown approximately 1/4 inch (about 0.6 cm) deep. They require some light for germination, so avoid burying them too deeply.
What kind of soil does garden chervil prefer when being transplanted?
Garden chervil thrives in well-drained, loamy soil with a pH between 6.0 and 7.0. Enriching the soil with organic compost can be beneficial.
What should I do if the garden chervil isn't growing even a week after transplanting?
Patience is crucial! Ensure you are watering garden chervil consistently and it is receiving sufficient sunlight. It's possible it might be prioritizing root development.
Can garden chervil be transplanted in partially shaded areas?
Yes, garden chervil can tolerate partially shaded areas, but for optimal growth, full to partial sunlight (at least 4 to 6 hours daily) is recommended.
My garden chervil leaves are turning yellow after transplanting, why is that?
This could indicate overwatering or inadequate drainage. Ensure the soil is well-drained and do not allow garden chervil to sit in waterlogged soil.
How often should I water my transplanted garden chervil?
Water your newly transplanted garden chervil thoroughly and keep the soil moist but not saturated. Adjust based on weather conditions and soil moisture levels.
Can I transplant my garden chervil indoors?
Yes, garden chervil can be relocated indoors, provided you can offer it ample sunlight and suitable temperature and moisture conditions.


