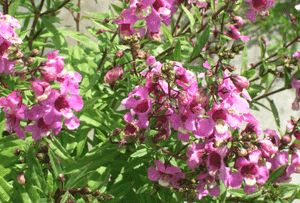
How to Transplant Angelonia?
The ideal period for relocating angelonia is in the revitalizing embrace of early spring, ensuring robust development. Choose a bright area with soil that drains effectively, enhancing angelonia's initial establishment in its new environment. Careful manipulation is crucial to prevent root trauma.
What Preparations are Needed Before Transplanting Angelonia?
What is the Ideal Time for Transplanting Angelonia?
The perfect time for relocating angelonia is during its period of new growth, typically in the spring. This timing allows the root system to become established before the intense heat of summer. Moving angelonia during this season of renewal ensures that its delicate roots have ample opportunity to settle into their new environment, gaining the strength needed to endure summer's challenges. You're giving angelonia the best possible start by choosing the gentle embrace of spring, promoting health and abundant blooms.
How Much Space Should You Leave Between Angelonia Plants?
When moving angelonia, provide each plant ample room to develop and thrive. The optimal spacing is 1-2 feet (30-60cm) apart, which will enable them to flourish without competing for nutrients and light.
What is the Best Soil Mix for Angelonia Transplanting?
Prepare your soil for angelonia by ensuring it drains effectively, similar to a quality potting mix. Incorporate a slow-release fertilizer or compost prior to planting. This will give your plant an excellent start and keep it nourished throughout its growth cycle.
Where Should You Relocate Your Angelonia?
Angelonia thrives in sunlight! Select a garden location that receives abundant sun exposure, at least 6-8 hours daily. This bright spot will help angelonia produce magnificent, vibrant flowers.
What Equipments Should You Prepare Before Transplantation Angelonia?
Gardening Gloves
To safeguard your hands while handling soil and the angelonia plant.
Spade or Shovel
Needed to excavate the planting hole and to extract the angelonia from its original spot.
Hand Trowel
Useful for refining the hole and positioning the plant.
Gardening Hose or Watering Can
To ensure the angelonia plant and its surrounding soil remain adequately hydrated before and after relocation.
Organic Matter (like peat moss or compost)
To improve soil structure and supply nutrients.
Mulch
For retaining soil moisture after planting.
How Do You Remove Angelonia from the Soil?
How Do You Remove Angelonia from the Soil?
From Ground: Start by watering your angelonia plant to moisten the soil; this facilitates digging. Using a spade or shovel, create a wide trench around the plant, deep enough to accommodate the plant's root ball while keeping it intact. Carefully work the spade beneath the root ball and gently lift the angelonia plant from the ground.From Pot: If your angelonia plant is in a container, the removal process differs slightly. Turn the pot on its side, hold the angelonia plant gently by its stems or leaves, and tap the bottom of the container until the plant slides out. Be careful to avoid pulling or damaging the plant during this process.From Seedling Tray: When moving angelonia from a seedling tray, push up from the bottom to extract the entire root ball and soil. Do not pull the seedling by the stem as this may cause harm.
Step-by-Step Guide for Transplanting Angelonia
Preparation
Begin by watering the angelonia plant in its current location. Prepare the new planting site; it should be twice as wide as the angelonia plant's root ball and of the same depth.
Site Modification
Enhance the hole by incorporating organic material such as compost or peat moss and blending it with the existing soil.
Plant Placement
Position the angelonia plant in the prepared hole so that the top of the root ball is level with the soil surface. Gently spread the roots outwards.
Soil Backfilling
Refill the hole, ensuring there are no air pockets that could cause the roots to dry out.
Watering
Water the angelonia plant generously immediately after planting, thoroughly saturating the root zone. Apply mulch around the plant to aid in moisture retention.
How Do You Care For Angelonia After Transplanting?
Watering
Maintain consistent soil moisture for the initial weeks after relocating your angelonia to help the plant develop strong roots. Avoid saturating the soil, as angelonia dislikes standing water.
Monitoring
Watch for signs of shock such as wilting or yellowing foliage. Trim any affected areas to help the angelonia plant recover its health.
Frost Protection
Angelonia is susceptible to frost damage. If frost is anticipated, cover the angelonia plant to shield it.
Pruning
Regularly trim your angelonia plant to encourage a bushier form and more abundant blooms.
Troubleshooting Common Issues with Angelonia Transplantation.
What is the optimal time to transplant angelonia?
The best period to relocate angelonia is during the early to mid-phase of its growth cycle. This corresponds to early spring through mid-summer.
What should be the proper spacing when planting angelonia?
Ensure that angelonia plants are positioned approximately 1-2 feet (30-60 cm) apart. Adequate spacing promotes plant health and growth by improving air circulation.
What size of a hole should I dig for transplanting angelonia?
Excavate a hole roughly twice the size of the root ball. This is approximately 10 inches (25 cm) in diameter, allowing the roots to spread out easily.
Do I need to prune angelonia while transplanting?
While not essential, pruning angelonia can help the plant focus on developing a robust root system after relocation. Just ensure it's done gently.
What kind of soil does angelonia need during transplanting?
Angelonia prefers well-drained soil with a neutral pH. If your garden soil is heavy clay or sandy, consider amending it with organic matter to enhance its structure.
How much water should I provide angelonia after transplanting?
Water angelonia thoroughly immediately after transplanting. Continue regular watering, but prevent the soil from becoming waterlogged. Angelonia thrives in moderately moist soil conditions.
Why are the leaves of my transplanted angelonia turning yellow?
Yellowing leaves can indicate overwatering. Ensure the soil drains well and never leave angelonia in waterlogged conditions. Balance is crucial.
Can angelonia be transplanted during flowering?
Yes, but it's generally healthier to relocate angelonia during its active growth season—early spring to mid-summer. If it's flowering, the plant might experience some temporary transplant shock.
What should I do if my angelonia wilts soon after transplant?
Wilting can be a sign of transplant shock. Don't fret, give it time. Continuously monitor water and light conditions. If wilting persists, consult a local nursery or gardening expert.
Should I fertilize angelonia directly after transplanting?
It's not necessary to fertilize right away. Allow angelonia to acclimate to its new surroundings for a few weeks. Afterward, you can use a balanced fertilizer to encourage growth.


