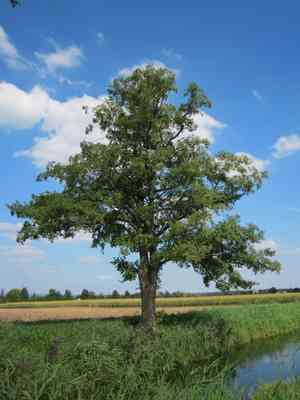
How to Transplant Black alder?
The optimal window for relocating black alder is from the initial budding phase through the unfurling of leaves, generally spanning late winter to early summer. This timing enables the specimen to properly acclimate to its new setting. Select a damp, adequately draining site that receives either partial or complete sunlight. During the transplanting process, carefully manage the root ball and guarantee the correct planting depth to foster a robust root structure.
Essential Preparations Before Relocating Black Alder
Optimal Period for Black Alder Relocation?
The best time to move black alder is from the start of spring to early summer. During this period, environmental factors support the plant's development, leading to stronger, more vibrant growth. Furthermore, transplanting at this time helps black alder establish itself firmly before the harsh winter arrives. Seize this ideal chance to give black alder a new home, ensuring its continued flourishing and development in the subsequent year.
Required Spacing Between Black Alder Plants?
When relocating black alder, allow each plant ample room to expand by maintaining a distance of 8-12 ft (2.4-3.7 m) between them. Providing sufficient space ensures a healthy and thriving plant!
Ideal Soil Blend for Black Alder Relocation?
To best prepare black alder for transplanting, utilize a well-draining, fertile soil with a slightly acidic pH. Incorporate a slow-release fertilizer into the soil to supply vital nutrients for your plant's development.
Optimal Location for Your Black Alder?
For peak growth, relocate black alder to an area that receives full sun to partial shade. This means they should get at least 6 hours of sunlight daily to support their health and development.
Equipment Needed for Black Alder Transplantation
Gardening Gloves
To safeguard your hands while handling the plant and soil.
Shovel or Spade
For excavating holes and moving soil.
Garden Trowel
To gently separate the plant's root ball from its current spot.
Watering Can or Hose
To hydrate the plant before removal and after relocation.
Organic Mulch
To provide a protective layer over the recently transplanted black alder.
Method for Extracting Black Alder from the Ground
Method for Extracting Black Alder from the Ground?
From Ground: Start by watering the black alder plant to moisten the soil. This facilitates easier removal of the plant without harming the root ball. After watering, use a spade or shovel to dig around the plant. Ensure your trench has a diameter at least twice the plant's width. Angle your shovel or spade outward as you dig to avoid cutting into the roots. Once your trench is complete, carefully work your shovel under the root ball. Exercise patience and gentleness to keep the root ball intact. Lift the plant from the ground and proceed to the transplanting process.From Pot: Begin by moistening the soil in the pot with water. Tilt the pot on its side and gently roll it. This action is intended to loosen the root ball within the pot. Gently pull the black alder plant from the pot while tapping its base. Ensure the root ball remains intact.From Seedling Tray: Gently compress the bottom of each cell in the tray to release the seedling and root ball. This minimizes root disturbance. Handle the black alder plant with care to prevent damage to its delicate stem or roots.
Step-by-Step Guide for Relocating Black Alder
Preparation
Excavate a hole in your chosen location to a depth that is twice the black alder plant's root ball. The width of the hole should be two times greater than the root ball. Place the removed soil adjacent to the hole.
Positioning black alder
Place your black alder plant in the hole and gently spread out its roots. The top of the root ball should be level with the ground surface.
Backfilling the Hole
Begin refilling the hole with soil, striving to break down any large clumps. Ensure you firm the soil as you fill to eliminate air pockets.
Watering
Water the black alder plant immediately after planting, ensuring the surrounding soil is moist.
Mulching
Spread organic mulch around the base of the black alder, leaving a small gap around the stem. This will help retain moisture and suppress weed growth.
Post-Transplantation Care for Black Alder
Watering
Ensure regular watering for the black alder during the initial weeks. This aids the plant in establishing its roots in the new location. Adjust watering based on weather conditions – more in hot weather and less when it's cool or rainy.
Pruning
If you observe any dead, dying, or damaged branches after transplanting, prune them to encourage new growth.
Monitoring
Watch for signs of stress, such as yellowing leaves or slowed growth. If these symptoms appear, consider modifying your care routine or consulting a horticultural expert.
Addressing Common Issues with Black Alder Relocation.
When is the optimal time to relocate black alder?
The ideal period to move black alder is from the peak of spring to the start of summer. This allows the plant ample time to establish itself before the colder seasons.
What is the recommended spacing between black alder during relocation?
The black alder spreads considerably, so it's best to maintain a distance of approximately 8 to 12 feet (2.4 to 3.7 meters) between each transplanted specimen. This permits adequate growth and prevents overcrowding.
What actions can I take if my relocated black alder is not thriving?
Ensure the plant has received sufficient sunlight and water. Also, verify that the soil pH is between 5.0-7.0, which is optimal for this plant. If these measures are ineffective, consulting a local gardener might be beneficial.
How deep should the hole be when relocating black alder?
For black alder, the hole should be twice as wide and equal in depth to the root ball. This typically amounts to about 10 inches (25 cm).
Is there a preferred soil type for relocating black alder?
Yes, black alder favors well-drained, slightly acidic to neutral soil. However, this perennial plant is quite resilient and can endure a broad range of soil conditions.
Should I apply fertilizer when relocating black alder?
Not initially. Relocate black alder first, then after about two weeks, you can consider adding a slow-release, balanced fertilizer to enhance the plant's health and growth.
What should I do after placing the black alder in the hole?
Backfill the hole with soil, ensuring you do not bury the plant's stem. After planting, water black alder thoroughly and continue to do so regularly.
How to handle black alder during relocation to prevent damage?
Handle black alder gently during relocation. Keep the root ball intact and avoid excessive shaking or exposure to direct sunlight, which can harm the plant.
What if my relocated black alder is wilting or losing leaves?
If your black alder is wilting or shedding leaves post-transplant, it might be experiencing shock. Ensure it is well-watered, but not overwatered, and keep it in partial or dappled sunlight until it recovers.
How much water does black alder require after relocation?
Black alder prefers moist but not waterlogged soil. Provide a thorough watering after transplanting and subsequently water regularly, especially during dry weather.


