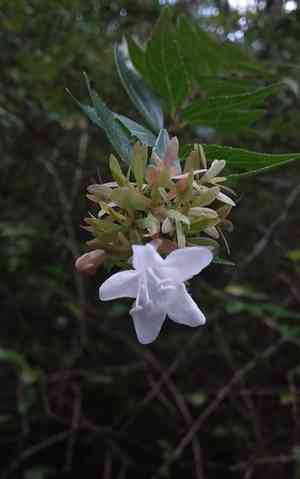
How to Transplant Abelia × grandiflora?
The ideal period for relocating glossy abelia is after the winter cold diminishes, generally spanning from mid-spring to late spring. Select a brightly illuminated, protected location that offers effective water drainage. When shifting glossy abelia, gently manage its root structure to guarantee a smooth adaptation.
What Preparations are Needed Before Transplanting Glossy Abelia?
What is the Ideal Time for Transplanting Glossy Abelia?
The best time to move glossy abelia is from early spring's awakening until just before summer's peak warmth. Relocating glossy abelia during this timeframe helps roots settle in the mild, active growth period. A helpful hint: transplanting in these gentle months provides glossy abelia the best start, avoiding harsh summer heat or winter cold. This strategic timing utilizes nature's cycle for strong development. By following all steps, your glossy abelia will thrive in its new spot, flourishing from the perfectly timed transplant.
How Much Space Should You Leave Between Glossy Abelia Plants?
When relocating your glossy abelia, aim for a spacing of approximately 3-6 feet (0.91-1.83 meters) between each specimen. This provides ample room for your glossy abelias to thrive and ensures sufficient air circulation for healthy development.
What is the Best Soil Mix for Glossy Abelia Transplanting?
For your glossy abelia, well-drained soil, rich in organic material, is precisely what they require. Prepare the bed by incorporating compost or a balanced, slow-release fertilizer to give them an excellent start. A slightly acidic pH is perfect for glossy abelia.
Where Should You Relocate Your Glossy Abelia?
Place your glossy abelia in a location where it can receive at least 6 hours of direct sunlight daily, or where it gets light shade. The correct amount of sun is crucial for beautiful blooms and a happy, flourishing glossy abelia.
What Equipments Should You Prepare Before Transplantation Glossy Abelia?
Gardening Gloves
To safeguard your hands while handling soil and the plant.
Spade or Shovel
For excavating around and beneath the plant to extract it and prepare the new site.
Wheelbarrow
To move the glossy abelia if it's large, or to transport soil and compost.
Hand Trowel
For smaller digging tasks or to refine the planting cavity.
Watering Can or Hose
To hydrate the plant prior to removal and after replanting.
Pruning Shears
To trim any damaged or excessively long roots or branches before relocation.
Garden Fork
To loosen soil around the root ball without causing significant root damage.
Mulch
To apply around the base of glossy abelia after transplanting to aid in moisture retention.
Burlap or Tarp
To wrap the root ball during transit to prevent soil disintegration and protect the roots.
How Do You Remove Glossy Abelia from the Soil?
How Do You Remove Glossy Abelia from the Soil?
From Ground: First, hydrate the glossy abelia plant to moisten the soil. Next, excavate a wide trench around the plant using a shovel or spade, ensuring the plant's root ball remains intact. Carefully work the spade beneath the root ball to lift the plant from its original spot.From Pot: Water the glossy abelia in its container to make the soil damp and easier to extract. Turn the pot sideways and gently tap the bottom to help loosen the root ball. If the plant doesn't slide out, you may need to run a hand trowel along the pot's interior to encourage separation.From Seedling Tray: Water the seedlings to ensure the soil is moist. Use a hand trowel or a small spoon to carefully scoop out each glossy abelia seedling, taking care not to harm the delicate roots. Support the seedling by holding its base as you lift it.
Step-by-Step Guide for Transplanting Glossy Abelia
Preparation
Water your glossy abelia thoroughly before beginning the transplant process to minimize shock and facilitate extraction.
Digging the New Hole
Excavate a hole in the ground that is twice the width of the glossy abelia's root ball and of the same depth to ensure the plant sits at its previous level.
Root Pruning
Inspect the plant's roots and trim any damaged or dead sections with pruning shears to promote healthy growth post-transplant.
Placing the Plant
Carefully position the glossy abelia in the center of the new hole. Gently spread out the roots if they are clustered to encourage expansion and growth.
Backfilling
Refill the hole with the excavated soil, gently tamping down around the root ball to eliminate air pockets without overly compacting the soil.
Watering
Water the glossy abelia generously after planting to settle the soil around the roots and provide essential hydration for the plant's recovery.
Mulching
Apply a layer of mulch around the base of the glossy abelia, leaving some space around the stem to prevent rot and help the soil retain moisture.
How Do You Care For Glossy Abelia After Transplanting?
Watering
Maintain consistent moisture in the soil around the glossy abelia for the initial weeks following transplanting to support new root development.
Monitoring
Regularly inspect the glossy abelia for indications of stress such as wilting or discolored foliage and adjust care as needed.
Pruning
Trim any branches that were damaged during the transplant to direct the glossy abelia's energy towards recovery and new growth.
Staking
If the glossy abelia is tall or susceptible to wind damage, provide support with a stake to stabilize it while its roots become established.
Troubleshooting Common Issues with Glossy Abelia Transplantation.
What's the best time to transplant glossy abelia for successful growth?
The ideal period is during mid to late spring, after the final frost but before intense summer heat.
How far apart should I space glossy abelia when transplanting?
Allow glossy abelia ample room to thrive by spacing them 3-6 feet apart (approximately 90-180 cm), depending on the variety's mature size.
What soil preparation is needed before transplanting glossy abelia?
Enrich the soil with organic matter and ensure it drains well to prevent root rot.
How deep should the planting hole be for glossy abelia?
Dig a hole twice the width and the same depth as the root ball to encourage proper root development.
Can I transplant glossy abelia on a hot, sunny day?
It's best to transplant glossy abelia on an overcast day or late afternoon to minimize transplant shock and water loss.
What are the signs of transplant shock in glossy abelia?
Symptoms include wilting leaves, yellowing, and stunted growth; alleviate by ensuring proper watering and care.
How often should I water glossy abelia after transplanting?
Water thoroughly after transplanting and then regularly, keeping the soil moist but not waterlogged.
Should I fertilize glossy abelia immediately after transplanting?
Wait a few weeks to fertilize, allowing glossy abelia to establish roots. Use a balanced fertilizer following product instructions.
How do I protect glossy abelia from pests during the transplanting process?
Inspect the plant for pests before transplanting and use appropriate measures to treat if necessary.
When should I prune glossy abelia after transplanting?
Prune glossy abelia the following season after transplanting to shape the plant and promote vigorous new growth.


