Boost Growth: How and When to Repot Your Greater periwinkle Plant
1
Best Period: Repotting Greater periwinkle is best done in early spring.
2
Containers: Your new container should be 2.5 to 5 cm (1 to 2 inches) wider than the previous one.
3
Growing Medium: Employing a soil that drains well helps avoid root decay and encourages robust development.
Why Replant Your Greater Periwinkle?
Understanding the growth pattern of Greater periwinkle
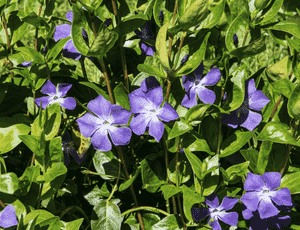
The Greater periwinkle is a robust, evergreen groundcover that flourishes with regular repotting. During its active growth, roots and foliage expand, requiring more room. Without sufficient space, the plant can become root-bound, leading to hindered development.
Recognizing indicators for a new container
Watch for clear signs that your Greater periwinkle needs a larger pot. If roots emerge from drainage holes, the plant dries out too quickly between waterings, or growth is stunted despite proper care, it's time for a bigger container.
Advantages of repotting for plant vitality and flowering
Replanting Greater periwinkle enhances root health, supplies fresh nutrients, and promotes more abundant blooms. New soil often provides better aeration and drainage, helping the plant establish a strong root system, which in turn supports lush foliage and plentiful flowers.
What You'll Need to Replant Greater Periwinkle
Choosing the appropriate pot size and material
Select a new container that is at least 2.5 to 5 cm (1 to 2 inches) wider in diameter than the current one. Terracotta pots are highly recommended for their breathability, which aids soil aeration. Ensure the pot has adequate drainage holes to prevent waterlogging.
Selecting suitable growing medium and drainage options
A well-draining soil mixture is essential for Greater periwinkle. Opt for a potting blend that includes perlite or sand to improve drainage. Good drainage prevents root rot, a common problem in potted plants.
Key implements for the repotting procedure
Gather tools such as a garden trowel, protective gloves, pruning shears, and a watering can. Having these readily available will ensure a smooth and efficient repotting process.
How to Replant Your Greater Periwinkle: A Step-by-Step Guide
Preparing the new container and potting mix
Begin by filling the new pot with a foundational layer of fresh potting mix. This offers a cushion for the roots and ensures immediate contact with nutrient-rich soil.
Carefully extracting your plant from its old pot
To remove the Greater periwinkle from its current container, gently tap around the edges and tilt it sideways. Carefully ease the plant out, holding the base of the stem rather than pulling on the foliage to avoid damage.
Inspecting and trimming the root system
Once out of the pot, examine the roots for any signs of disease or decay. Trim any dead or excessively long roots with sanitized pruning shears to encourage new growth.
Positioning the plant in its new container
Place the Greater periwinkle in the center of the new pot. Fill in around the root ball with potting mix, gently pressing down to eliminate air pockets. Leave some space at the top for watering.
Post-replanting care recommendations
After repotting, water the plant thoroughly and place it in a location with indirect sunlight. Keep the soil moist but not saturated in the following weeks to help the plant adapt to its new surroundings.
Common Issues When Replanting Greater Periwinkle and How to Prevent Them
Root damage and how to minimize it during repotting
Minimize root damage by handling the plant gently and avoiding excessive disruption of the root ball. Ensure your tools are clean and sharp to make precise cuts when needed, reducing the risk of infection.
Managing stress on Greater periwinkle after repotting
To reduce stress, repot your Greater periwinkle during early spring when it's naturally in a growth phase. Avoid fertilizing immediately after repotting, as this can burn the roots. Instead, wait a few weeks for the plant to adjust.
Addressing pests and diseases during repot
Inspect the plant and soil for pests such as aphids or whiteflies before repotting. Remove any visible pests and treat with appropriate insecticides if necessary. Use fresh, sterile potting mix to prevent the introduction of diseases.


