Boost Growth: How and When to Repot Your Common houseleek Plant
1
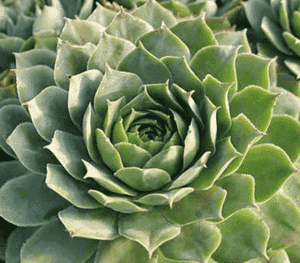
Sempervivum tectorum, commonly known as Common houseleek, is a hardy succulent that flourishes in both indoor and outdoor environments.
2
For optimal development, the most suitable periods to transplant Common houseleek are in the Spring and Winter.
3
These succulents are susceptible to excessive moisture; therefore, employing a soil mix with excellent drainage is essential during transplantation.
Optimal Repotting Times for Sempervivum tectorum
Recognizing when your Sempervivum tectorum is root-bound
A key indicator that your Sempervivum tectorum requires repotting is when its root system becomes pot-bound. This occurs when roots encircle the container's interior. You might observe reduced vigor, slowed development, and roots emerging from drainage holes. Another sign is rapid soil drying post-watering.
Seasonal considerations for best growth
The best periods for transplanting your Sempervivum tectorum are during spring and winter. These seasons offer ideal conditions for recovery and development. In spring, the plant enters its active growth phase, making it suitable for repotting. Winter, being a dormant period, allows the plant to acclimate without active growth stress.
Selecting the Right Container and Substrate for Your Sempervivum tectorum
Choosing the appropriate pot size and material
When selecting a new container for your Sempervivum tectorum, opt for one only slightly larger than its current pot. This provides ample root expansion space without overwhelming the plant. It's also crucial to choose pots made from materials that promote good drainage, like terracotta or unglazed ceramic. These materials facilitate excess moisture evaporation, preventing root rot, a common succulent issue.
Preparing or selecting the ideal soil mixture
Sempervivum tectorum thrives in a well-draining soil blend. You can either purchase a commercial cactus or succulent mix or create your own by combining standard potting soil with sand or perlite in a 2:1 ratio. This mixture ensures efficient water drainage while still supplying sufficient nutrients. Additionally, a layer of gravel at the pot's base can further enhance drainage.
Step-by-Step Repotting Procedure for Sempervivum tectorum
Gently extracting your Sempervivum tectorum from its current container
Begin by carefully loosening the soil around the plant using a small trowel or your fingers. Gently tip the pot and tap it to release the plant. If it's stuck, gently massage the pot to help ease it out. Avoid pulling the plant by its leaves or stem to prevent damage.
Preparing the new container and positioning the plant
Prepare the new pot by adding a layer of gravel or small stones at the bottom for improved drainage. Fill the pot halfway with the well-draining soil mix. Center your Sempervivum tectorum in the pot, ensuring the roots are evenly spread. Then, fill the remaining space with soil, gently pressing it down to remove air pockets.
Properly adding soil and initial watering post-repotting
Once your Sempervivum tectorum is securely placed in its new pot, add a final layer of soil and gently press down to stabilize the plant. Water the plant lightly to help settle the soil. It's crucial not to overwater at this stage; just a small amount of moisture will suffice. Allow the soil to dry out between waterings to prevent root rot.
Post-Repotting Care for Sempervivum tectorum
Watering routines and light exposure
After repotting, your Sempervivum tectorum may need time to adjust. Water the plant sparingly, allowing the soil to completely dry between waterings. Typically, watering once every two weeks should be adequate. Place the repotted plant in a location receiving 4-6 hours of daily sunlight. If indoors, a south-facing window is ideal.
Monitoring your Sempervivum tectorum for signs of distress
Observe your Sempervivum tectorum closely in the weeks following repotting. Look for signs of stress, such as wilting, yellowing foliage, or stunted growth. If you notice any of these, evaluate your watering schedule and ensure the plant receives sufficient sunlight. It can take a few weeks for the plant to adapt to its new environment, so be patient and provide consistent care.


