Boost Growth: How and When to Repot Your Baby rubber plant Plant
1
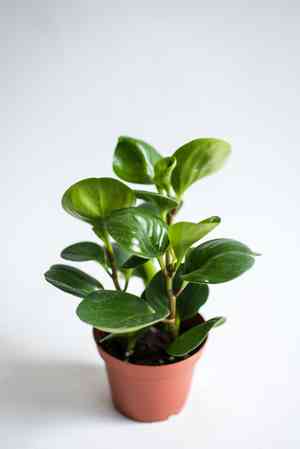
The Baby rubber plant, recognized for its vibrant, shiny foliage, is ideal for enhancing your interior with a touch of nature.
2
The best times to repot your Baby rubber plant are during the spring and winter months.
3
Employing a fast-draining potting medium that includes perlite or sand assists in avoiding root decay.
Why Rehouse Your Baby Rubber Plant?
Indicators your Baby Rubber Plant requires a new home
Recognizing when to rehouse your Baby Rubber Plant is vital for its wellness and development. Clear indications include roots emerging from drainage holes, the plant appearing top-heavy, or rapid soil drying. These suggest your plant has outgrown its current container and needs more room to flourish.
Advantages of repotting for plant vitality and expansion
Rehousing your Baby Rubber Plant not only provides more room but also revitalizes the soil, ensuring access to key nutrients. Regular rehousing prevents root-bound conditions and promotes vigorous growth. This also allows for root inspection, checking for disease or pest issues.
Selecting the Appropriate Container and Growing Medium
Optimal pot dimensions for your Baby Rubber Plant
Choosing the correct pot size is crucial for your Baby Rubber Plant's health. Typically, opt for a pot 2.5-5 cm (1-2 inches) wider in diameter than its current one. This size permits roots to fill the new space without being overwhelmed, helping to prevent waterlogging and root decay.
Soil types suitable for Baby Rubber Plants
The Baby Rubber Plant thrives in a well-draining potting mix. A combination of peat, perlite, and sand provides a light, aerated soil. This mix ensures easy water flow, reducing root rot risk, which is essential for the plant's long-term health.
The Rehousing Procedure
Detailed instructions for repotting
Start by gently extracting the Baby Rubber Plant from its original pot. Carefully loosen the root ball with your fingers and remove excess old soil. Position the plant centrally in the new pot, adding fresh soil around it to fully cover the roots. Lightly compress the soil to remove air pockets and secure the plant.
Careful handling of the rootball and safe transplanting
When manipulating the root ball, be gentle to prevent root damage. If you find any brown or soft roots, trim them with sterilized shears. This ensures only healthy, white roots are transplanted, giving your Baby Rubber Plant the best chance to adapt and grow robustly in its new setting.
Post-repotting irrigation and initial care
After rehousing, thoroughly water your Baby Rubber Plant until water drains from the bottom. This helps settle the soil around the roots and eliminates any remaining air pockets. Place the plant in a shaded area for a few days to aid recovery from transplant shock, and delay fertilization for several weeks.
Addressing Post-Repot Stress in Baby Rubber Plants
Identifying signs of stress in your plant
Following rehousing, observe your Baby Rubber Plant for stress indicators. Wilting, yellowing foliage, or slowed growth can signal plant stress. These symptoms typically arise as the plant adjusts to its new environment and should improve with proper attention.
Practical advice to aid plant adjustment
To help your Baby Rubber Plant acclimate post-repot, ensure it receives moderate, indirect illumination and maintain consistent soil moisture. Avoid overwatering and refrain from immediate fertilization after rehousing. If issues persist, check for drainage problems or pests that might be impacting its vitality.


