Boost Growth: How and When to Repot Your Lemon balm Plant
1
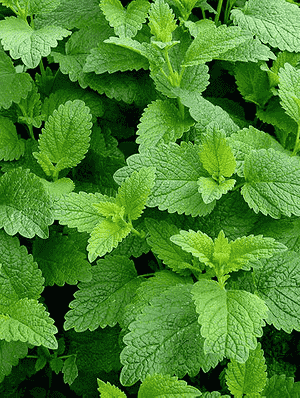
Lemon balm flourishes in soil that drains well and receives some shade.
2
The optimal times to re-pot your Lemon balm are during spring and winter.
3
Re-potting aids in avoiding root constriction and promotes more robust development.
Why Repot Your Lemon Balm?
Understanding the Advantages of Repotting
Relocating your Lemon balm offers several advantages, primarily boosting the plant's overall health and development. When you move the plant to a different container, it receives new substrate, which often contains more nutrients than the old, depleted medium. This nutrient boost can lead to more vigorous growth, enhanced leaf flavor, and a healthier plant overall. Additionally, repotting can help manage pests and diseases that might have accumulated in the previous soil.
Recognizing Indicators That Your Lemon Balm Needs a New Container
Knowing when your Lemon balm requires repotting is essential. Key signs to observe include roots emerging from drainage holes, soil that dries out rapidly after watering, and a general lack of vitality in the plant. If your Lemon balm appears to be struggling despite consistent care, it might be time for a new pot and fresh growing medium.
When Is the Optimal Time to Repot Lemon Balm?
Ideal Seasons for Repotting
The best period to repot your Lemon balm is during the spring or winter months. Repotting in the spring aligns with the plant's natural growth cycle, providing it with a fresh start for the active season. Similarly, winter is a good time because the plant is in a semi-dormant state, making the transition less stressful.
Signs to Observe Before Deciding to Repot
Before choosing to repot, look for specific indications that your Lemon balm requires more room. Roots appearing at the soil surface or extending from the pot's drainage holes are clear indicators. Additionally, if the plant's growth has slowed or its leaves appear yellow and wilted, these can suggest that the Lemon balm is in need of repotting.
Selecting the Correct Pot and Soil for Lemon Balm
Choosing the Perfect Pot Size and Material
When selecting a new container for your Lemon balm, size and material are important. Aim for a pot that is approximately 5-10 cm (2-4 inches) wider in diameter than the current one. Materials like terra cotta are excellent as they provide good air circulation to the roots. Ensure the pot has sufficient drainage holes to prevent waterlogging, which can lead to root rot.
The Best Soil Mixture for Robust Growth
Lemon balm prefers well-draining soil that retains some moisture but doesn't remain saturated. A blend of standard potting mix with added perlite or sand usually works well. This allows for proper air circulation around the roots while providing the right balance of moisture retention and drainage.
How to Repot Lemon Balm: Step-by-Step Guide
Preparing Your Work Area and Tools
Before beginning the repotting process, gather all necessary tools and supplies. You'll need a new pot, fresh soil mix, a small gardening trowel, and a watering can. Choose a clean, spacious area to work in to avoid making a mess and to give yourself ample room to handle the plant easily.
Carefully Removing Lemon Balm from Its Current Container
Start by gently loosening the soil around the edges of the current pot. Carefully tilt the pot on its side and gently tap it to loosen the root ball. If the plant doesn't slide out easily, use a knife to run along the edges of the pot to free the roots. Take care not to damage the delicate roots during this process.
Transplanting Into the New Container
Place some fresh soil mix at the bottom of the new pot, forming a small mound in the center. Position the Lemon balm on top, gently spreading its roots. Fill in around the sides with more soil, ensuring that you don't bury the plant deeper than it was in its previous pot. Gently firm the soil around the plant, but avoid compacting it too tightly.
Aftercare: Ensuring Successful Adjustment
After repotting, water the Lemon balm thoroughly until water drains from the bottom of the pot. Place the pot in a location with partial shade to help reduce transplant shock. Over the next few weeks, closely monitor the plant for signs of new growth. Water regularly and ensure the soil remains moist but not waterlogged.


