Boost Growth: How and When to Repot Your Broom tea-tree Plant
1
Transplant your Broom tea-tree during the spring or winter for best development.
2
Select a container that measures 2-3 cm (1 inch) wider in diameter than its present one.
3
Make sure your Broom tea-tree receives both sun and shade, particularly following transplantation.
Why Repot Your Broom tea-tree?
Understanding the growth cycle of your Broom tea-tree
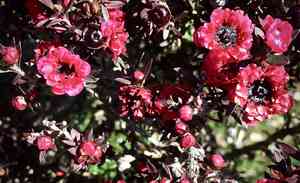
The Broom tea-tree is a robust and adaptable plant, recognized for its beautiful white blossoms and tea-like appearance. Like all flora, it undergoes a life cycle, and comprehending this cycle aids in preserving its health. Typically, this plant enters a dormant period in winter and begins new growth in spring. Transplanting during these seasons supports optimal root development and expansion.
Signs that indicate it is time for repotting
There are clear indicators that your Broom tea-tree requires repotting. If you observe roots emerging from the drainage apertures in the current container, it's a strong signal. Other signs include the plant becoming top-heavy or water not permeating the soil correctly. Periodically checking these signs can help you decide when to provide your plant with a new home.
Benefits of repotting for plant health and vitality
Repotting offers numerous advantages for your Broom tea-tree. It replenishes the soil's nutrient content and provides more room for root expansion, both vital for sustained growth and flower production. Additionally, removing old soil helps reduce the risk of pests and diseases, giving your plant a better chance to flourish.
Choosing the Right Tools and Materials
Selecting the appropriate pot size and type
When choosing a new container for your Broom tea-tree, it's crucial to select one that's only slightly larger than the current pot. Ideally, the new pot should be 2-3 centimeters (1 inch) wider in diameter. Terracotta pots are excellent choices as they provide good root aeration, but plastic pots can also be suitable if they have adequate drainage.
Essential tools for the repotting process
To facilitate a smoother repotting process, gather necessary tools such as a small shovel or trowel, gardening gloves, pruning shears for any required root trimming, and a watering can. Having these tools readily available ensures you can manage the repotting process efficiently and safely.
Best soil mix for Broom tea-tree
Your Broom tea-tree will thrive best in a well-draining soil mixture. A combination of standard potting soil blended with some sand or perlite to improve drainage works wonders. This mix offers both the nutritional content and the aeration needed for healthy root development.
Preparing Your Broom tea-tree for Repotting
How to safely remove the plant from its current pot
Begin by gently loosening the soil around the pot's edges. Carefully tilt the pot to one side and slowly ease the plant out, supporting the plant's base with your hand. Avoid pulling the plant by its stems or branches as this can cause significant harm.
Inspecting and trimming the root system
Once your Broom tea-tree is out of its container, examine the root system for any indications of disease or decay. Healthy roots should appear white or light brown and feel firm. Trim away any unhealthy roots using sterilized pruning shears. This step helps promote new, healthy root growth.
Pre-repotting care tips to reduce stress on your plant
Before repotting, thoroughly water your Broom tea-tree, but ensure the soil is not waterlogged. This helps reduce transplant shock. Additionally, keep the plant in a shaded area for a few days before and after the repotting process to help it acclimate.
The Repotting Process: A Step-by-Step Guide
Filling the new pot with the right amount of soil
Place a layer of soil mix at the bottom of the new pot. The base layer should be approximately 1.27 to 2.54 centimeters (0.5 to 1 inch) deep. This ensures the plant's base doesn't sit directly on the pot and has space for root expansion.
Positioning the Broom tea-tree in the new pot
Carefully center your Broom tea-tree in the new pot. Ensure that the plant sits at the same soil level as it did in the old pot. Fill in around the roots with soil mix, gently firming it as you go to eliminate air pockets.
Final steps after repotting
Lightly water the plant after repotting to help settle the soil. Avoid overwatering as your plant's roots need time to adjust. Place the pot in a location that provides a balance of sunlight and shade, ensuring it properly acclimates to its new environment.
Post-Repotting Care for Broom tea-tree
Essential care tips for the first weeks after repotting
In the initial weeks following repotting, closely observe your Broom tea-tree. Water sparingly, allowing the top inch of soil to dry out between waterings. Keep the plant in a protected location to minimize stress.
How to monitor your Broom tea-tree's adjustment to its new environment
Watch the plant for signs of distress, such as yellowing leaves or drooping. This can indicate overwatering or shock. If such signs appear, adjust the care routine accordingly by reducing water or moving the plant to a less intense light situation.
When to resume regular feeding and watering schedule
Once the plant exhibits signs of new growth, which typically occurs within four to six weeks, you can resume a regular watering and feeding schedule. Use a balanced liquid fertilizer every few weeks to support continued healthy growth.


