Boost Growth: How and When to Repot Your Parrot's beak Plant
1
Transplanting aids in restoring soil nutrients, fostering more robust development for your Parrot's beak.
2
Spring typically offers the ideal period for repotting, aligning with the plant's natural growth phase.
3
A root-bound Parrot's beak exhibits indicators such as inhibited growth and roots emerging from the pot's base.
Reasons to Replant Parrot's Beak
Understanding the growth patterns of Parrot's beak
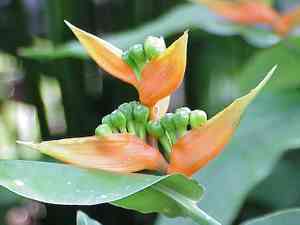
The Parrot's beak, a vibrant tropical plant known for its striking colors, flourishes when given adequate space to grow. Over time, as it expands, the roots can outgrow their current pot, necessitating a change to continue thriving.
Spotting signs that indicate it's time to repot
Your Parrot's beak will signal its need for a larger home through several indicators. Look for signs like slowed or stunted growth, roots emerging from the potâs drainage holes, and the plant becoming top-heavy and unbalanced. These are tell-tale signs that it's time for a repotting session.
Benefits of timely repotting for plant health
Timely repotting ensures that your Parrot's beak receives fresh soil and nutrients, which are crucial for its health and vitality. It also prevents root congestion, allowing for better water absorption and reduced risk of diseases. Ultimately, repotting contributes to a more robust and lush plant.
When Is the Best Time to Repot?
Seasonal considerations for repotting Parrot's beak
The optimal time to repot your Parrot's beak is during spring or winter. These seasons typically coincide with slower growth periods, reducing the stress on the plant as it adjusts to its new environment.
Ideal conditions and setting for the task
Choose a day with mild temperatures and indirect sunlight to perform the repotting. A calm, wind-free day is ideal to avoid additional stress on the plant. Ensure you have all necessary materials ready to make the process seamless and efficient.
Preparing to Repot Parrot's beak
Selecting the right pot and potting mix
Opt for a pot that is one to two sizes larger than the current one. Ensure it has good drainage holes to prevent waterlogging. For the potting mix, use a well-draining mix suitable for tropical plants, rich in organic matter to support healthy growth.
Tools and materials needed for repotting
Prepare the following tools and materials: a pair of gardening gloves, a spade or hand trowel, fresh potting soil, a watering can, and pruning shears. Having these items on hand will make the repotting process smoother.
Preparing your workspace and plant for repotting
Set up a clean workspace, either outdoors or in a well-ventilated area. Lay down a tarp or newspaper to catch any soil spills. Gently water your Parrot's beak a day before repotting to make it easier to remove from its current pot and to reduce transplant shock.
Step-by-Step Guide to Repotting Parrot's beak
Removing the plant carefully from its current pot
Gently turn the pot upside down while supporting the base of the plant with your hand. Tap the pot lightly to loosen the root ball. Carefully slide the Parrot's beak out, taking care not to damage the roots.
Examining and trimming the root system if necessary
Inspect the roots for any signs of rot or damage. Trim away any dead or excessively long roots using clean, sharp pruning shears. This encourages healthy new growth and prevents potential issues in the new pot.
Placing and securing the plant in the new pot
Add a layer of fresh potting mix to the bottom of the new pot. Place the Parrot's beak in the center, adjusting the height so that the root crown is just below the potâs rim. Fill in around the roots with potting mix, gently patting it down to eliminate air pockets.
Proper aftercare following repotting
Water the plant thoroughly to settle the soil. Place it in a location with indirect sunlight and avoid fertilizing for the first few weeks to allow it to acclimate. Monitor the plant closely for signs of stress or shock and adjust care as needed.
Common Challenges and Solutions
Dealing with pot-bound root systems
If the roots are severely pot-bound, meaning they form a dense mass and circle the pot, gently tease them apart with your fingers or a clean knife. This encourages the roots to spread out in the new pot, promoting better growth.
Addressing underwatering or overwatering post-repot
After repotting, itâs crucial to maintain balanced watering practices. Too much water can lead to root rot, while too little can cause dehydration. Check the soil moisture regularly and water when the top 2-3 cm (1 inch) feels dry.
Preventing stress and shock in Parrot's beak after repotting
Minimize stress by keeping the plant out of direct sunlight and away from strong drafts for the first few weeks. Gradually reintroduce it to its usual environment and care routine, ensuring it has time to adjust to its new home.


