Boost Growth: How and When to Repot Your Round-leafed navel-wort Plant
1
Transplanting your Round-leafed navel-wort during its active growth period promotes more robust development.
2
Select a container with adequate drainage to avoid excessive moisture retention.
3
Following repotting, position your plant in a location with filtered light.
Why Replant Your Round-leafed navel-wort?
Understanding the growth requirements of Round-leafed navel-wort
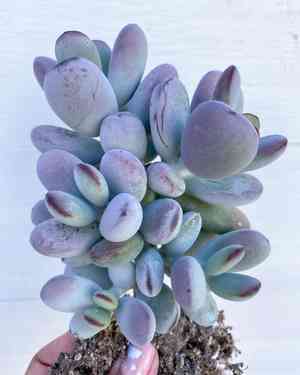
The Round-leafed navel-wort is a charming succulent known for its thick, rounded foliage and appealing look. Like many succulents, it grows somewhat slowly, but eventually, your plant will outgrow its current container. Replanting addresses its increasing growth demands, providing ample space for roots to spread and efficiently access vital nutrients.
Indicators that your Round-leafed navel-wort requires a new container
Here are some clear signs that your Round-leafed navel-wort needs to be repotted: Roots emerging from the drainage holes. Stunted growth or yellowing leaves. Soil drying out too quickly. The plant appears top-heavy and might even tip over.
Advantages of timely replanting
Prompt repotting ensures your Round-leafed navel-wort continues to flourish. Benefits include improved root system vitality, better nutrient uptake, and preventing root decay. It also offers an opportunity to examine and address any root issues before they become severe.
When is the Optimal Time to Replant?
Ideal periods for repotting Round-leafed navel-wort
The most suitable times for repotting your Round-leafed navel-wort are spring and winter. During these seasons, the plant is either entering its dormant phase (winter) or emerging from it (spring), making it less stressed by the change.
Assessing the plantâs readiness
Before repotting, confirm your plant is prepared for the move. Look for the indicators mentioned previously, and check if the plant has filled its current pot. A plant with overly bound roots is a clear sign that it's time for a more spacious home.
Choosing the Correct Pot and Substrate
Selecting the appropriate pot size and material
Choose a new pot that is 5-10 cm (2-4 inches) larger in diameter than the existing one. Terracotta pots are excellent due to their porous nature, which aids in moisture regulation. Always ensure the pot has sufficient drainage holes to prevent waterlogging.
Suitable soil types for Round-leafed navel-wort
A well-draining cactus or succulent blend is perfect for the Round-leafed navel-wort. You can create your own mix by combining potting soil with sand and perlite to improve drainage.
The Replanting Procedure: A Step-by-Step Guide
Preparing your workspace and tools
Begin by gathering all necessary items: the new pot, fresh potting mix, a small shovel, gloves, and pruning shears. Cover your work area with newspaper or a tarp to contain soil spills and simplify cleanup.
Gently extracting the plant from its current container
Carefully tilt the pot on its side and gently tap it to loosen the soil. Holding the plant's base, carefully pull it out of the pot, being careful not to harm the roots.
Inspecting and trimming the roots if needed
Examine the roots for any dead or decaying sections and remove them with clean pruning shears. Healthy roots are typically white or light brown. This is also a good chance to gently untangle roots if they are tightly coiled.
Placing the Round-leafed navel-wort into its new container
Fill the new pot with a layer of fresh soil mix, position the plant in the center, and add soil around the roots. Gently pat the soil to remove air pockets, ensuring the plant is stable but not overly compacted.
Post-care: Irrigation and placement
Water the plant lightly to help the soil settle. Place your repotted Round-leafed navel-wort in a spot with indirect sunlight to allow it to adapt to its new container. Gradually reintroduce it to brighter conditions if necessary.
Common Errors to Avoid When Replanting
Excessive watering after replanting
A frequent error is overwatering immediately after repotting. Keep the soil slightly moist but not saturated. Overwatering can lead to root rot, especially as the roots recover from being disturbed.
Utilizing pots without drainage
Avoid using containers that lack proper drainage holes. Non-draining pots retain excess moisture, increasing the risk of root rot. Ensure your pot allows water to exit freely.
Neglecting root health during replanting
Before placing your plant in its new pot, always check the roots for signs of disease or decay. Ignoring root health can result in the spread of illnesses and eventual plant decline.


