Boost Growth: How and When to Repot Your Queen's tears Plant
1
The best period to transplant Queen's tears is in the Spring or Winter.
2
Employ a soil blend that drains effectively to avoid root decay.
3
Choose a container that is 1-2 inches (2.5-5 cm) wider than its present one.
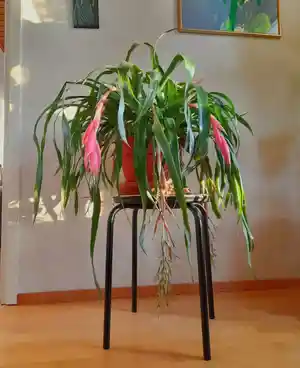
Why Replant Your Queen's tears?
Recognizing indicators that your Queen's tears requires a new container
Transplanting your Queen's tears plant is crucial for its vitality and vigorous development. Here are some indications your plant might need a different pot:Roots extending: If you observe roots emerging from the drainage openings of the current container, it clearly signals the plant needs more room.Substandard soil quality: If the potting medium has solidified or isn't retaining moisture effectively, it's time for a refresh. This typically means it has lost its nutrients and isn't supporting the plant's requirements.Hindered development: If your Queen's tears has ceased growing despite proper care, it could be due to constricted roots or depleted substrate.
Advantages of transplanting for well-being and development
Transplanting offers numerous benefits for your Queen's tears:Nutrient restoration: Fresh potting mix supplies vital nutrients that may be absent in the old, exhausted substrate.Root vitality: Repotting allows for the removal of any dead or overgrown roots, fostering a healthier root system.Enhanced proliferation: With additional space and improved soil quality, your plant is likely to flourish and grow more robustly.
Selecting the Appropriate Pot and Soil for Queen's tears
Choosing a container size and type suitable for Queen's tears
Picking the correct pot is vital for repotting. Look for a container that is 1-2 inches (2.5-5 cm) wider in diameter than the current one. This provides ample space for root expansion. Opt for pots made from materials like terracotta or ceramic, which facilitate better air circulation and drainage, preventing root rot.
The significance of a well-draining soil mixture
The potting mix for Queen's tears should drain efficiently to prevent roots from sitting in water, which can lead to root rot. You can use a bromeliad-specific blend or create a mixture of standard potting soil with some orchid bark and perlite. This combination ensures good drainage and aeration while retaining sufficient moisture for the plant.
How to Replant Queen's tears: A Step-by-Step Guide
Step 1: Gently extract the plant from its present vessel
Start by carefully taking the Queen's tears out of its current pot. You can achieve this by holding the plant's base and gently tilting the container. If the plant resists, tap the pot's sides to loosen the soil. Be careful not to harm the delicate roots during this process.
Step 2: Carefully trim any deceased or overgrown roots
Examine the roots for any indications of decay or excessive growth. Using sanitized scissors or pruning shears, remove any dead or overly long roots. This promotes healthy root development and prevents potential issues like root rot.
Step 3: Position the plant in its new container with fresh substrate
Place a layer of fresh, well-draining potting mix at the bottom of your new pot. Center the Queen's tears and gently fill the pot with soil. Ensure the plant is at the same depth as it was in the old pot. Gently press the soil around the roots to eliminate any air pockets.
Step 4: Provide adequate water and place in suitable conditions
After repotting, water the plant thoroughly until water exits the drainage holes. Ensure the plant is situated in a spot with bright, indirect light. Avoid exposing it to direct sunlight immediately after repotting, as it might stress the plant.
Post-Repotting Care Advice for Queen's tears
Appropriate watering regimen after transplanting
After repotting, it's crucial to establish a consistent watering routine. Typically, Queen's tears prefers to be kept consistently moist but not waterlogged. Water the plant when the top 1-2 inches (2.5-5 cm) of soil feel dry to the touch. Adjust the frequency depending on your home's humidity and temperature.
Monitoring plant health and growth modifications
Keep a close watch on your plant's health and adjust care as needed. Look for signs of distress, such as yellowing leaves or slow growth, and consider if changes in light, water, or temperature are required. Fertilize with a balanced, water-soluble fertilizer every 4-6 weeks during the growing season to promote robust growth.


