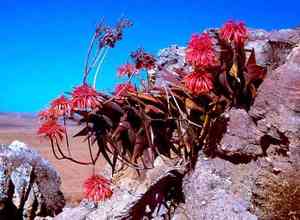
Boost Growth: How and When to Repot Your Mitre aloe Plant
1
Transplanting Mitre aloe in Spring or Winter is best for its development.
2
Confirm the new container possesses sufficient drainage openings to avoid excessive moisture.
3
New potting mix offers the vital nutrients and air circulation required by Mitre aloe.
Why Is Repotting Mitre aloe Important?
Fosters robust root development and prevents root constriction.
Relocating Mitre aloe to a larger container provides ample room for root expansion, thereby encouraging more vigorous root growth. When Mitre aloe remains in the same pot for an extended period, its roots can become pot-bound, hindering nutrient absorption and stunting development.
Boosts nutrient absorption by introducing fresh growing medium.
New soil is crucial for supplying the essential nutrients your plant requires. Over time, the potting mix can become depleted of vital elements, and repotting helps replenish this nutrient base, ensuring your Mitre aloe continues to flourish.
Prevents ailments by removing old, potentially contaminated substrate.
Aged soil can become a breeding ground for pests and pathogens. Repotting allows you to replace this old substrate with clean, new soil, which aids in disease prevention and offers your Mitre aloe a healthier environment for growth.
Identifying the Right Time to Repot Mitre aloe
Assessing root development: Look for roots emerging from drainage openings.
A clear indicator that your Mitre aloe requires repotting is when roots start to protrude from the pot's drainage holes. This signifies that the plant has outgrown its current container and needs more space to accommodate its expanding root system.
Observing growth rate and vitality: Slow development may suggest a need for more room.
If you notice your Mitre aloe growing slower than usual, it could indicate that the plant's roots are constricted and it needs a larger pot. Besides slow growth, yellowing foliage or general poor health can also signal that it's time for a change.
Choosing the Right Pot and Soil for Mitre aloe
Selecting a container with adequate drainage.
Choosing the appropriate pot is vital for your Mitre aloe's well-being. Opt for a container with multiple drainage holes at the bottom to prevent water accumulation, which can lead to root rot. Terracotta pots are an excellent choice as they allow excess moisture to evaporate.
Utilizing soil that supports proper moisture and aeration.
The growing medium for your Mitre aloe should be well-draining and rich in organic matter. A cactus or succulent blend is ideal, as it provides the correct balance of moisture retention and air circulation, ensuring the roots receive sufficient air and do not become waterlogged.
Step-by-Step Guide to Repotting Mitre aloe
Carefully extracting the plant from its previous container.
Begin by gently loosening the soil around the plant to facilitate removal. Carefully lift the Mitre aloe from its current pot, holding it at the base to avoid damaging the leaves or stem.
Trimming old or decayed roots to encourage new growth.
Inspect the roots and prune away any that appear aged, dead, or rotted using sterilized shears. This promotes healthier development and helps the plant direct its energy towards forming new, robust roots.
Positioning the plant in the new pot with fresh growing medium.
Place a layer of soil at the bottom of the new pot before positioning the Mitre aloe. Fill in around the roots with more soil, ensuring the plant is centered and stable. The soil should be packed firmly but not excessively tight.
Appropriate watering after repotting.
Following repotting, water the Mitre aloe lightly to settle the soil. Be careful not to overwater, as the plant needs time to adapt to its new surroundings. Wait a few days before watering again, allowing the roots to establish.
Aftercare for Mitre aloe Following Repotting
Ensuring sufficient light and temperature.
Place your Mitre aloe in a location where it can receive ample indirect sunlight. Avoid direct sun exposure immediately after repotting to minimize stress on the plant. Maintain the temperature around 18-24°C (65-75°F) for optimal development.
Monitoring soil moisture and adjusting irrigation as needed.
Keep an eye on the soil's moisture level and modify your watering schedule accordingly. Allow the soil to dry out slightly between waterings to prevent root rot. Ensure that the pot remains well-drained and never let the plant sit in water.


