Boost Growth: How and When to Repot Your Japanese maple Plant
1
Transplanting in Spring or Winter reduces strain on your Japanese maple.
2
Confirm the new container offers sufficient drainage to avoid root decay.
3
Employ a soil blend that drains effectively for optimal outcomes.
Optimal Timing for Japanese Maple Repotting
Identify the best seasons for transplanting to minimize stress and encourage robust development.
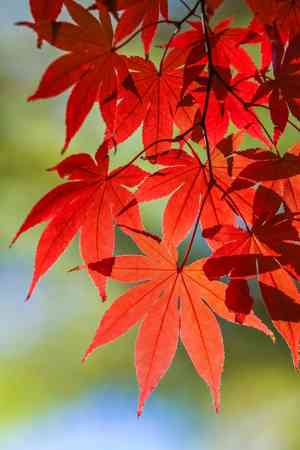
Selecting the appropriate period to repot your Japanese maple significantly impacts its vitality and expansion. The ideal times for transplanting this cherished plant are during Spring and Winter. In these seasons, the tree is either emerging from or entering dormancy, which aids in reducing stress and enables it to adapt more effectively to its new surroundings. Repotting in Spring ensures the tree has the entire growing period to establish its root system in its new home, while Winter repotting helps circumvent the intense summer heat, which can impose additional strain on the plant.
Indicators suggesting your Japanese maple requires repotting.
Recognizing when your Japanese maple needs to be repotted is crucial for maintaining its well-being. Observe these signs to determine if it's time: roots emerging from drainage holes, water pooling on the soil surface for extended periods, or the plant appearing top-heavy and unstable. Furthermore, if the soil seems compacted and fails to retain moisture, it's a clear signal that repotting is necessary to provide roots with more space and fresh soil nutrients.
Selecting the Appropriate Container and Substrate for Japanese Maple
Criteria for choosing the perfect pot size and material.
Choosing the correct container for your Japanese maple is vital for its prosperity. The pot should be sufficiently large to accommodate root expansion but not excessively so. A good guideline is to select a pot that is 5-8 cm (2-3 inches) wider in diameter than the current one. Ensure the pot has ample drainage holes to prevent waterlogging, which can lead to root decay. Regarding material, terracotta pots are excellent as they facilitate better air circulation to the roots, but be aware they can dry out faster compared to plastic containers.
The ideal soil blend for a flourishing Japanese maple.
Utilizing the correct soil mixture is essential for the health of your Japanese maple. Choose a well-draining, slightly acidic soil blend that offers good aeration. A combination of 50% standard potting soil, 25% pine bark, and 25% perlite or coarse sand works effectively. This blend ensures that the roots receive adequate moisture without remaining waterlogged, which can cause root rot.
Detailed Guide to Repotting Japanese Maple
Preparing your tree and the new container.
Begin by watering your Japanese maple a day prior to repotting. This helps soften the soil and makes it easier to extract the plant from its old pot. Concurrently, prepare the new pot by placing a layer of coarse gravel or broken terracotta pieces at the bottom to aid drainage. Add a shallow layer of your soil mix on top, which will serve as the new foundation for your tree.
How to safely extract your plant from its previous pot.
When removing your Japanese maple from its old pot, gently tilt the pot to one side and carefully slide the plant out. If the tree is stuck, use a knife to loosen the soil around the edges. Avoid pulling the plant by the trunk as this can harm the roots. Once removed, inspect the root ball for any dead or decaying roots and trim them with sterilized scissors.
Steps for positioning and stabilizing your Japanese maple in its new pot.
Position your Japanese maple in the center of the new pot, ensuring the top of the root ball is approximately 2-3 cm (1 inch) below the rim. Fill in around the root ball with your soil mix, gently pressing it down to eliminate air pockets. Confirm the tree is standing upright and stable. Water the plant thoroughly to help settle the soil and remove any remaining air pockets.
Post-repotting care advice to help your Japanese maple recover and thrive.
After repotting, place your Japanese maple in a shaded, protected location to aid its recovery from transplant shock. Gradually reintroduce it to its usual spot over one to two weeks. Water it consistently, keeping the soil moist but not saturated. Refrain from fertilizing for about a month to allow the roots to establish in their new environment. Monitoring the tree for signs of stress, such as wilting leaves or slowed growth, can help detect any issues early and ensure your plant flourishes.
Common Errors to Avoid When Repotting Japanese Maple
Excessive watering after repotting: balancing moisture levels.
One of the most frequent errors after repotting is overwatering. While your tree requires sufficient moisture to settle into its new pot, too much water can suffocate the roots and lead to rot. Water the plant when the top 2-3 cm (1 inch) of soil feels dry to the touch. Always ensure that surplus water can drain freely from the bottom of the pot.
Using unsuitable soil types that can cause root rot or stunted growth.
Another common mistake is employing the wrong type of soil. Avoid heavy, clay-rich soils or garden soil, as these can compact easily and retain excessive moisture. Instead, opt for a well-draining, aerated soil mix as previously mentioned. This will provide the correct balance of moisture and airflow to the roots, promoting healthy growth and preventing root diseases.


