How to Prune Adam's needle?
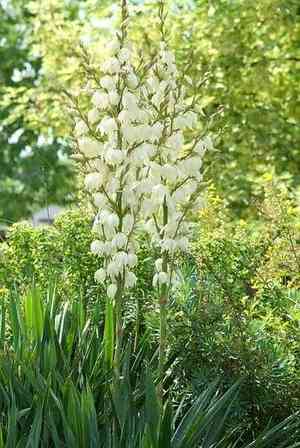
Adam's needle, characterized by its prominent, blade-like foliage and elevated floral stalks, is a resilient evergreen thriving in adequately drained soil and abundant sunlight. Trim away any deceased or compromised leaves from the base and eliminate faded flower stems to stimulate further development. The optimal periods for this trimming are early spring or winter, coinciding with the plant's dormant phase. This practice not only preserves its visual appeal but also deters the establishment of pests. The plant's inherent toughness and undemanding care requirements mean it needs very little human interference.
What Are the Benefits of Pruning Adam's Needle?
What Are the Benefits of Pruning Adam's Needle?
Trimming adam's needle encourages the development of new blooms, enhancing its aesthetic appeal. It also aids in preventing pest infestations and diseases by eliminating potentially susceptible or already affected portions of adam's needle.
What Is the Best Time for Pruning Adam's Needle?
What Is the Best Time for Pruning Adam's Needle?
Pruning adam's needle in early spring is ideal, just before the active growth period begins. This timing allows adam's needle to recover from cuts without new growth being harmed by cold. Also, in early spring, the plant's energy reserves are high, promoting quick recovery. Winter is also suitable for pruning adam's needle as the plant is dormant. During this time, there's minimal risk of stressing the plant since growth is paused, and less chance of infection from pruning wounds as many pathogens are inactive in cold weather. Furthermore, the absence of foliage in winter provides a clearer view of the plant's structure, simplifying strategic cuts. By pruning during these recommended seasons, gardeners can maintain adam's needle's health, control its shape, and prevent energy waste on parts that might be removed later.
What Tools Do I Need to Prune Adam's Needle?
Sharp Bypass Pruners
Perfect for making clean cuts on adam's needle's thinner, non-woody leaves and small stems, ensuring rapid healing and minimal harm.
Long-Handled Loppers
Helpful for reaching into the dense, rosette-like structure of adam's needle to trim thicker stems or spent flower stalks without injuring the gardener.
Protective Gloves
Crucial for safeguarding the gardener's hands from the sharp edges of adam's needle's leaves.
Pruning Saw
Essential for cutting through the more mature, woody stems of adam's needle that may develop as the plant ages.
Garden Shears
Useful for trimming the edges of adam's needle's leaves if they become too long or begin to fray.
How to Prune Adam's Needle
Step1: Preparation and Timing for Pruning
Gather pruning tools such as sharp, clean pruning shears or a knife. Begin pruning in late winter to early spring, as adam's needle is entering its active growth phase and can recover from pruning more effectively.
Step2: Protective Wear and Foliage Assessment
Wear protective gloves and long sleeves to shield your skin from adam's needle's sharp foliage. Approach the plant carefully, looking for the dead, yellow, or brown leaves typically found at the bottom of the plant.
Step3: Dead Foliage Removal Technique
Identify the base of the dead foliage you wish to remove. Make a cut directly at the point where the dead leaf emerges from the main stem or trunk. Use a downward slicing motion to avoid damaging healthy tissue.
Step4: Clearing Bottom Dead Leaves
Continue to remove all dead foliage from the bottom of the plant. This will not only improve adam's needle's appearance but also help prevent disease and pests from taking hold in the decaying material.
Step5: Pruning Worn-out Stems
Inspect adam's needle for worn-out stems, which might be due to age or damage. Locate the stem's base where it emerges from the main trunk. It is important to cut back these stems to their base to encourage new growth and maintain a compact shape.
Step6: Shape Evaluation and Selective Trimming
During the pruning process, periodically step back to check the overall shape of adam's needle. Make any necessary adjustments by selectively removing any additional foliage that contributes to an imbalanced appearance, ensuring not to prune more than one-third of the plant at a time to avoid stressing it.
Step7: Post-pruning Clean-up
Once the dead foliage and worn-out stems are removed, clean up any debris around the base of adam's needle to improve air circulation and deter pests or diseases.
Step8: Disposal of Pruning Debris
Dispose of the pruned material in a compost bin or appropriate waste, unless the foliage shows signs of disease. In this case, dispose of it with household waste to prevent the spread of pathogens to other plants.
Step9: Plant Care After Pruning
After pruning, if needed, water adam's needle deeply and consider applying a balanced, slow-release fertilizer to support the plant's recovery and new growth.
Step10: Sanitization of Pruning Tools
Sanitize your pruning tools with a solution of one part bleach to nine parts water to prevent the spread of any plant diseases between your garden plants.
Post-Pruning Care for Adam's Needle
Post-Pruning Care for Adam's Needle
Immediately after pruning adam's needle, water the plant thoroughly to aid in recovery. Provide it with full sun to partial shade and maintain temperatures above freezing, ensuring low humidity levels to prevent rot. Feed adam's needle with a balanced, slow-release fertilizer to support new growth. Regularly inspect the pruning sites for signs of infection or distress, such as discoloration or wilt. If symptoms are present, treat with appropriate fungicides or insecticides and adjust care as needed.
Common Pruning Mistakes with Adam's Needle
Over-pruning and Plant Stress
Excessive pruning can lead to damage or stunted growth in adam's needle. Removing too much foliage at once can stress the plant and reduce its ability to thrive.
Damage from Dull or Dirty Tools
Using dull or unclean pruning tools can injure adam's needle, introducing pests or diseases. Clean, sharp tools are vital for making precise cuts that heal quickly.
Incorrect Cutting of Central Growth Tip
Pruning back the central growth tip mistakenly can slow or halt the vertical growth of adam's needle, as it grows from this central point. Thus, it is important to avoid cutting the central spear unless it has died back naturally.
Common Pruning Tips for Adam's Needle
Trim Dead or Damaged Foliage to Base
Focus on removing only dead, damaged, or diseased leaves from adam's needle, cutting them back to the base of the plant without damaging the trunk.
Remove Flower Stalks Post-Blooming
Safely remove the flower stalks of adam's needle after blooming to encourage further growth and maintain the plant's appearance, without affecting the leaves or central growth tip.
Use Protective Gear When Pruning
Wear appropriate protective gear such as gloves when pruning adam's needle, as the edges of the leaves can be sharp, potentially causing cuts or irritation.


