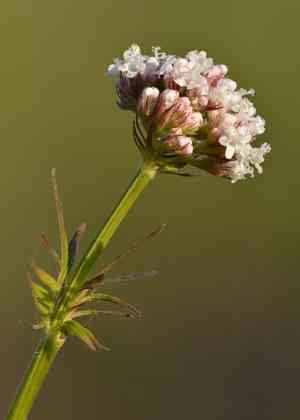
How to Prune Valerian?
Recognized for its pleasant aroma and therapeutic attributes, valerian greatly profits from trimming. To foster compact development, trim back mature leaves in early spring prior to the emergence of fresh shoots. Remove spent flower heads following their bloom to deter self-propagation and stimulate a subsequent flowering. Refrain from pruning in late summer, as this can impede root formation before the cold season. Trimming not only sculpts the plant but also guarantees robust growth and improves the yield of its precious roots.
What Are the Benefits of Pruning Valerian?
What Are the Benefits of Pruning Valerian?
Trimming valerian promotes robust development and helps maintain its form, ensuring peak health and visual appeal.
What Is the Best Time for Pruning Valerian?
What Is the Best Time for Pruning Valerian?
Pruning in early spring coincides with valerian's awakening from dormancy, fostering vigorous new growth by eliminating old or dead leaves. Late summer trimming assists in shaping the plant and removing spent blossoms, preventing self-seeding and encouraging a second bloom, which typically occurs in early fall.
What Tools Do I Need to Prune Valerian?
Hand Pruners
Perfect for making clean cuts on valerian's slender stems, hand pruners provide precise control and minimal plant damage. Opt for bypass pruners over anvil types to avoid crushing stems.
Shears
Useful for shaping valerian and trimming multiple stems simultaneously. Shears offer a quick and efficient method to maintain the plant's desired form.
Pruning Saw
While not typically required for valerian, a small pruning saw might be useful for cutting older, woodier stems if the plant has been left to grow for several years without upkeep.
Gloves
Protect hands from potential skin irritants in valerian and ensure a secure grip on tools during pruning.
Garden Waste Bag
Have a garden waste bag ready to collect and dispose of valerian cuttings immediately after pruning, keeping the area tidy and reducing disease transmission.
How to Prune Valerian
Step1: Initiation of Pruning Season
Start the pruning process for valerian in late winter or early spring, before new growth emerges. Ensure all tools are clean and sharp to prevent plant damage and achieve precise cuts.
Step2: Dead Stem Removal
Identify dead stems on valerian by looking for those that are brown, brittle, and lack green growth. Using bypass pruners, make cuts at a 45-degree angle just above a healthy leaf set or a growth node, where new growth will appear.
Step3: Yellow Leaf Trimming
Inspect valerian for yellow leaves, which can signal age, disease, or nutrient deficiencies. Carefully remove these leaves by snipping them off at the base of the leaf stem using precision pruners.
Step4: Withered Flower Deadheading
Locate withered flowers on valerian to encourage new growth and prevent the plant from expending energy on seed production. Deadhead the spent blooms by snipping them off just above the first healthy leaves below the flower.
Step5: Old Stem Reduction for Plant Shape
Shape valerian by cutting back one-third of the oldest, woodiest stems to ground level to improve air circulation, stimulate new growth, and maintain the plant's desired form. This also helps lower disease risk.
Step6: Post-Pruning Cleanup
Conclude by clearing all pruned material from around valerian to prevent disease and pests. Dispose of or compost the material appropriately, avoiding composting diseased plant parts.
Step7: Post-Prune Watering
Water valerian deeply after pruning to aid its recovery from the stress of trimming and to encourage new growth. Adjust watering based on rainfall and the plant's seasonal requirements.
Step8: Growth Monitoring and Fertilization
Monitor valerian after pruning for signs of new growth or any issues. Light fertilization may be beneficial to support new growth, but ensure it's suitable for the soil type and current plant health.
Post-Pruning Care for Valerian
Post-Pruning Care for Valerian
Immediately after trimming valerian, water the plant thoroughly to lessen transplant shock. Maintain a consistent environment with indirect light, optimal humidity of 60-70%, and stable temperatures of 60-70°F. Following pruning, apply a balanced, slow-release fertilizer to assist recovery. Regularly check valerian for wilting, discolored leaves, and signs of infection. If symptoms appear, isolate the plant and consult a horticulturalist. Adjust care as needed for the plant's rapid revitalization.
Common Pruning Mistakes with Valerian
Excessive Pruning Stress
Trimming valerian too severely, which can stress the plant and hinder its ability to recover and produce healthy growth.
Using Dull or Dirty Tools
Failing to use clean, sharp tools for pruning valerian, which can result in jagged cuts and increase the likelihood of disease.
Leaving Dead or Diseased Foliage
Neglecting to remove dead or diseased leaves, which can diminish valerian's vitality and aesthetic appeal.
Inadequate Thinning and Airflow
Overlooking the importance of thinning out dense growth, which can impede air circulation and foster the development of fungal diseases.
Ignoring Plant's Natural Shape
Disregarding the natural shape and growth habit of valerian when pruning, potentially leading to an unnatural appearance and reduced flowering.
Common Pruning Tips for Valerian
Clean Cuts Above Leaf Nodes
Make precise cuts just above a leaf node or branching point to encourage valerian to develop new, healthy shoots.
Remove Dead or Diseased Stems
Trim away any dead or diseased stems to maintain valerian's vigor and prevent the potential spread of pathogens.
Use Disinfected Precision Tools
Utilize appropriate pruning tools, such as secateurs or shears, that have been disinfected to ensure precision and minimize harm to valerian.
Thin Overcrowded Areas for Health
Thin out densely packed areas to improve light penetration and air flow, supporting the overall health and blooming of valerian.
Prune to Enhance Natural Form
Follow valerian's natural shape, selectively trimming to enhance its form and support abundant flowering without compromising the plant's structure.


