How to Prune Red clover?
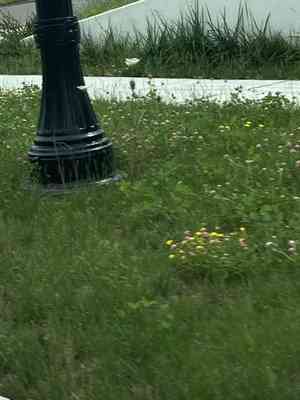
This enduring herbaceous plant flourishes in grasslands and open areas, recognized by its spherical pink blossoms and three-part leaves. Trifolium pratense benefits from consistent trimming to stimulate robust development and hinder excessive seed production. After its initial flowering period, reduce its height by half to foster a subsequent bloom. The most effective time for trimming spans from early spring to late summer, aligning with its periods of rapid growth. Strategic cutting can improve the nutritional value of fodder and the longevity of crops in farming environments.
What Are the Benefits of Pruning Red Clover?
What Are the Benefits of Pruning Red Clover?
Trimming red clover promotes robust regrowth and helps maintain its desired form. This practice encourages fresh, healthy foliage and flower development, improving red clover's overall look and vigor.
What Is the Best Time for Pruning Red Clover?
What Is the Best Time for Pruning Red Clover?
During Early Spring, red clover begins a new growth cycle, making it the optimal period for pruning or shaping the plant to encourage strong development. Pruning before new growth starts minimizes stress on red clover and boosts its resistance to disease and pests. In Late Summer, trimming can help manage its size, prevent excessive growth, and remove any faded flowers to stimulate a potential second bloom. This is also an ideal time as red clover has ample opportunity to recover before colder weather arrives, reducing the risk of winter damage to recently pruned areas.
What Tools Do I Need to Prune Red Clover?
Hand Shears
Perfect for cutting individual red clover stems. Hand shears offer precision, essential for trimming without harming the main crown.
Garden Scissors
Useful for precise cuts and removing spent red clover blossoms. They allow for accurate trimming, preventing damage to new buds.
Bypass Pruners
Excellent for making clean cuts on red clover's stems without crushing them, crucial for maintaining healthy growth.
Handheld Weed Fork
Helps eliminate unwanted weed growth around red clover without disturbing its root system.
Gloves
Protect hands from red clover's stems, which can be rough, and from potential skin irritants when deadheading or handling the plant.
How to Prune Red Clover
Step1: Gathering and Sterilizing Pruning Tools
Collect the necessary tools for trimming red clover, such as sharp, sanitized pruning shears or scissors. Disinfect the tools with a solution of 1 part bleach to 9 parts water to prevent disease spread.
Step2: Identifying Dead Stems
Locate dead stems on red clover by looking for those that are brown, brittle, and lack green growth. Dead stems can be found at the plant's base or throughout its foliage.
Step3: Removing Dead Stems at Base
Snip the dead stems at their base, ensuring the cut is made close to the soil line without damaging the plant's crown. This will help direct the plant's energy towards new, healthy growth.
Step4: Detecting Diseased Foliage
Inspect red clover for any signs of diseased foliage, which may include discolored leaves, spots, or growths. Remove these affected parts to prevent the disease from spreading to the rest of the plant.
Step5: Pruning Below Diseased Areas
Make cuts on diseased foliage just beneath the affected area, ensuring you cut into healthy, disease-free tissue. This will help maintain red clover's health by eliminating potential sources of infection.
Step6: Cleanup of Pruned Debris
After trimming the specified parts, clear away all removed debris from around red clover. Dispose of the material far from the garden area to reduce the risk of disease transmission.
Step7: Post-Pruning Watering
Water red clover sufficiently after pruning to alleviate stress and encourage new growth. Avoid overhead watering to minimize disease risk, especially if red clover has experienced leaf spot issues.
Step8: Sanitizing Tools Post-Pruning
Sanitize your pruning tools after completion to prevent transferring any potential pathogens to other plants or to red clover the next time it requires trimming.
Post-Pruning Care for Red Clover
Post-Pruning Care for Red Clover
Immediately after trimming red clover, ensure adequate watering to aid recovery, avoiding waterlogging. Maintain balanced light exposure, neither too intense nor too dim, and keep red clover in an environment with stable temperature and moderate humidity levels. Apply a balanced, low-nitrogen fertilizer to support regrowth. Regularly check red clover for any signs of stress, such as wilting or discoloration, and for infections. If symptoms are present, treat with appropriate fungicides or pest controls. Monitor red clover's growth progress, adjusting care as needed.
Common Pruning Mistakes with Red Clover
Over-pruning Shock
Trimming too much at once, which can shock red clover and diminish its vitality.
Too-Short Stem Cutting
Cutting red clover's stems excessively short, leaving insufficient space for new growth and potentially harming the plant's ability to thrive.
Neglecting Dead Foliage Cleanup
Ignoring dead or diseased foliage, which can hinder the growth of healthy red clover plants by consuming resources or spreading disease.
Common Pruning Tips for Red Clover
Moderate One-Third Pruning
Remove only the top third of red clover when trimming to encourage a denser growth habit and more flowering without placing excessive stress on the plant.
Correct Deadheading for Reblooming
When deadheading, snip off the spent flower heads of red clover just above the first set of full, healthy leaves to promote continuous blooming throughout the season.
Disease Inspection and Tool Sanitization
Regularly inspect red clover for signs of disease or stress and remove any affected parts promptly, using clean, sharp pruning tools to prevent the transmission of pests or pathogens.


