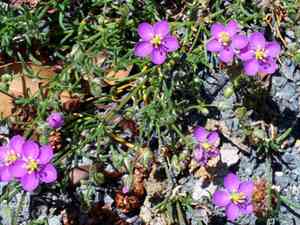
How to Prune Red sandspurry?
Distinguished by its spreading nature and diminutive, colorful blossoms, red sandspurry thrives with careful trimming to preserve its form and foster more compact development. Perform a light trim in spring to stimulate branching. Throughout summer and autumn, selectively eliminate faded flowers and congested stalks to improve air circulation and lower the chance of illness. Trimming during these seasons corresponds with red sandspurry's periods of vigorous growth, guaranteeing rapid recuperation and vitality. Consistent trimming also deters self-seeding if preferred.
Advantages of Trimming Red Sandspurry
Advantages of Trimming Red Sandspurry
Trimming red sandspurry encourages robust development by eliminating dead or diseased sections, thereby preventing pathogen spread. This action also helps maintain red sandspurry's desired form, fostering dense, compact growth, rather than straggly or sparse expansion.
Optimal Time for Trimming Red Sandspurry
Optimal Time for Trimming Red Sandspurry
Trimming red sandspurry in Spring is ideal as it prepares the plant for new growth and helps maintain a compact shape before the start of the growing season. Late Summer trimming helps remove any undesirable or elongated growth that occurred during the peak growing period. Early Fall trimming is beneficial for shaping the plant and removing old growth before winter dormancy. These periods ensure that red sandspurry can recover swiftly without stress, promoting health and vigor while minimizing the risk of disease and pest infestation that can arise from improper timing. Avoid trimming red sandspurry during late Fall or Winter to prevent damage to new buds developing for the next growth cycle.
Tools Required for Trimming Red Sandspurry
Hand Pruners
Given that red sandspurry typically has slender stems, sharp hand pruners are perfect for making clean cuts without harming the delicate stems.
Gardening Scissors
For precise trimming of red sandspurry, especially when dealing with its fine and delicate growth, gardening scissors offer the accuracy needed to remove unwanted growth without impacting the rest of the plant.
Garden Shears
If red sandspurry has spread extensively and requires shaping or thinning, garden shears are useful for uniformly cutting back larger areas. This ensures the plant retains its desired form and promotes healthier, denser growth.
Pruning Snips
To reach into dense growth of red sandspurry without causing incidental damage to surrounding areas, pruning snips with long, narrow blades are excellent. They provide precision for selective thinning and removal of dead or diseased foliage.
How to Trim Red Sandspurry
Clean tools
Before beginning, ensure all trimming tools are clean and sharp to prevent disease transmission and make clean cuts on red sandspurry.
Identify
Examine red sandspurry thoroughly to locate any withered leaves that need removal, focusing on the base and interior areas where air circulation might be reduced.
Cut
Using your pruning shears, snip off the withered leaves at their base where they connect to the main stem. Make the cuts clean and close to the stem without causing damage.
Dispose
Gather the removed withered leaves and discard them away from red sandspurry to prevent any potential disease spread.
Monitor
Observe red sandspurry after trimming to ensure good health and to identify any further signs of wilting requiring attention.
Common Trimming Errors with Red Sandspurry
Over-trimming
Removing too much growth from red sandspurry in a single trimming session can stress the plant and diminish its vitality.
Dull tools
Using blunt or unclean trimming tools can result in jagged cuts that may lead to pest infestations or disease.
Incorrect cuts
Making cuts too close to the main stem of red sandspurry can injure the plant, while leaving too long a stub can hinder proper healing.
Ignoring spent blooms
Failing to remove spent flowers from red sandspurry may limit reblooming potential and divert energy away from plant health.
Insufficient thinning
Not thinning out crowded areas of red sandspurry can lead to poor air circulation and light penetration, which may result in damp conditions and fungal growth.
General Trimming Advice for Red Sandspurry
Sharp tools
Ensure trimming tools are sharp and clean before cutting red sandspurry to promote clean, healthy cuts that heal quickly.
Angle cuts
Make cuts at a 45-degree angle just above a leaf node or lateral branch to encourage red sandspurry to grow in a desired direction and prevent water accumulation.
Deadhead regularly
Regularly remove spent flowers of red sandspurry to promote continuous blooming and prevent seed formation which drains the plant's energy.
Focus on leggy stems
Target long, leggy stems for trimming to stimulate red sandspurry to produce new growth and maintain a desirable shape and size.
Balanced approach
Trim red sandspurry by evenly distributing cuts across the plant to avoid creating bare spots or disproportionate growth.


