How to Prune American elder?
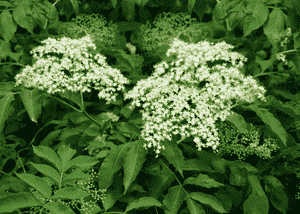
This leaf-shedding bush, recognized for its substantial groupings of white blossoms and tiny, dark purple fruits, thrives with consistent trimming to sustain its vitality and form. Trim american elder in the early springtime prior to the emergence of new shoots. Employ renewal pruning by severing one-third of the most mature stalks down to the soil each year. Additionally, eliminate any lifeless or ailing wood and thin out congested sections to boost air movement. Such trimming practices not only foster more flourishing, sturdier specimens but also augment fruit yield.
What Are the Benefits of Pruning American Elder?
What Are the Benefits of Pruning American Elder?
Trimming american elder promotes robust development and assists in maintaining its desired form. By selectively removing plant sections, it fosters a stronger framework and enhanced health.
What Is the Best Time for Pruning American Elder?
What Is the Best Time for Pruning American Elder?
Trimming american elder in early spring is beneficial as it allows for the removal of any dead or damaged wood from winter before the plant begins its rapid growth phase. This timing also ensures that the energy american elder has stored for new growth can be directed into producing strong, healthy shoots, improving the plant's overall vigor. Additionally, since american elder flowers on new wood, pruning just before the growing season will not negatively impact flowering and subsequent fruiting as it would if the plant were pruned after new growth has developed. Early spring pruning also typically coincides with a period when the threat of severe cold has passed, reducing the risk of frost damage to fresh cuts and new growth which can compromise the health of american elder.
What Tools Do I Need to Prune American Elder?
Hand Pruners
Essential for making clean, precise cuts on smaller stems of american elder, typically up to ¾ inches in diameter. Ideal for shaping and removing unwanted suckers.
Loppers
Necessary for cutting through thicker branches of american elder, up to 1½ to 2 inches in diameter. The longer handles provide leverage to make the task easier.
Pruning Saw
Used for the largest branches of american elder that are more than 2 inches in diameter. A pruning saw allows for cutting without damaging the surrounding stems.
Gloves
Protects the gardenerâs hands from scratches and the sap of american elder, which can be irritating to some people's skin.
Protective Eyewear
Safety goggles protect the eyes from flying debris and sap while pruning american elder.
How to Prune American Elder
Step1: Timing Pruning for Dormant Season
Select the appropriate time to prune american elder, which is in late winter or early spring before new growth starts, when the plant is still inactive.
Step2: Sterilize Tools to Prevent Disease
Sanitize your pruning tools with rubbing alcohol or a 10% bleach solution to prevent the spread of diseases.
Step3: Prune Dead Wood and Angle Cuts
Begin by removing any dead wood. Make clean cuts at a slight angle, about 1/4 inch above an outward-facing bud to promote an open growth habit.
Step4: Remove Diseased Branches to Healthy Wood
Identify and remove any diseased branches next. Cut them back to healthy wood, ensuring the cut is at least a few inches below the diseased section to remove all infected material.
Step5: Eliminate Suckers for Tree-Like Structure
Look for suckers, which are vigorous vertical shoots that grow from the base or roots of american elder. Prune all suckers back to ground level to maintain a clear stem and encourage a more tree-like form.
Step6: Prevent Damage by Removing Crossing Branches
Check for crossing or rubbing branches, and remove them to prevent wounds and subsequent disease entry points. Select the weaker branch or the one that contributes least to the desired shape for removal.
Step7: Thin Crowded Areas for Air Flow
Thin out crowded areas to improve air circulation, which helps to reduce the likelihood of disease. Remove some of the older canes, cutting them back to the ground to stimulate new growth.
Step8: Shape Plant by Trimming Unbalanced Branches
Finally, shape american elder if necessary, by shortening overly long or unbalanced branches. Prune back to a bud facing the direction you wish new growth to take, keeping the overall desired shape of the plant in mind.
Step9: Dispose of Pruning Debris to Reduce Pests
Clean up all pruning debris from around american elder to minimize the chance of disease and insect infestations.
Step10: Water and Mulch Post-Pruning
After pruning, water american elder if the soil is dry and apply a layer of mulch to conserve moisture and provide nutrients as it decomposes.
Post-Pruning Care for American Elder
Post-Pruning Care for American Elder
After trimming american elder, immediately water thoroughly to reduce stress. Maintain moderate light exposure, avoiding direct high-intensity sunlight. Ensure ambient humidity and temperature are consistent with american elder's growing habits. Apply a balanced, slow-release fertilizer to support regrowth, avoiding over-fertilization. Regularly inspect for wilting, discoloration, or signs of infection, addressing issues promptly with appropriate treatments. Monitor growth to adjust care as american elder recovers.
Common Pruning Mistakes with American Elder
Avoid Over-Pruning to Prevent Stress
Excessive pruning of american elder, which can stress the plant and reduce its vitality, leading to fewer flowers and berries.
Use Clean, Sharp Tools to Avoid Damage
Using dull or dirty pruning tools, which can damage american elder's branches and potentially introduce disease to the plant.
Correct Pruning Cuts for Healthy Growth
Making improper cuts, such as cutting too close to the bud, which can harm american elder and impede healthy regrowth.
Conserve Old Wood for Better Flowering
Removing too much old wood in one season, which can decrease the number of flowers, as american elder blooms on old wood.
Sanitize Tools to Prevent Disease Spread
Skipping the sanitization of pruning equipment between cuts, especially when managing diseased parts of american elder, which can spread pathogens.
Common Pruning Tips for American Elder
Sharp, Clean Shears for Quick Healing
Use clean, sharp pruning shears for clean cuts that will heal quickly and minimize stress to american elder.
Promote New Growth with Old Stem Removal
Cut back the oldest stems to ground level to encourage american elder to produce new growth, which is where the most vigorous flowering occurs.
Thin Overcrowded Areas to Decrease Disease
Thin out any overcrowded areas to improve air circulation and reduce the risk of disease in american elder.
Balance Structure with Even Pruning
Maintain a balanced structure by evenly distributing the pruning cuts around american elder, promoting even growth and shaping.
Remove Dead Wood to Maintain Health
Identify and remove any dead, damaged, or diseased wood first, which helps to maintain the overall health of american elder.
Direct New Growth Outward with Accurate Cuts
When shortening stems, cut just above a bud facing the outside of american elder to direct new growth outward and ensure an open habit.


