How to Prune Black-eyed susan?
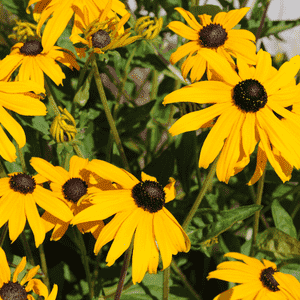
Featuring vivid, daisy-like blossoms and a prominent dark center, Rudbeckia hirta flourishes in sun-drenched environments. Consistently remove faded flowers to stimulate continuous blooming and preserve its aesthetic appeal. This practice can prolong the floral display well into the initial weeks of autumn. Reducing the plant's height by approximately one-third in early spring encourages a denser form and a greater abundance of flowers. Refrain from trimming later in the growing cycle to permit seed maturation, which offers sustenance for avian species during winter and aids in natural reseeding. Trimming this variety leads to a more orderly specimen and extends its period of floral exhibition.
Advantages of Trimming Black-eyed Susan
Advantages of Trimming Black-eyed Susan
Trimming black-eyed susan promotes more abundant flowering and vigorous development. Strategic cuts help maintain an attractive form and contribute to the plant's overall vitality.
Optimal Time for Trimming Black-eyed Susan
Optimal Time for Trimming Black-eyed Susan
Trimming black-eyed susan in early spring stimulates new growth and aids in shaping the plant. It's also an ideal period to remove dead or damaged foliage from the prior season, making way for fresh development. As black-eyed susan enters its active growth phase in spring and summer, regular trimming is beneficial for maintaining plant health and encouraging a bushier habit. Deadheading, or the removal of faded flowers, can be done in summer to encourage more blooms. Trimming in late fall, after the plant has flowered and before the first frost, helps prepare black-eyed susan for dormancy while minimizing the risk of frost damage to fresh cuts. This also allows gardeners to remove old growth and prevent fungal diseases or pest infestations over winter.
Tools Required for Trimming Black-eyed Susan
Hand Pruners
Perfect for deadheading and cutting back black-eyed susan as they provide clean cuts without harming the stems.
Pruning Shears
Best for shaping black-eyed susan during the growing season, allowing precise control for maintaining plant health and appearance.
Gardening Gloves
Crucial for protecting hands from black-eyed susan's rough foliage and any potential skin irritants when handling the plant.
Garden Scissors
Suitable for snipping off spent flowers of black-eyed susan and thinning out crowded areas to enhance air circulation.
Lopping Shears
Useful for cutting back larger stems if black-eyed susan is overgrown, though typically, hand pruners should suffice.
How to Trim Black-eyed Susan
Step1: Optimal Trimming Schedule
Determine the correct time to trim black-eyed susan, which is usually after blooming in late summer or fall. This timing helps encourage more flowers and prevents the plant from self-seeding excessively if not desired.
Step2: Preparing Sterilized Shears
Prepare clean, sharp trimming shears. Sterilize them with alcohol or a bleach solution to prevent the spread of diseases among plants.
Step3: Deadheading for Increased Blooms
Begin by removing dead flowers. Cut the flower stems just above the first leaf below the faded flower. This prompts black-eyed susan to produce more blooms.
Step4: Removing Diseased Stems
Locate any diseased stems, which may appear discolored, distorted, or have unusual growths. Trim these stems back to the base of the plant or to a healthy section well below the affected part.
Step5: Trimming Old Non-Flowering Stems
Identify old stems that did not produce flowers this season or appear weak and spindly. Trim these old stems back to the ground to encourage new growth and improve air circulation within the plant.
Step6: Shaping Overgrown Plants
If the plant is overgrown or you wish to shape it, you can cut back the entire plant by one-third to one-half. Make the cuts at a 45-degree angle, just above a bud or leaf node, to promote new branching.
Step7: Post-Trimming Cleanup
After trimming, clear away all debris from around the plant to reduce the risk of disease and pests.
Step8: Watering and Fertilizing After Trimming
Water the plant if the soil is dry and apply a balanced fertilizer to support new growth, following the recommendations for black-eyed susan.
Aftercare for Black-eyed Susan Post-Trimming
Aftercare for Black-eyed Susan Post-Trimming
After trimming black-eyed susan, ensure immediate adequate watering to aid recovery. Maintain slightly moist soil without waterlogging. Place black-eyed susan in a well-lit area without direct harsh sunlight. Adjust temperature to 70-75°F and keep humidity moderate. Apply balanced liquid fertilizer, diluted to half strength, to support new growth. Monitor black-eyed susan for wilted leaves or discoloration indicating stress or infection. If any adverse signs appear, trim affected areas and apply a fungicide if necessary. Regular gentle care fosters healthy regrowth.
Common Trimming Errors with Black-eyed Susan
Failure to Deadhead Spent Flowers
Neglecting to remove dead or faded flowers, a practice known as 'deadheading', which can lead to wasted energy on seed production rather than new blooms for black-eyed susan.
Excessive Trimming and Plant Stress
Cutting back black-eyed susan too severely, which may stress the plant and hinder its ability to recover and produce robust growth.
Trimming with Unclean or Dull Tools
Using dirty or dull tools, which could potentially introduce disease to black-eyed susan or cause jagged cuts that are slow to heal.
General Trimming Advice for Black-eyed Susan
Deadheading with Clean, Sharp Shears
Use clean, sharp trimming shears to deadhead spent blooms on black-eyed susan, cutting back to just above a leaf node to promote further flowering.
Promptly Remove Damaged Foliage
Trim away any damaged or diseased foliage from black-eyed susan as soon as it is noticed to help maintain the overall health and appearance of the plant.
Thinning for Improved Air Circulation
Thin out dense growth periodically to improve air circulation around black-eyed susan, which can help prevent fungal diseases and promote stronger growth.


