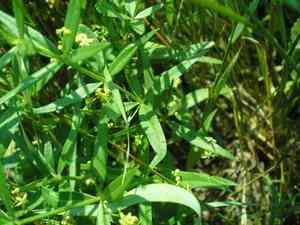
How to Prune Dyer's madder?
Dyer's madder, a perennial herb prized for its vivid red roots historically utilized as a pigment, flourishes with appropriate attention. In spring, trim dyer's madder to foster robust development, removing any deceased or excessively long stalks. Throughout summer, gentle shaping preserves its form and enhances air circulation, diminishing the likelihood of illness. Cutting dyer's madder close to the soil surface encourages fresh sprouts, boosting root expansion for pigment harvesting. Primary advantages encompass heightened root strength and potential increases in output.
Advantages of Trimming Dyer's Madder
Advantages of Trimming Dyer's Madder
Trimming dyer's madder encourages robust development and helps maintain its desired form. It enables gardeners to eliminate old or dead sections, fostering new, healthier growth while also shaping the plant for aesthetic or spatial purposes.
Optimal Time for Trimming Dyer's Madder
Optimal Time for Trimming Dyer's Madder
Trimming dyer's madder during late spring or early summer aligns with its active growth period, ensuring quick recovery and minimizing stress. Pruning after winter allows for the removal of any frost-damaged parts, promoting strong new growth. This timing also precedes dyer's madder's blooming cycle, preventing the loss of flowers or seeds crucial for reproduction and dye production. Additionally, pruning during this period helps maintain plant shape and health, while reducing the likelihood of disease and pest infestations that can thrive in dense foliage.
Tools Required for Trimming Dyer's Madder
Hand Pruners
Perfect for cutting small stems and branches; must be sharp to ensure clean cuts without harming dyer's madder.
Pruning Saw
Useful for severing thicker, woody stems that hand pruners cannot manage.
Lopping Shears
Excellent for reaching into dense growth to selectively trim stems in the middle or back of a dyer's madder clump without disturbing the rest.
Gardening Gloves
To safeguard hands from thorns and scrapes while trimming dyer's madder.
Pruning Knife
Beneficial for shaping or mending any tears to ensure a smooth wound that can heal effectively on dyer's madder.
How to Trim Dyer's Madder
Sanitize Tools
Before trimming dyer's madder, ensure all pruning tools are disinfected to prevent the spread of illness.
Remove Diseased Foliage
Carefully cut off any diseased leaves from dyer's madder, making clean cuts at the base of each leaf to avoid damaging the stem.
Trim Withered Foliage
Locate and trim away withered leaves from dyer's madder, as they can no longer contribute to the plant's growth and may attract pests.
Cut Diseased Stems
Identify and remove diseased stems by cutting them back to healthy tissue, ensuring cuts are made at a 45-degree angle to promote healing.
Discard Trimmed Parts
Properly dispose of all removed parts away from the garden to minimize the risk of disease spread to healthy parts of dyer's madder or other plants.
Common Trimming Errors with Dyer's Madder
Excessive Pruning
Removing too much growth at once can stress dyer's madder, impeding its development.
Incorrect Cut Placement
Cuts made too far from a bud or node can result in dead stubs, while cuts too close can damage the bud.
Using Dull Implements
Dull pruning tools can cause jagged cuts that make dyer's madder vulnerable to disease.
Neglecting Unhealthy Material
Failing to remove diseased or damaged parts can allow problems to spread throughout dyer's madder.
Ignoring Growth Habit
Pruning without understanding dyer's madder's growth pattern can result in a less vigorous plant with poor form.
General Trimming Advice for Dyer's Madder
Clean Tools
Use sharp, sanitized pruning tools to make clean cuts, reducing stress and potential infection of dyer's madder.
Identify Nodes
Make cuts just above outward-facing buds or nodes to encourage a desirable shape and avoid leaving stubs.
Gradual Trimming
Trim dyer's madder gradually over time rather than all at once, allowing it to recover and grow properly.
Healthy Growth Removal
Occasionally remove some healthy material to improve air circulation and light penetration in the center of dyer's madder.
Post-Bloom Trimming
While excluding seasonal advice, trim soon after dyer's madder has finished blooming to prevent cutting off future flower buds.


