How to Prune Radish?
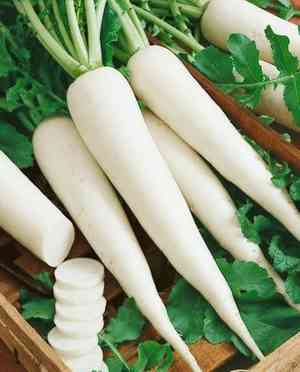
Radish, a favored root vegetable cultivated for its crisp, edible taproot, thrives with limited yet deliberate trimming. Eliminate solely compromised or discolored foliage to foster robust development. Optimal pruning occurs early in the growing period, with seedling thinning guaranteeing appropriate root formation. Refrain from significant leaf removal, as leaves are vital for photosynthesis and root expansion. Strategic pruning enhances plant well-being, improves soil aeration, and aids in disease prevention.
Advantages of Trimming Radish
Advantages of Trimming Radish
Trimming radish promotes vigorous development and maintains its form. It helps direct energy towards growing strong roots and foliage, ensuring a healthier crop.
Optimal Time for Trimming Radish
Optimal Time for Trimming Radish
Early spring is ideal for trimming radish, as this is just before new growth starts. Trimming at this time allows the plant to focus its energy on producing strong, healthy shoots for the upcoming season. Late autumn is also suitable when the plant enters dormancy; trimming then removes any spent or diseased foliage and can help prevent disease spread. Additionally, during these seasons, the absence of extreme temperatures minimizes stress on radish, ensuring better recovery post-trimming.
Tools Required for Trimming Radish
Sharp Scissors or Shears
For radish, sharp scissors or garden shears are essential. Since radish has relatively soft stems and foliage, clean cuts are crucial to avoid damage and facilitate harvesting.
Garden Knife
A garden knife can be useful for radish when thinning seedlings. It allows for precise cuts close to the soil, ensuring remaining plants have ample space to grow.
Hand Pruners
If radish is grown larger for seed harvesting, hand pruners might be necessary. They offer a comfortable grip and are suitable for cutting thicker stems that sometimes develop on mature radish plants.
How to Trim Radish
Step1: Identify Bolting Stalks
Examine radish for signs of bolting, which occurs when a tall stalk rapidly grows from the plant's center. This indicates radish is moving towards flowering and seed production, which can reduce root quality.
Step2: Cutting Bolting Stalks at Base
Use clean, sharp scissors or pruning shears to cut bolting stalks. Make the cut at the base of the stalk where it emerges from the center of the radish, being careful not to harm surrounding leaves or the root.
Step3: Remove Yellowed or Damaged Leaves
Inspect radish for any yellowed, brown, or damaged leaves that may have been caused by pests, disease, or physical injury. Removing these leaves improves air circulation and redirects energy to healthy root production.
Step4: Trim Damaged Leaves Cleanly
Trim damaged leaves by snipping them off at their base where they connect to the main body of the radish. Ensure each cut is clean to prevent pathogen entry.
Step5: Identify Signs of Root Rot or Disease
If radish is grown in consistently wet conditions or affected by root diseases, they may show signs of rot or disease. These signs can include discoloration, soft texture, or an unpleasant odor at the root.
Step6: Examine and Wash Roots for Disease
Carefully remove radish from the soil to examine roots if disease is suspected. Gently wash roots with water to remove soil and assess damage extent.
Step7: Trim Diseased Root Portions
Using sterile pruning shears, cut away diseased root portions. Cut until healthy tissue is reached, which is typically firm and uniformly colored.
Step8: Replant in Well-Draining Soil
After trimming roots, replant radish in well-draining soil to prevent future disease issues. Ensure the location has proper air circulation and avoid overwatering to maintain healthy roots.
Step9: Sanitize Pruning Equipment
Sanitize all pruning equipment with a solution of 1 part bleach to 9 parts water before and after the process to prevent disease spread to healthy plants.
Step10: Monitor Plant Post-Trimming
Monitor radish after trimming for any signs of stress or further disease and take appropriate measures, such as adjusting watering habits or applying a suitable fungicide if necessary.
Post-Trimming Care for Radish
Post-Trimming Care for Radish
Immediately after trimming radish, water thoroughly to reduce stress. Maintain a consistent environment with full sun exposure, moderate humidity, and a temperature range between 60-70°F to encourage robust growth. Apply a balanced fertilizer to replenish nutrients and promote healing. Regularly inspect radish for signs of stress, such as wilting or discoloration, and for any infection indicators like mold. Take swift action by adjusting care or applying appropriate fungicides if problems arise.
Common Trimming Errors with Radish
Over-trimming: Reducing Harvest Quality and Size
Trimming radish too aggressively, which can diminish the size and quality of the harvest.
Using Unclean or Dull Trimming Tools: Plant Damage and Disease
Using unclean or dull tools when trimming, which can harm radish plants and introduce diseases.
Ignoring Growth Patterns: Misguided Trimming and Root Health
Trimming radish without understanding the plant's growth pattern, potentially removing healthy foliage that supports root development.
Common Trimming Tips for Radish
Tool Sanitization: Preventing Disease Spread
Sanitize your cutting tools before and after trimming radish to prevent disease spread.
Early Seedling Thinning: Promoting Robust Root Development
Thin radish seedlings early, leaving the strongest for more space, nutrients, and light, which promotes better root development.
Leaf Harvesting: Sustaining Photosynthesis Capability
Cut the radish greens above the root top if harvesting the leaves; ensure you leave a portion of the leaves to allow the plant to continue photosynthesis.


