How to Prune Ring-cupped oak?
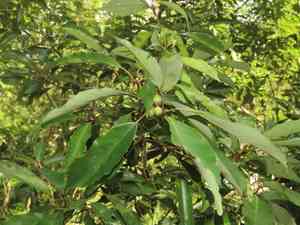
This wide-leaved evergreen, characterized by its elegantly curving limbs, is optimally trimmed in the colder months. To foster robust development, eliminate any lifeless, ailing, or intersecting branches. Reducing the density of the crown to improve light access and airflow is crucial. Shortening cuts can sculpt the plant and manage its dimensions. Refrain from extensive pruning, as ring-cupped oak reacts unfavorably to drastic cuts. Trimming preserves the plant's form, strengthens its well-being, and can encourage the production of acorns.
What Are the Benefits of Pruning Ring-cupped Oak?
What Are the Benefits of Pruning Ring-cupped Oak?
Trimming ring-cupped oak promotes robust development and maintains its form. It eliminates dead or diseased wood, fosters a sturdy framework, and can boost the tree's overall vitality, leading to a more aesthetically pleasing outline.
What Is the Best Time for Pruning Ring-cupped Oak?
What Is the Best Time for Pruning Ring-cupped Oak?
Pruning from late winter to early spring is optimal for ring-cupped oak as it remains dormant, minimizing plant stress and the chance of disease transmission. This timing enhances the plant's natural shape and vigor since wounds heal quicker with the spring growth surge. It also avoids cutting off developing buds that appear during the growing season, thus not negatively impacting flowering or fruiting cycles.
What Tools Do I Need to Prune Ring-cupped Oak?
Bypass Pruners
Perfect for making precise cuts on young, green branches of ring-cupped oak without harming the plant tissue.
Loppers
Suitable for cutting larger branches that are out of reach or too thick for bypass pruners; their long handles provide leverage, simplifying pruning tasks on ring-cupped oak.
Pruning Saw
Essential for removing mature, thick branches of ring-cupped oak, especially when they are too large for loppers.
Pole Pruner
Useful for reaching higher branches in mature ring-cupped oak without needing a ladder.
Secateurs
Ideal for detailed work and precise trimming of ring-cupped oak, such as shaping and removing small shoots and leaves.
Hedge Shears
Generally not needed for ring-cupped oak as they are better suited for shaping hedges rather than the selective pruning ring-cupped oak requires.
How to Prune Ring-cupped Oak
Sterilize
Before beginning the pruning process, sanitize all your cutting tools to prevent the spread of diseases to ring-cupped oak. Use a solution of one part bleach to nine parts water or rubbing alcohol to thoroughly clean the blades.
Identify
Examine ring-cupped oak to locate dead or diseased branches, which may appear discolored, brittle, or have unusual growths. These branches can impede the plant's overall health and development.
Cut
Using sharp, clean pruning shears, cut dead and diseased branches where they meet healthy tissue. Make the cut at a slight angle to encourage proper healing and prevent water from collecting on the cut surface, which could lead to decay.
Dispose
Carefully remove and discard the pruned dead and diseased branches away from ring-cupped oak to minimize the risk of further disease spread. Do not compost these materials, as they may still harbor pathogens.
Seal
If the cut is large or if it is recommended for ring-cupped oak, seal the cut with a pruning paste or wound dressing to protect the exposed tissue from infections and pests. However, for many trees, sealing is not necessary, as they naturally compartmentalize and heal pruning wounds.
Common Pruning Mistakes with Ring-cupped Oak
Overpruning
Removing excessive foliage or too many branches, which can stress ring-cupped oak and result in weak growth or reduced resilience.
Improper Cut Location
Making cuts either too close or too far from the bud, jeopardizing the health of ring-cupped oak by either damaging the bud or leaving a stub that can cause pest and disease issues.
Tearing Bark
Pruning with dull tools, leading to jagged cuts that harm ring-cupped oak's bark and create entry points for disease.
Flush Cutting
Cutting branches flush against the trunk, which removes the branch collar and hinders ring-cupped oak's natural healing process, potentially leading to decay.
Neglecting Tool Sanitization
Using uncleaned pruning tools, which can spread diseases between plants, negatively impacting ring-cupped oak's health.
Random Pruning
Pruning without a clear plan or objective, which can result in an undesirable shape and may harm ring-cupped oak's growth pattern.
Common Pruning Tips for Ring-cupped Oak
Right Cut Angle
Make cuts at a 45-degree angle, just above an outward-facing bud to encourage outward growth and prevent water accumulation that could lead to disease in ring-cupped oak.
Clean Tools
Use sharp and sanitized pruning tools to make clean cuts and reduce the risk of introducing pathogens to ring-cupped oak.
Branch Collar Preservation
Cut outside the branch collar without leaving a stub to aid ring-cupped oak's natural healing and prevent decay.
Thinning Over Topping
Focus on thinning out crowded areas to improve air circulation and light penetration, rather than simply reducing the height of ring-cupped oak, which can lead to poor structure.
Safety First
Wear appropriate safety gear, such as gloves and safety glasses, when pruning to prevent injuries from ring-cupped oak's potentially sharp branches.
Gradual Pruning
Remove no more than 25% of ring-cupped oak's foliage at once to prevent stress and ensure sustained health and vigor.


