How to Prune Cherry laurel?
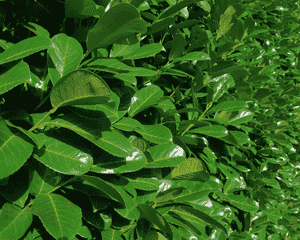
This expansive evergreen shrub, distinguished by its lustrous green foliage and white blossoms, thrives with regular trimming to preserve its form and stimulate denser development. Essential methods involve removing aged branches and judiciously reducing the length of new growths. The most favorable period for pruning is from late spring to early summer, following the blooming cycle. Important factors include minimizing disease potential by executing precise cuts and refraining from excising over one-third of cherry laurel's leaves simultaneously to avert strain.
What Are the Benefits of Pruning Cherry Laurel?
What Are the Benefits of Pruning Cherry Laurel?
Trimming cherry laurel promotes abundant flowering and boosts the plant's resistance to pests and diseases, ensuring vigorous and attractive development.
What Is the Best Time for Pruning Cherry Laurel?
What Is the Best Time for Pruning Cherry Laurel?
Trimming cherry laurel from late spring to early summer aligns with the conclusion of its primary growth phase, after frost danger has passed but before intense summer heat. This timing allows cherry laurel to recover from cuts without the strain of extreme weather, which could worsen damage or lead to illness. Furthermore, pruning after the blooming period ensures the plant's display is not diminished, and new growth stimulated by pruning will have ample time to mature before winter's arrival. It is crucial to avoid pruning in late autumn or winter, as this can leave cherry laurel susceptible to frost damage on fresh cuts. Pruning during the recommended seasons helps maintain cherry laurel's form, encourages robust growth, and prevents the potential spread of pests and diseases that are more active at other times of the year.
What Tools Do I Need to Prune Cherry Laurel?
Hand Pruners
Perfect for cutting cherry laurel's smaller branches, typically under 1/2 inch in diameter. Bypass pruners, with their scissor-like action, provide clean cuts essential for healthy regrowth.
Loppers
Loppers with extended handles are useful for reaching cherry laurel's higher branches or for cutting through thicker stems, up to about 2 inches in diameter. Bypass loppers are recommended for precise cuts.
Pruning Saw
For removing larger branches of cherry laurel that are more than 2 inches in diameter. A pruning saw is designed to cut on the pull stroke, providing efficient cutting.
Hedge Shears
Useful for shaping cherry laurel when it is grown as a hedge. They help create a neat and tidy appearance with even lines.
Pole Pruner
Allows for the pruning of cherry laurel's higher branches safely from the ground. A pole pruner typically combines a lopper and saw blade to cut through thick branches at a distance.
Pruning Gloves
Protective gloves to safeguard the gardenerâs hands from thorns and rough bark while pruning cherry laurel.
Garden Scissors
For snipping off cherry laurel's unwanted suckers or small shoots that sprout from the base or roots of the plant.
How to Prune Cherry Laurel
Step1: Initial Plant Inspection
Examine cherry laurel before pruning, identifying dead wood, diseased branches, and overgrown shoots. This initial assessment will determine which parts require attention and help plan the pruning process.
Step2: Prepare and Sterilize Tools
Clean and sharpen your pruning tools. Sterilize them with a solution of one part bleach to nine parts water to prevent the spread of disease.
Step3: Remove Dead Wood
Start by removing any dead wood. Cut the dead branches at the point where they meet healthy wood, making sure to angle the cuts so water runs off the wound, which helps prevent disease.
Step4: Cut Away Diseased Branches
Identify and remove diseased branches. Cut the branches several inches into the healthy wood beyond the disease's point of visible damage to ensure all the diseased tissue is removed.
Step5: Prune Overgrown Shoots
Prune overgrown shoots to maintain the shape of cherry laurel. Trim these shoots by cutting just above a set of leaves or a bud, which will direct new growth in the desired direction.
Step6: Thin Out Dense Areas
Thin out dense areas to allow light and air to penetrate cherry laurel, which reduces the risk of disease. Remove some of the older branches to the base to encourage new growth and better air circulation.
Step7: Shape the Plant Aesthetically
After making all necessary cuts, ensure that the overall shape of cherry laurel is natural and aesthetically pleasing, trimming any irregularities.
Step8: Clean Pruning Debris
Clean up all pruning debris from around cherry laurel, which could harbor pests or diseases, to maintain a healthy growing environment.
Step9: Water and Fertilize
After pruning, water cherry laurel well and, if appropriate for the time of year, apply a balanced fertilizer to promote healthy regrowth.
Step10: Disinfect Tools Post-Pruning
Disinfect your pruning tools once more after use to prevent the spread of any undetected diseases to other plants.
Post-Pruning Care for Cherry Laurel
Post-Pruning Care for Cherry Laurel
Immediately after trimming cherry laurel, water thoroughly to reduce stress. Ensure cherry laurel is situated in well-lit conditions, but away from intense midday sun. Maintain ambient humidity and a stable temperature range to aid recovery. Apply a balanced, slow-release fertilizer to replenish nutrients. Regularly inspect cherry laurel for discolored leaves or sap oozing, signs of distress or disease. If symptoms arise, promptly apply appropriate fungicides or pest control measures.
Common Pruning Mistakes with Cherry Laurel
Avoid excessive pruning above one-third
Over-pruning can lead to sparse foliage and reduce the plant's vigor. It is a mistake to remove more than one-third of cherry laurel's growth in a single pruning session.
Use clean, sharp tools for healthy cuts
Using dull or dirty pruning tools can damage branches and introduce diseases to cherry laurel. It is crucial to use clean, sharp tools to make clean cuts.
Prune new growth, avoid old wood cuts
Cutting into the old wood that no longer produces new growth can limit cherry laurel's ability to regenerate. Prune primarily the newer, softer green growth.
Remove dead or crossing branches promptly
Neglecting to remove dead, damaged, or crossing branches can lead to unhealthy plant growth and pest issues for cherry laurel.
Have a clear pruning goal for proper shape
Pruning without a clear goal or purpose can result in an unnatural shape or reduced flowering in subsequent years for cherry laurel.
Cut close to buds, avoid leaving stubs
Leaving stubs after making cuts can hinder the healing process and promote disease entry. Make cuts close to a bud or the main branch without leaving a stub.
Common Pruning Tips for Cherry Laurel
Prune with a purpose for plant health
Identify the purpose of pruning cherry laurel, such as shaping, removing damaged limbs, or thinning for better airflow, to guide the pruning process.
Prune above an outward-facing bud
Prune just above a bud facing the outside of the plant to encourage outward growth, maintaining an open, natural form for cherry laurel.
Thin branches for light and airflow
Thinning out congested branches will improve light penetration and air circulation, favoring a healthy cherry laurel.
Sanitize tools to prevent disease spread
Regularly sanitize pruning tools with alcohol or a bleach solution to prevent the spread of disease between plants.
Space larger cuts to avoid plant shock
Take care to space out larger cuts to maintain cherry laurel's overall structure and prevent shock to the plant.
Make angled cuts to prevent water damage
When shortening branches, make angled cuts to direct water away from the bud, reducing the risk of rot and disease.


