How to Prune Creeping phlox?
Known for its ground-covering nature and vibrant floral display, creeping phlox flourishes with limited upkeep trimming. After blooming, cutting back excessive growth fosters thicker leaves and subsequent flowers. Throughout the growing season, eliminate deceased or injured stems to sustain the plant's well-being. Regular thinning prevents congestion, improving air movement and lowering the chance of illness. Refrain from severe pruning to safeguard the inherent shape and vigor of creeping phlox.
Advantages of Trimming Creeping Phlox
Advantages of Trimming Creeping Phlox
Trimming creeping phlox promotes new growth, resulting in more vibrant flowers. It keeps creeping phlox compact, preventing excessive spread, and preserves its attractive mounded shape. Regular trimming also ensures creeping phlox remains healthy and strong.
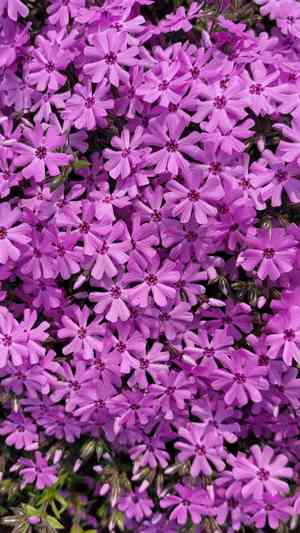
Optimal Time for Pruning Creeping Phlox
Optimal Time for Pruning Creeping Phlox
Trimming creeping phlox in early spring encourages more abundant blooms and maintains a dense, compact form. Pruning after flowering allows for the removal of spent blossoms and promotes re-blooming without disrupting the plant's natural growth cycle. Avoiding late-season pruning ensures creeping phlox has ample time to recover and establish itself before winter, which is vital for its health and vigor.
Tools Required for Pruning Creeping Phlox
Bypass Hand Pruners
Perfect for making clean cuts on creeping phlox's stems without crushing tissue. Recommended for their precision in removing dead or overgrown stems.
Small Gardening Scissors
Useful for refining the shape of creeping phlox and trimming small, delicate areas. They offer control for detailed pruning of this dense, mat-forming plant.
Gardening Gloves
Protects hands from scratches while working with creeping phlox, ensuring a safer pruning experience.
Leaf Rake
Helpful for gently clearing away trimmed foliage from the dense mats of creeping phlox, keeping the area tidy and reducing disease risk.
Long-Handled Lopper
Though generally not needed for creeping phlox, they might be useful for reaching and managing any tangled or difficult-to-access areas within larger patches.
How to Prune Creeping Phlox
Step1: Timing Pruning Post-Bloom
Wait for the appropriate time to prune creeping phlox, which is immediately after the blooming period ends to avoid cutting off flower buds. Blooming typically occurs in spring and early summer.
Step2: Sanitizing Tools Before Pruning
Sanitize your pruning shears with a solution of one part bleach to nine parts water to prevent the spread of any diseases.
Step3: Removing Spent Flowers to Encourage Rebloom
Begin pruning creeping phlox by removing spent flowers. Snip the flower heads off just above the first set of healthy leaves to encourage a potential second bloom and to prevent seeding if not desired.
Step4: Cutting Back Dead or Damaged Plant Tissue
Identify any dead or damaged tissues, including brown or withered leaves and stems. Carefully cut these parts back to the base or to the point of healthy tissue to promote new growth and improve air circulation.
Step5: Managing Invasive Runners
Locate invasive runners, which are the long trailing stems that spread beyond the desired area. Trim them back to within the bounds of the planting area to maintain the shape and size of creeping phlox.
Step6: Overall Shaping and Healthy Trimming
Shape creeping phlox by giving it a light trim overall, if necessary, to maintain a neat appearance. Do not cut back more than one-third of the plant at a time to avoid stressing the plant.
Step7: Proper Disposal of Pruning Debris
Dispose of all pruned material either by composting it away from creeping phlox or by discarding it with yard waste to prevent any potential disease or pests from spreading.
Step8: Hydrating Plant After Pruning
Water creeping phlox thoroughly after pruning to aid recovery and encourage new growth. However, avoid overwatering as creeping phlox prefers well-draining soil and could be prone to root rot.
Step9: Monitoring Plant Post-Pruning
Monitor creeping phlox for new growth and health issues in the weeks following pruning. Additional light feeding with a balanced, slow-release fertilizer may be beneficial to the recovery and vigor of creeping phlox.
Post-Pruning Care for Creeping Phlox
Post-Pruning Care for Creeping Phlox
Immediately after pruning creeping phlox, ensure adequate water to avoid stress, without over-saturating. Position creeping phlox in spots with proper light exposure, maintaining a consistent environment with controlled humidity and temperature. Apply a balanced fertilizer to support regrowth, avoiding high-nitrogen formulas that encourage foliage over flowers. Monitor creeping phlox closely for wilt, discoloration, or signs of infection, using appropriate fungicides or insecticides if needed, and verify that the soil allows for proper drainage to prevent root rot.
Common Pruning Mistakes with Creeping Phlox
Excessive Pruning Reduces Blooms, Increases Disease Risk
Over-pruning creeping phlox, which can lead to reduced blooming and leave the plants vulnerable to diseases.
Dull, Dirty Tools Damage Plants and Spread Disease
Using dull, unclean pruning tools that can damage stems and introduce pathogens to creeping phlox.
Neglecting Base Pruning Leads to Poor Plant Health
Pruning only the top portion and neglecting the removal of dead or weak stems from the base, which can lead to poor air circulation and plant health.
Common Pruning Tips for Creeping Phlox
Light Post-Bloom Trimming for Shape and Dense Growth
After blooming, lightly trim creeping phlox just enough to shape the plant and promote denser growth, without cutting into the woody part of the stems.
Sharp, Sterilized Shears for Quick Healing Minimize Disease
Use sharp, clean pruning shears to make clean cuts that will heal quickly, minimizing the risk of disease.
Base Thinning for Better Light and Air, Healthier Growth
Thin out crowded areas by selectively removing some stems at the base to improve light penetration and air flow, which helps to prevent disease and promote robust growth.


